Wednesday, December 22, 2010

Eggnog Cookies with Rum-Eggnog Glaze

After my eggnog evening a few nights earlier - I decided to continue the flavor profile in my own creative outlet - cookie making! (Note: after yet another night of homemade eggnog that I had at my parents' place in SC - I'm done for the year - that 1 1/3 cup of rum divided by two people doesn't feel so good the next day...especially when you combine it with 3-4 glasses of wine...oh man)

However, while I was still on my eggnog kick - capturing the essence into a cookie seemed to be a good idea. My taste testers: my co-workers, of course!! The result? I was told by two non-eggnog lovers that they just might give eggnog another chance after having my cookies. I would say that's probably a success.


Eggnog Cookies with Rum-Eggnog Glaze


2 1/4 cups flour
1 teaspoon baking powder
1/2 tsp. salt
1 1/2 teaspoons cinnamon
1 teaspoon nutmeg
1 1/4 cups sugar
3/4 cup butter, room temp
1/2 cup + 1 T. eggnog
1.5 teaspoon vanilla
2 egg yolks
rum-eggnog glaze (recipe below) and nutmeg for topping

Preheat oven to 300F.

In a medium bowl combine flour, baking powder, cinnamon and nutmeg; mix well with a wire whisk and set aside.

In a large bowl, cream sugar and butter with an electric mixer. Add eggnog, vanilla and egg yolks and beat at medium speed until smooth. Add the dry ingredients and beat at low speed just until combined.

Drop by rounded teaspoons onto ungreased baking sheets, 1″ apart. Sprinkle lightly with nutmeg or skip this step and sprinkle on the nutmeg after you ice the cookies. Bake for 28-32 minutes or until bottoms turn light brown.

Transfer to cool, flat surface immediately with spatula.

Eggnog Glaze
1 C. confectioners’ sugar
2 T. commercial eggnog
1 T. rum

In small bowl, mix confectioners’ sugar, eggnog and rum until smooth. Makes about 1/2 cup.


Even though I got the thumbs up from the office - I still have to be my own critic. They were a little bit on the sweet side. 1 1/4 cups of sugar should have been a little bit of a red flag for that...if I were to make them again, I'd cut down on the sugar....maybe somewhere between 3/4 and 1 cup. It's not that the sweetness was overwhelming, but to taste buds that are not accustomed to generous levels of sugar, it may be a bit much.

Another change would be the cooking time. They took me about 35+ minutes per batch. I got a little frustrated with the second batch so I upped the cooking temperature to about 325 degrees to move them along.

Otherwise, I was pretty happy with the results. While I can't think of eggnog for at least 11 more months, I would certainly consider making these again.

Monday, December 20, 2010

Roast Chicken and Root Vegetables with Braised Artichokes

With the holidays - I have severely fallen behind on my blogger duties. I was spoiled by some incredible meals before Derek left for South Carolina - pork, steak, roast chicken (below). And then the food frenzy continued over the holidays. While I'd like to think I'm "fooded out" from the over abundance that characterizes the holidays...I still find myself intrigued by new recipes to try - just hopefully they stay on the lighter side (for the most part).

This Roast Chicken recipe would probably fall in the OK category for the health-focused start to the New Year. It also follows the common trend for my recent posts having come from Thomas Keller's Ad Hoc at Home. I cannot say more positive things about what this cookbook can do for a home-cook - taking basic recipes and instructing them to perfection. Once again, his recipe was a success.

Below is the original recipe from the book. Derek modified it a bit to fit the vegetables that we had - I think that portion of the recipe can lend way to some interpretation. However, the basics with preparing the chicken were followed to a T.

Thomas Keller's Roast Chicken with Root Vegetables
from Ad Hoc at Home

One 4 to 4 1/2 lb chicken
Kosher salt and freshly ground black pepper
6 garlic cloves, smashed and peeled
6 thyme sprigs
2 large leeks (did not use)
3 tennis-ball-sized rutabagas (did not use - used parsnips instead)
2 tennis-ball-sized turnips (used)
4 medium carrots, peeled, trimmed, and cut in half (used)
1 small yellow onion, trimed, leaving root end intact, and cut into quarters (did not use)
8 small (golf-ball-sized) red-skinned potatoes (did not use)
1/3 cup canola oil
4 tablespoons (2 ounces) unsalted butter, at room temperature

Remove the chicken from the refrigerator and let stand at room temperature for 1 1/2 to 2 hours, or until it comes to room temperature.

Preheat the oven to 475 F.

Remove the neck and innards if they are still in the cavity of the chicken. Using a paring knife, cut out the wishbone from the chicken. (This will make it easier to carve the chicken.) Generously season the cavity of the chicken with salt and pepper, add 3 of the garlic cloves and 5 sprigs of thyme, and massage the inside of the bird to infuse it with the flavors. Truss the chicken.

Cut off the dark green leaves from the top of the leeks. Trim off and discard the darkened outer layers. Trim the root ends, cutting around them on a 45-degree angle. Slit the leeks lengthwise almost in half, starting 1/2 inch above the root ends. Rinse the leeks well under warm water.

Cut off both ends of the rutabagas. Stand the rutabagas on end and cut away the skin, working from top to bottom and removing any tough outer layers. Cut into 3/4-inch wedges. Repeat with the turnips, cutting the wedges to match the size of the rutabagas.

Combine all the vegetables and remaining garlic cloves and thyme sprig in a large bowl. Toss with 1/4 cup of the oil and season with salt and pepper. Spread the vegetables in a large cast-iron skillet or a roasting pan.

Rub the remaining oil over the chicken. Season generously with salt and pepper.

Make a nest in the center of the vegetables and nestle the chicken in it.

Cut the butter into 4 or 5 pieces and place over the chicken breast.

Put the chicken in the oven and roast for 25 minutes. Reduce the heat to 400 F and roast for an additional 45 minutes, or until the temperature registers 160 F in the meatiest portions of the bird--the thighs, and under the breast where the thigh meets the breast--and the juices run clear. If necessary, return the bird to the oven for more roasting; check it every 5 minutes.

Transfer the chicken to a carving board and let rest for 20 minutes.

Just before serving, set the pan of vegetables over medium heat and reheat the vegetables, turning them and glaazing them with the pan juices.

Cut the chicken into serving pieces, arrange over the vegetables and serve.


Derek served this with another addition from the Ad Hoc "Bible" - probably an OK term to use at this point...Braised Artichokes. Artichokes may be expensive and a good bit of work to prepare (peeling away the outer layers to expose the softer artichoke heart) but it all seems worth it when you bite into a perfectly tenderized artichoke sprinkled with some fleur de sel.
artichokes during the braising process:


...and the completed meal...


Given that we paid $25 dollars for a single chicken - a surprise that just about gave us a heart attack...I'm really glad this was good. I was then left to eat the leftovers for the next few days as Derek jetted off to the East Coast - which I gladly did so. Moist, tender - potentially in need of a squeeze of lemon on the chicken breast for a tad bit more flavor - but overall, a perfectly cooked chicken. And the root vegetables were delectable, cooking in the fat and juices of the chicken - perhaps not he best description in the world but if anyone has had the potato wedges sold from Roli Roti, the rotisserie chicken truck, that are cooked in the drippings of the ever rotating chickens - well then you know what I'm talking about. A meld of flavors that comforting and hearty - and perhaps, not too scale tipping at the end of the day.

"Light-er" Homemade Eggnog

“Eggnog – YUCK, no thanks!” This had been my natural response to any previous eggnog offer. Who wants that nasty thick liquid that plops out of a carton and coats your stomach for the next four hours. And don’t even get me started on that nutrition label….and that’s for the drink WITHOUT alcohol! Yikes! No wonder people pack on the pounds over the holidays. Yet here I am writing up a review for an eggnog that was made willingly at my apartment…and that I was sad when we licked the bowl clean. What happened to my aversion to this guilt-packed holiday beverage? That’s the magic of homemade cuisine. You have control over the ingredients, the preparation, the taste, the texture….the final outcome! And when all of those features align, you’ve got yourself one heck of an eggnog. I’ll equate the difference to the disparity between a cheap frozen store-bought pizza and a pizza fresh out of the 800 degree wood burning oven with top notch ingredients. Yep, it’s about like that.

Now for lovers of the store-bought product, this may not be for you. It’s a completely different product…in my opinion, that’s a very good thing…but to “store-bought purists” it may not be. This serves as my disclosure. Also to those who love a thick heavy-cream laden drink…you are warned as well. The base recipe that we used for the eggnog calls for a liberal amount of heavy cream…a standard for eggnog recipes. Though I am sure that the final product of the original recipe is divine, I don’t think I could coax myself into having more than one glass…and I’d be a little afraid that my body would punish me for the amount of lactose that I was putting in it. So Derek and I agreed to slim down the eggnog recipe in order for us to fully enjoy our holiday eggnog evening.

“Light-er” Homemade Eggnog
Makes about 3-4 drinks

3 egg yolks
1 cup confectioners' sugar
1 cup dark rum (we used Appleton Estate)
¼ cup heavy whipping cream
3/4 cup 2% milk
2-3 egg whites (2 is probably best…3 for a more frothy product)
fresh nutmeg

Note: Derek “pasteurized” the eggs before using them by heating room temperature eggs to 140-150 degrees for about 3 minutes …and made sure to get cage-free, organic eggs…there is less of a chance of salmonella when the eggs don’t come from a source where the chickens are cooped up along with all of their waste…

Beat the egg yolks until they are light in color. Gradually beat in the confectioners' sugar. Add 2 cups of liquor (or combination of liquors) very slowly, beating constantly. (Note: Any of these liquors can form the basic ingredient of the nog or may be combined to taste.)

Let the mixture stand covered for 1 hour to dispel the "eggy" taste. Add, beating constantly, 2 or more cups of liquor and the whipping cream. Refrigerate for 3 hours. Beat the egg whites until stiff but not dry. Fold them lightly into the other ingredients. Serve the eggnog sprinkled with fresh nutmeg.


I cannot emphasis the importance of using fresh nutmeg. It makes a world of difference. The beverage itself is not super thick…which is a good and bad thing. Good because I’d rather not keep downing alcoholic milkshakes…and bad because I can easily down a glass of alcoholic holiday cheer. These are deceptively strong so it was probably a good thing that Derek and I only made a small amount…otherwise we may have kept on sipping…and Derek may have repeated his infamous missed-flight-after-a-night-of-eggnog mistake (yes, that did happen in New York…the first time we made homemade eggnog…missing a flight just before Christmas? Not a good idea). We joked that this would happen again as we decided to make eggnog once again on the night before his departure for South Carolina – however…this time his flight was later in the morning and the eggnog was probably a bit more reasonable in portion size.

We used three egg whites which made the final product pretty frothy on top – given that I love cocktails with egg whites…this was a nice feature for me. For not being a fan of eggnog – I’m certainly glad I gave this one a try…and we are going on about 2 or 3 years of making this now…so I san probably say that I’m starting a bit of an eggnog tradition in my household – who would have thought!?


For your reference…here’s the original recipe that came from our good friend Phil

Homemade Eggnog
Makes about 12 drinks

12 egg yolks
1 lb. confectioners' sugar
4 or more cups dark rum, brandy, bourbon or rye (Phil uses 6)
2 quarts whipping cream
8 to 12 egg whites
fresh nutmeg

Beat the egg yolks until they are light in color. Gradually beat in the confectioners' sugar. Add 2 cups of liquor (or combination of liquors) very slowly, beating constantly. (Note: Any of these liquors can form the basic ingredient of the nog or may be combined to taste.)

Let the mixture stand covered for 1 hour to dispel the "eggy" taste. Add, beating constantly, 2 or more cups of liquor and the whipping cream. Refrigerate for 3 hours. Beat the egg whites until stiff but not dry. Fold them lightly into the other ingredients. Serve the eggnog sprinkled with fresh nutmeg.

Sunday, December 19, 2010

Ad Hoc Peppercorn Filet Mignon with Broccolini and Bufala Mozzarella Salad

In just one week I had the best pork tenderloin of my life (see Ad Hoc Brined Pork Tenderloin) and also one of the best steaks of my life. Thank you Thomas Keller for creating such a fabulous, technically perfect cookbook with your Ad Hoc at Home. And thank you Derek for being able to follow directions. Yes, the steak recipe came from Ad Hoc at Home as well. As did the broccolini salad that accompanied it – just brilliant.

Derek’s newfound love interest in the kitchen…this cookbook…has been making posting about the meals quite simple in that he actually follows the recipe rather than creating a beautiful meld of several recipes and techniques found online. I think that the style of the recipes also fits in nicely with my preferred style of cuisine – taking quality ingredients and treating them with respect, bringing out the naturally exquisite flavors. Of course my other style of cuisine is a mishmash of vegetables and whatever is in my refrigerator…so that seems slightly contradictory – but then again it could just be the difference in wanting to take time and create a masterpiece and wanting to use up ingredients and create something easy and comforting – for my tastebuds at least.

This meal – one prepared by Derek certainly falls in the simple and perfect category. After all, the steak was a simple filet prepared with three ingredients – salt, pepper, canola oil. That’s it!! Seems like anyone could make it perfect, right? The key, though, is in the preparation. Simple, perfect, preparation.

Ad Hoc Peppercorn Filet Mignon

1/2 cup black peppercorns
Canola oil
6 8oz beef tenderloin steaks 1 and 1/2 inches thick
Kosher salt

Put peppercorns in a small saucepan and cover with 2 cups of canola oil. Bring oil to a simmer over medium high heat. Remove from heat and let peppercorns steep for 1 hour.

Drain peppercorns and crush with a mortar and pestle. Spread crushed peppers on work surface. Coat both sides of steaks and let sit for 30 minutes.

Preheat oven to 350.

Heat oil in cast iron pan over medium high heat. Season steaks with kosher salt. Add steaks to pan and sear for 4 minutes. Turn steaks and sear other side for 4 more minutes.

Transfer steaks to oven and cook for about 18 minutes for medium rare and 24 minutes for medium well. Remove from oven and let rest before serving.


Not wanting a ton of steak – I picked out the smallest one that the meat guy had – probably about 5 oz…maybe even 4.5 oz. It wasn’t large. But let me tell you…the flavor that came out of that little guy…wow. It was so much more satisfying than a 12 oz ribeye that you order at a restaurant. It was rich and tender and so evenly cooked – that was what surprised me the most. Oftentimes when you have a steak, you cut into the middle to see how it is done…because obviously the ends are more well done than you care. I wish I had taken a picture of the inside of my steak (would have been much better than the blurry image above…that was Derek’s steak). The end was as perfectly medium to medium rare as the middle was. And you could cut it with a butter knife (or so I assume…I didn’t try). The amount of pepper that Derek put on seemed very generous prior to cooking…we both expected a good hit of spicy black pepper when we took a bite. Instead the black pepper flavor was infuse into the steak but the spice and “kick” was gone! It was miraculous. And heavenly…and with a Frank Family Cabernet, for a moment in time I was elevated to a level of divinity.

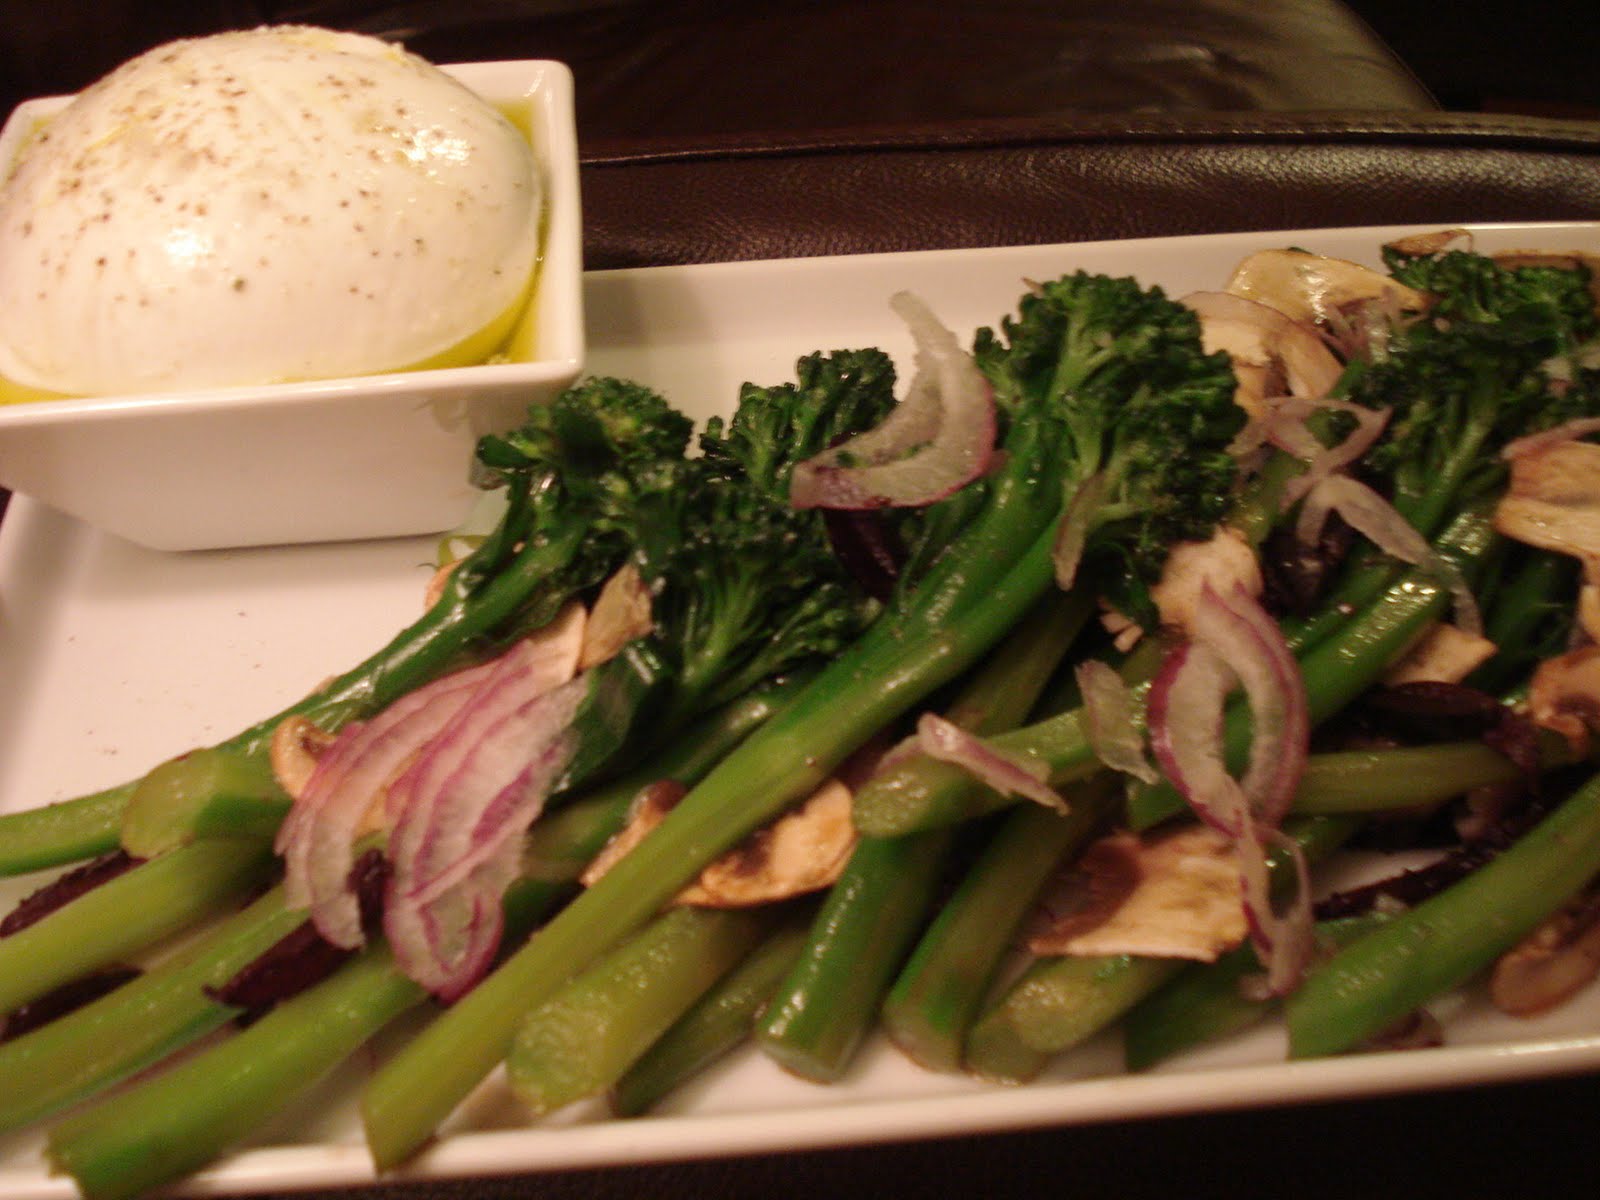
And though I would have been thoroughly happy and satisfied with just my little steak in the middle of a big plate…savoring each morsel for dinner – I was even more fortunate to have an incredible side dish/salad – also coming from Ad Hoc – and actually the initial inspiration for the meal. While flipping through Ad Hoc contemplating what we should have for dinner, a picture of broccolini and mushrooms with some fresh burrata cheese caught my eye. I’m a sucker for burrata. I figured that the vegetables were boiled and/or sautéed…as were the mushrooms…so when I bit into what Derek delivered as the side dish, I was surprised – it really was a broccolini salad! Served cold! How fantastic!!! The mushrooms – not even cooked! The broccolini, briefly blanched to bring out the beautiful natural green – but still crisp to the tooth. Wow.

Broccolini and Bufala Mozzarella Salad

1 pound broccolini, thick ends removed and remaining stems peeled slightly, as in photo above
3 large cremini mushrooms, stemmed and cleaned
1/2 cup black Cerignola olives (it’s pretty important to get this particular kind because they are milder than most other olives. Whole Foods carries them on the olive bar.)
Kosher salt and fresh black pepper
Burrata cheese (the smallest round you can find, but you will definitely have leftovers)
Extra virgin olive oil
Sherry vinaigrette (see recipe below)
instructions

1. Bring a large pot of water to a boil. Salt generously before adding broccolini. While water is coming to a boil, prepare a large bowl of ice water. When water boils, add the broccolini and blanch until crisp-tender, about 4 minutes. Submerge broccolini in bowl of ice water to stop the cooking, then drain and pat dry with paper towels.

2. Cut the mushroom caps into paper-thin slices. I used a sharp paring knife, but the book suggests that a Japanese mandoline also works well. Place in a small bowl.

3. Cut all 4 sides of each olive away from the pit in flat slices. Lay the slices flat-side-down and cut into thin slices, as seen in photo above.

4. Lay the broccolini in a single layer on a plate and drizzle with about 2 Tbsp. vinaigrette (see recipe below). Toss with your hands to coat. Sprinkle with additional salt or pepper if desired. Add 1 Tbsp. vinaigrette to the bowl with the mushrooms, and toss to coat, adding a bit more if needed. Move broccolini to serving platter and top with marinated mushrooms, then sliced olives.

5. Place the burrata in a small serving bowl. Using kitchen shears, cut a small X in the top of the burrata to expose the creamy center. Drizzle with a little olive oil and sprinkle with pepper. Add the bowl of burrata to the serving platter. Serve salad with tongs and a spoon for the burrata. Each person can top their own serving with the burrata.

Sherry vinaigrette

Whisk together 2 Tbsp. sherry vinegar and 2 Tbsp. red wine vinegar in a small bowl. Stream in about 1/2 cup olive oil (the dressing will still look slightly broken – do not emulsify completely), and season with salt and pepper to taste. Whisk in more olive oil if dressing is too tart.


Unfortunately the cheese shop did not have burrata. Sure, I was a little bit sad, but we substituted it with Bufala Mozzarella which we were told is essentially the same as Burrata but without the creamy center. It was still fantastic. The key to the salad is making the mushrooms and red onion so thin that they blend into the salad rather than stand out in their raw state. I could have had this alone for dinner…with a piece of good bread…but clearly I was happy with my steak and would have fought someone if they tried to take it away from me after I had taken my first bite.

What I loved about the broccolini was that it brought the thought of salad to a different light. Cooked a little bit longer it would be considered more of a side dish, but as the broccolini was barely cooked…and the rest of the ingredients were raw…it truly was a salad!

You know sometimes when you have a really good meal you just get kind of giddy (or am I alone here…)? This was one of those meals…and I cannot wait to try out some more delicious discoveries from Chef Derek-Thomas Keller.

Thursday, December 16, 2010

Chocolate Peppermint Biscotti

After successfully making gingerbread biscotti two days earlier, I decided to try my hand at another biscotti variation. This time another set of holiday flavors were on my mind – chocolate and peppermint. Not being thrilled with the chocolate peppermint recipes that I was coming across, I decided to use a chocolate almond recipe as my base and tweak it to make it peppermint. The difference between this recipe and the other ones that I found floating around the internet was the lack of butter used. Every single recipe that I was coming across had butter! Having just read that a true Italian biscotti is made without butter, I wanted to maintain some level of authenticity – though I’m sure chocolate and candy canes are probably not the most authentic Italian mix out there. Perhaps for my next biscotti batch I’ll try a butter-based recipe, but so far I’ve been extremely pleased with the way the non-butter recipes have turned out.

You’ll note that in this recipe I used 1 Tbsp. of shortening. This was to compensate for the fact that I was using cocoa powder rather than semisweet chocolate.

Chocolate Peppermint Biscotti

1 cup cocoa powder
1 Tbsp. shortening
1 cup (210 grams) firmly packed light brown sugar
1 3/4 cups (230 grams) all-purpose flour
1 tablespoon (4 grams) instant espresso powder
1 teaspoon (5 grams) baking soda
1/4 teaspoon salt
3 large eggs
1 1/2 teaspoons pure vanilla extract
1 tsp. peppermint extract
3/4 cup peppermint candy canes, crushed

1/3 cup dark chocolate chips, melted with a little shortening
1/3 cup mint chips, melted with a little shortening

Preheat oven to 350 degrees F (177 degrees C).

In a large bowl, sift or whisk together the flour, cocoa powder, brown sugar, espresso powder, baking soda and salt.

In the bowl of your electric mixer, or with a hand mixer, beat the eggs and vanilla and peppermint extracts until combined (about 30 seconds). Add the dry ingredients mixture and beat until a stiff dough forms, adding the peppermint candy about half way through mixing.

With floured hands divide the dough in half. On a lightly floured surface roll each half of dough into a log about 10 inches (25 cm) long and 2 inches (5 cm) wide. Transfer the logs to the prepared baking sheet, spacing about 3 inches (7.5 cm) apart. Bake until almost firm to the touch, about 35 - 40 minutes (logs will spread during baking). Remove from the oven, place on wire rack, and let cool for 10 minutes.

Using a long spatula transfer the logs to a cutting board. Using a serrated knife cut the dough into slices 3/4 inch (2 cm) thick on the diagonal. Arrange the slices cut-side down on the baking sheet. Bake 15 minutes. Turn the slices over and bake until crisp and dry, about 15 minutes longer. Remove from oven and let cool on wire rack.

Drizzle with melted chocolate and then with the mint chip mixture.

Store in an airtight container.

Makes about 30 biscotti

The final product surprised me in two ways…

1) The candy canes were gone after baking!! I should have thought this would have happened as they are simply just sugar based candies – however, I was still slightly surprised.
2) The biscotti had the same exact flavor as the beloved Girl Scout cookie – Thin Mints. The texture was clearly different as this is a harder product, but the flavor was spot on.


Unfortunately I did not take a picture of the beautiful final product – dark biscotti base drizzled in brown and light green “frostings.”

I keep the final product in the freezer, as I do with most of my cookie products. I just can’t stand the taste of cookies that have been sitting at room temperature for a few days. They always seem to take on some new flavor that really shouldn’t be there. I kept half of the batch for myself (it’s just about gone…) and then sent the other half to Afghanistan – I will be curious to find out how they held up!

Tuna Nicoise Salad Revisited

The previous time that I made a Tuna Nicoise salad - Derek was out of town and didn't get to partake. When I decided this would be my contribution for dinner, I decided to just follow the same recipe that I had used before as it was so delicious.


Dressing
Juice 1/2 lemon
1 tsp whole grain mustard
splash caper juice
1/2 tsp. honey
1/2 tsp. red wine vinegar
pepper
sprig thyme, leaves removed
2 chives, minced
1 small garlic clove, minced
2 Tbsp. EVOO


Whisk together all ingredients except for the EVOO. Slowly stream in the EVOO while constantly whisking the mixture together so that the EVOO can become emulsified. Set Aside.

Salad Components:

Mixed greens
Boiled baby red potatoes
Blanched green beans cut into 2 inch pieces
Cherry tomatoes, cut in half
Capers
Calamata olives, cut in half
Hardboiled eggs cut in half
Fresh raw tuna, with EVOO, s&p, seared rare

Mix together salad components up to the hardboiled eggs and dress. Lay on a plate a top with sliced tuna and eggs.

This was good, as expected, but did bring one fact to light: WE NEED SHARP KNIVES! The tuna was butchered due to dull knives...it tasted great but the presentation was ruined. Derek ordered some adequate knives a few days later...cannot wait to play with them.

Wednesday, December 15, 2010

Ad Hoc Brined Pork Tenderloin with Caramelized Fennel and Polenta

One of the great things about Derek's potential participation in MasterChef is the fact that he is now keen on trying out new recipes and new methods of cooking - just in case he makes it! I get to reap the benefits of this endeavor, serving as the key taste tester due to my wonderful critiquing skills and the fact that I'm typically the only other person dining with him!

His latest inspiration has stemmed from his recent purchase, Thomas Keller's Ad Hoc at Home.

Thomas Keller is the well known chef of French Laundry, Napa Valley's Three Michelin Star restaurant. I haven't been lucky enough to eat there yet but one day...yes one day...I'll have to save up some more pennies in my piggy bank before that happens. For those of us who are not as financially secure, he opened up another restaurant up in wine country - Ad Hoc - this one focusing more on home cooking cuisine - done perfectly. The interesting thing about this restaurant is that he serves up just one menu per night at around $50 for a four course meal - appetizer, entree, cheese, dessert. I sound like a frequent guest at this establishment when I haven't even been there once either. However, I feel well acquainted with the style and focus of the restaurant having perused the hefty cookbook adorned with photos and simple explanations of techniques. For a home cook who wants to learn how to cook perfectly executed, fairly simple recipes, this is a great book.

All three components of the meal came from Ad Hoc at home and seemed relatively simple. Brined Pork Tenderloin with Caramelized Fennel and Polenta.

I found the following recipe online claiming to be the Ad Hoc recipe...so I'm assuming this is just about how Derek prepared it.

Ad Hoc Brined Pork Tenderloin
Pork Brine
(from Ad Hoc at Home)

3 T honey
6 bay leaves
2 fresh rosemary springs
1/4 oz fresh thyme sprigs
1 oz fresh flat leaf parsley sprigs
6 cloves garlic, crushed with the skin left on
1 T black peppercorns
1/2 c kosher salt
4 c water
1 pork tenderloin, silverskin removed)

Bring all the ingredients to boil. Stir and  boil for 1 minute, until the salt is dissolved. Cool completely before adding the pork. (If you want to cool your brine quickly put the pot in a large bowl of ice and it'll do the trick.) Put the pork tenderloin and  brine in a bowl just big enough to hold them. Let sit in the fridge for 4 hours (apparently 4 hours is the optimal time for brining...any more time left in the brine would potentially make the pork too salty so this is certainly not a "prepare ahead of time - i.e. overnight" recipe.)

Now to cook the brined pork.

INGREDIENTS:
1 T canola oil
salt and pepper
1 T unsalted butter
1 garlic clove, crushed
3 fresh thyme sprigs
1 fresh rosemary sprig
4 - 5 slices cured (preserved) lemon slices
sea salt

Remove the pork from the brine, rinse it and pat it dry. Let the pork sit at room temperature for 30 minutes.

Preheat oven to 350 F.

Heat the olive oil over medium-high heat in a large skillet. Salt and  pepper the pork. Put the pork in the hot skillet and cook until golden brown on all sides, about 6 minutes. Add the butter, garlic, thyme, rosemary and lemon slices. Cook for another two minutes basting the herbs, lemon and garlic with the juices in the pan.

Move the pork to a roasting pan with a rack set in it. Lay the lemon slices across the top of the pork, overlapping them a little. Top with the thyme, rosemary and garlic. Roast for 20 minutes, until the pork registers 135-140 on an instant read thermometer.

Let the pork sit for 15 minutes before slicing to serve.


The components are simple but I can confidently say that this was the very best pork tenderloin that I have ever had. Derek made an apple compote to accompany the pork consisting of chopped and peeled green apples, currants, sugar...then adding a special kick with some apple brandy. Cooked down until the apples are not crunchy and the flavors have melded.

The pork itself was extremely flavorful and juicy and oh my goodness - just simply perfect. Long gone are the days where you have to cook your pork to 160 degrees. Please, do not do that, that will ruin any potential that the meat has. This recipe brought out every ounce of potential that the little loin had. I was trying to put my finger on how to describe the flavor and came to a cross of roasted chicken and dark meat turkey. Dark meat because it was so juicy and flavorful, roasted chicken because it picked up so much of the herb and lemon goodness. Really, quite fantastic.

Served with the pork and apple compote were polenta and caramelized fennel. Polenta is polenta, I've had it before and with some cream and butter, you can't go wrong...I certainly ate it up.

The fennel, though, was a preparation that I had never had before and will certainly make again. Derek removed the tougher outer segments of the fennel bulb and quartered the bulbs. The fennel was blanched briefly as a first step - this may have happened before or after the cutting of the fennel into segments. After letting the blanched fennel rest, Derek coated them in EVOO, salt and pepper...simple. Then with some canola oil in a pan, he (or I...I actually did this part) cooked the fennel over medium heat turning the fennel pieces every few minutes to make sure to get a nice caramelization on each side. The whole cooking time was about 12 minutes or so - until they are nice and tender but still keep their shape.


These were fantastic.

The whole meal was - and it was just a Tuesday night. Knowing that at least one of my friends probably popped a Lean Cuisine in the microwave for dinner that night...well that makes me feel extremely lucky to be a guinea pig for a potential MasterChef.

Tuesday, December 14, 2010

Spiced Pumpkin Soup with Smoked Gouda and Ham Grilled Cheese

By the lack of posts that I have produced for the month of December, it is evident that the Pasquarella-Sugermeyer camp has been ordering take-out and eating leftovers for the majority of this month. Perhaps this is due to Derek's focus on his dish for his MasterChef audition - Duck Confit Salad with Candied Kumquats, Pecans, Clementine Segments, Tangerine Vinaigrette and a Smoked Gouda Crisp. No, there will not be a post that provides insight into that dish. I had very little to do with the actual production of the finished product. Derek had to brine the duck for 24+ hours and then cook it it in tons of duck fat at a low temperature (190 degrees) for around 10+ hours...a lot of work. It was, however, incredible and receiving top scores from the MasterChef judges...good enough to move Derek through the casting rounds up until now when we wait for a phone call by mid-January to see if he will be in the top 100.

Now that we can take duck off of our mind for a while now that the tryouts are over, it is probably time to get back into the kitchen and make something. I'm still feeling slightly uninspired - preferring to bake Christmas cookies and desserts rather can come up with a savory meal - but I took the reigns and put together a fairly simple but still satisfying home-cooked meal using up the last bit of our fresh pumpkin puree that was leftover from Thanksgiving.

Spiced Pumpkin Soup
original recipe found HERE

1 tablespoon butter
1/2 cup chopped carrot
1/2 cup chopped celery
1/4 cup chopped ripe banana
1/2 onion, chopped
1 garlic clove, minced
1 bay leaf
2.5 cups low-salt chicken broth
2 cups canned pure pumpkin
1/2 cup canned unsweetened coconut milk
1/8 cup sweetened condensed milk
1/4 teaspoon ground clove
1/4 teaspoon ground nutmeg
1/2 teaspoon ground cinnamon
1/2 teaspoon ground coriander
1/2 teaspoon sage leaves
1/4 teaspoon ground allspice
1 teaspoon yellow curry powder
1/4 teaspoon cayenne pepper
chopped fresh cilantro, for garnish

Melt butter in heavy large pot over medium-high heat. Add carrot and next 6 ingredients and sauté until vegetables are soft, about 13-15 minutes. Discard bay leaf. Transfer mixture to processor and blend until smooth. Return mixture to pot. Add broth and all remaining ingredients except cilantro. Simmer soup over medium-low heat 15 minutes to blend flavors. Cool slightly. Using a hand immersion blender or a regular blender (in batches), puree soup until smooth. Return soup to pot. Season to taste with salt and pepper.

Bring soup to simmer. Ladle into bowls. Sprinkle with cilantro and serve.


We served the soup with Smoked Gouda and Ham Grilled Cheese Sandwiches - probably one of the best grilled cheeses I've made before. I'm a sucker for smoked cheeses, gouda in particular. And paired with the ham - it's fantastic. We just buttered two long slices of country sourdough bread, sliced from a round loaf, and placed a sprinkling of cheese and ham slices in between, "pan searing" the sandwiches over medium heat until they are browned on each side. It's just a grilled cheese - but it was really good.

Now onto the soup - I was a bit over the soup after I sliced my thumb chopping sage. That never feels good - and this case was no different. Having to then call Derek into the kitchen to help finish up the final steps of the soups - and because he helped a little bit, I couldn't make him do the dishes afterward so guess who got stuck doing those. In general, I loved the spice and flavors of the soup. It was sort of like a slightly spicy (thanks to our addition of cayenne) version of a melted pumpkin pie. I was a little weary about the mass of spices used - and adjusted portions according to my own intuition (the original recipe called for 1 teaspoon of nutmeg. I know how strong nutmeg and how hard it is to fix a recipe after there has been too much nutmeg added - so I went on the safer side and used just over a 1/4 teaspoon.

I liked the thought of using coconut milk in the soup - and was also intrigued by the thought of sweetened condensed milk. I almost omitted this ingredient as I did not feel like opening a whole can of it - but the soup was screaming for a touch of sweetness. My error was that I put in a full 1/4 cup of the sweetened condensed milk as the original recipe stated. I should have put into account that the original recipe also called for 5 cups of chicken broth and I used just half of that. Needless to say, the soup was slightly too sweet. It would have probably fit the bill for most tastebuds that prefer a little sweetness, but for soup - I'd recommend using a little less. For a savory item like soup - the sweetener should do the same thing that salt does - it should bring out the flavors in the soup rather than be a flavor in itself. Use a little less sweetened condensed milk and it will be incredible.

This really was a unique soup - comforting too in that you have pumpkin pie in a bowl - without the buttery crust and the guilt!

Wednesday, December 8, 2010

Gingerbread Biscotti

In preparation for Christmas - I wanted to send my sister some homemade goodies - a "luxury" that she doesn't get very often over in Afghanistan. I can only imagine how difficult it is to be subjected day-after-day to cafeteria or "mess hall" food that is mediocre at best. The trick, however, is coming up with a baked good that will still taste OK after being shipped from California to Afghanistan - about a 7-10 day process. And let's not even think about having a chocolate-based treat - unless it's made with cocoa powder...the potential for a melted mess of sweetness is just too great to risk. Same with frosting or icing - that is certainly a bit too risky.

Then add in the health aspect, the goodies shouldn't be too terrible for you - after all, I don't want to be the cause of holiday guilt, just joy. Oh and it has to taste good on top of all of those limitations.

I have to give all credit to my co-worker for coming up with the final brilliant idea: biscotti. Of course! Why hadn't I thought of that before...for so long I had a couple biscotti recipes hanging around my recipe box (virtual collection - sad to say the old days of recipe note card collections is becoming extinct). Knowing me, though, I opted to continue to neglect the biscotti hopefuls that I had had lined up months ago: Deep Dark Chocolate Biscotti (a healthy recipe with flaxseed and whole wheat flour) and Fig and Walnut Biscotti – they’ll just have to stay in the cue…I’ll get to them one of these days. As I am obsessed with fall and winter baking flavors (pumpkin, gingerbread, cinnamon, nutmeg, etc.) I thought of the idea for a Gingerbread Biscotti – went on my online search of an established recipe – ended up with a perfect recipe for my first biscotti experience.

Gingerbread Biscotti
original recipe found here

Ingredients:
2 1/4 cups flour
2 teaspoons ground cinnamon
1 teaspoon baking powder
3/4 teaspoon ground ginger
1/2 teaspoon baking soda
1/4 teaspoon ground nutmeg
1/4 teaspoon ground allspice
1 egg, lightly beaten
2 egg whites, lightly beaten
2/3 cup dark brown sugar, packed
1/4 cup molasses
2 teaspoons vanilla extract
1/2 cup pecans, toasted and chopped
1/4 cup dried currants

1. In a large bowl, combine the first seven ingredients; In another bowl, combine the egg and egg whites, brown sugar, molasses and vanilla until smooth.

2. Stir the egg mixture into dry ingredients just until moistened; fold in pecans and currants; cover and refrigerate for 30 minutes.

3. Divide dough in half; shape each half into a ball; on a baking sheet coated with nonstick cooking spray, roll each ball into a 14-inch x 1 1/2-inch rectangle; Bake at 325 degrees for 24 to 28 minutes or until frim to touch; remove from the oven and reduce heat to 300 degrees.

4. Cool for 5 minutes, transfer to cutting board; cut diagonally with a serrated knife into 1/2-inch slices; place cut side down on baking sheets coated with nonstick cooking spray; bake for 20-25 minutes or until lightly browned turning once, remove to wire racks to cool, store in an airtight container.


The dough flavor was fabulous – and there wasn’t even any butter in the mix! Upon further investigation, I learned that true Italian biscotti did not contain any butter at all. The American version is the butter laden cookie – surprise, surprise! Apparently the butter makes the cookie a bit softer so you can choose to eat it on its own and it won’t be too hard – but it would also stand up to coffee or hot chocolate dipping. This is what the sources say at least. The difference between a cookie dough and a biscotti dough is liquidity. A biscotti dough is much harder as it has less liquid – simple as that.

I did what is probably a huge no-no in the baking world in order to come up with a result that I was 100% pleased with. I followed the recipe 100% for my first go-around with biscotti – baking the sliced biscotti (second round of baking) just about 14 minutes – 7 on each side. The ending result was a delicious cookie…still slightly soft but with a definite tough exterior like a biscotti should have. I was pleased with the result…eating all of the small first slices – after all, who wants such a small biscotti anyway! ;) After cooling completely, I placed the biscotti in an air-tight container and left it out on the counter overnight. The next morning I went to grab a biscotti only to find that they had softened up a bit! Still wonderful in flavor – but where did my hard, crunchy biscotti go!? All day at work I thought about these biscotti – wondering what happened! (ok perhaps I wasn’t thinking of this ALL day…but it was on my mind for a bit). I had it set in my mind to fix this problem and decided to pop the biscotti back in the oven one last time. After baking for another 15 minutes or so, I took the biscotti out and was face-to-face with a perfect biscotti. Crunchy but not rock candy…sweet but not overly so…comforting with molasses and cinnamon.

I wouldn’t recommend the re-bake approach for most cookies – however, given that these did not have any butter, I think the third trip in the over was essentially toasting the cookies and not messing with the internal structure.

I dipped one into my chai tea this morning and it was a glorious combination.

And yes, I did send some on their way to Afghanistan…but I certainly had to save some for myself!

Sunday, December 5, 2010

Spit Roasted Leg of Lamb with Preserved Lemon, Saffron, Olive, and Vinaigrette

Another fantastic Friday of coming home from a less-than-fabulous week of work and sitting down with a glass of wine while Derek prepares a gourmet meal for the two of us. I don't think this is something I will ever take for granted...I know I am so lucky to have this service provided to at no cost (though I do have to deal with his little quirks daily).

On the menu this night was lamb - a leg roast that had been picked up a few days earlier at our local meat market.

The recipe came from FoodNetwork.com - a Cat Cora recipe.

Note: Derek made at most a quarter of vinaigrette that the recipe provided calls for. I would have gone in shock if he had used up that whole expensive bottle of delicious champagne vinegar!

Spit Roasted Leg of Lamb with Preserved Lemon, Saffron, Olive, and Vinaigrette

Ingredients

1 cup champagne vinegar
1/2 teaspoon saffron threads
2 cups pure olive oil
1 tablespoon preserved lemon, small diced
1 cup oil cured olives, finely chopped
1 tablespoon cracked black pepper
1 (5 to 6 pound) leg of lamb
8 small sprigs rosemary
3 cloves garlic, sliced thinly
1/4 cup olive oil
1 tablespoon dry oregano, crumbled
1 tablespoon fresh oregano, chopped fine
1 lemon, juiced
2 teaspoon salt
1 teaspoon black pepper

Directions
In a small saute pan, bring the champagne vinegar and saffron to a boil for 1 minute. Pour into a bowl and whisk in the olive oil slowly as to incorporate it. Add the chopped preserved lemon and black olives. Season with pepper. I do not add salt to this because of the saltiness of the olives. This recipe makes a quart and will last for at least a month.

Preheat the oven to 500 degrees F.

Make sure the lamb leg is cleaned well and any hard fat is trimmed off. Make 8 slits in the leg and stuff them with the rosemary sprigs and garlic cloves. Rub the leg with the olive oil, dry and fresh oregano, lemon, salt, and pepper. Tie with kitchen twine to create a uniform shape to ensure even cooking.

Roast at 500 degrees F. for about 30 minutes. Lower heat to 375 degrees F. Add water to the pan if needed. Cook until internal temperature reaches 135 degrees.

Remove the lamb from the pan and let rest. Skim the fat from the pan juices and pour the juice onto the bottom of a platter. Slice the lamb into thin slices and serve topped with the preserved lemon sauce.


I think the picture make the piece of meat look odd - it was actually pretty lean for a piece of lamb. And it was SO tender. I really have to give Derek props for cooking this perfectly. It makes up for our overcooked lamb (though still tasty) on Easter. I'm glad he didn't follow the original recipe because it called for cooking the meat for over 3 hours. Mind you, it was probably a slightly larger piece of meat that it called for, but even if the timing had been adjusted accordingly, it still would have been far too long. This is why it is important to have a meat thermometer gauging cook time rather than a number in a recipe.

The meat actually took far less time than anticipated so we ended up eating dinner at 6:30 PM - that is completely unheard of at our place. Luckily I was hungry so I just omitted my usual post-work snack and went right on to dinner. Gave me the whole evening to work on our bottle of Syrah and go to bed fairly early...it was a Friday afterall.

The only negative critique that we both agreed on was that the rosemary was a bit too strong. While rosemary provides wonderful flavor, it slightly overpowered the meat and the tanginess of the preserved lemons.

This was served with an israeli couscous mixed with some roasted pumpkin seeds, shallots and currants.

The Syrah was a fantastic Arrowood - my favorite winery in Sonoma - and went nicely with the lamb.

Tuesday, November 30, 2010

Chestnut, Sausage, Pear and Dried Cherry Dressing


Perhaps the surprise star at the dinner table. This stuffing, or "dressing" if you will, was the best I have ever eaten and I'm proud to say that I made it! I knew that I wanted to incorporate chestnuts in it somehow. I've been craving it for a few Thanksgivings now but my family had previously opted to stick with our traditional celery, raisin, mushy stuffing. I make it sound gross...it's not. Actually quite good and it was what I was accustomed to. Now after having my new recipe, I don't know if I'll be able to go back.

The key difference between this year's recipe and my family's traditional recipe is the type of bread used. Rather than using standard store bought loaf bread that soaks up liquid and turns to mush (good mush, but much nonetheless) I used a ciabatta loaf from the bakery. I figured this would be a good middle ground between a soft loaf bread and a harder crusted peasant bread. This would allow me to keep the crusts on without risking a hard piece of crust in the final product.

I sifted through practically every chestnut stuffing recipe out there and could not settle on one perfect one that would incorporate all of the elements that I was looking for. So what did I do? Picked and chose precisely what I want to put in and threw it all together and crossed my fingers that it would turn out.

My final ingredient list included:

Chestnut, Sausage, Pear and Dried Cherry Dressing

3/4 loaf ciabatta bread, cubed and dried
1 medium onion, chopped
2-3 shallots, minced
butter
1.5 cups roasted chestnuts (I roasted my own, you could use store bought)
2 links of hot pork sausage, casing removed and crumbled
1/3 cup dry white wine
1 tsp. sugar
2-3 stalks celery, sliced
2 d'anjou pears, peeled and chopped
3/4 cup dried cherries, coarsely chopped
1/3 cup chopped parsley
3 Tbsp. sage, chopped
2 large eggs
2+ cups chicken stock
1/3 cup heavy cream
salt and pepper to taste

Tear bread into small bite-sized pieces and set in roasting pan or bowl. To dry bread, cover with paper towels and leave out overnight. Or, place on a baking sheet in batches and lightly toast. Set aside.

Brown sausage crumbles and set aside.

In a heavy-bottomed pan, over medium high heat, add 2 tablespoons of butter, and then add onion and shallots, season with salt and pepper, and cook, stirring occasionally, until just soft. Do not brown. Remove onions/shallots from pan and set aside.

Preheat the oven to 375 degrees F.

Add wine to pan and deglaze over medium high heat, cooking until wine reduces by about half. Pour remaining liquid over the onions. Wipe pan dry and add 2 Tbsp. butter. Add pears and sugar, and season with salt and pepper. Sauté pears, in batches if necessary, over medium high heat until they begin to brown slightly. Remove from heat.

In a large bowl or roasting pan, add sautéed ingredients to bread. Add celery, chestnuts, and cherries. Toss lightly to combine. Add sage and parsley and toss again. Pour in eggs and mix to incorporate. Slowly pour 1.5 cups stock over mixture and toss to combine. Taste and adjust for salt and pepper. Place stuffing in a 9×13 baking dish, and pour another cup of turkey stock over the stuffing, followed by the cream.

Bake stuffing for about 60 minutes, or until a golden crust forms on bottom. Serve immediately.


My mom said she wants this type of stuffing from now on. That made me feel proud. I gladly ate all of the leftovers and thought everything blended and complimented the other ingredients very well. I was afraid the hot sausage would ruin the dish but it actually added a nice contrast to the sweetness of the cherries and pear.

I think the key take-away for making a good stuffing is:
1. buy a good loaf of bread, nothing too hard or too soft
2. choose an array of ingredients that cover sweet, savory, meaty characteristics
3. use enough liquid to thoroughly saturate the bread.
4. cook long enough to bind everything together

With those components, I don't think you can go wrong!

Sweet Potato Soup with Cranberry Oil

I love the idea of having a soup as a starter for a Thanksgiving meal. It is something that can be made ahead of time and if the rest of the meal ends up taking longer than expected to prepare, it is an easy item to dish out to guests to curb their hunger. And if everything is prepared on time as planned, then it's a great, warming starter that shouldn't be too complicated in flavors, perfectly setting up the meal to come.

I wanted to incorporate sweet potatoes in my meal without having to serve both mashed potatoes and mashed sweet potatoes. At a typical Thanksgiving meal at home, the sweet potatoes are served in the form of Bourbon Sweet Potatoes...something that I loved as a child but have since lost interest in. My parents are not shy with the bourbon and I can't say it's my alcohol of choice. So when I was actually in control this year, sweet potatoes were going to be served in the form of a soup.


Sweet Potato Soup with Cranberry Oil


2 large orange-fleshed sweet potatoes
Salt
2 tbsp. olive oil
1 small yellow onion, peeled and chopped
1 medium leek, white part only, trimmed, cleaned, and chopped
2 medium carrots, peeled, trimmed, and chopped
1 rib celery, trimmed and chopped
2 cloves garlic, peeled and chopped
1/2 cup dry white wine
3.5 cups chicken stock
1/3 cup heavy cream
1 Tbsp. chipotle phuree
1/4 tsp. cinnamon
Freshly ground white pepper
1/4 cup Cranberry Oil, optional

1. Put sweet potatoes into a large pot and cover with cold water. Add 2 large pinches salt and bring to a boil over high heat. Reduce heat to medium and simmer until soft when pierced with the tip of a knife, 30–40 minutes. Drain and set aside until cool enough to handle.

2. Meanwhile, heat oil in a large heavy-bottomed pot over medium-high heat. Add onions, leeks, carrots, celery, and garlic and cook, stirring often with a wooden spoon, until vegetables begin to soften, about 5 minutes. Add wine, scraping any browned bits stuck to bottom of pot, and cook until alcohol has evaporated, about 2 minutes.

3. Add stock and reserved sweet potatoes to pot, increase heat to high, and bring to a boil. Reduce heat to medium and simmer until vegetables are very soft, about 30 minutes.

4. Working in batches, put vegetables and stock into a food processor or blender and purée until smooth, then return soup to pot. Stir in cream and chipotle puree, season to taste with cinnamon, salt and pepper, and bring to a simmer over medium heat. Drizzle some of the cranberry oil, if using, over each serving.

Cranberry Oil
1/2 cup fresh cranberries
1⁄4 cup extra-virgin olive oil
Salt and freshly ground black pepper

1. Put cranberries into a mortar and finely crush with pestle. Transfer to a small bowl, add oil, and stir to combine. Cover and refrigerate overnight.

2. The following day put cranberry mixture into a sieve set over a small bowl and gently press on solids with a rubber spatula to extract the red pulpy cranberry oil. Discard solids. Season to taste with salt and pepper. Whisk mixture before using.


The original recipe did not call for chipotle. However, it was what made the dish. When I tasted it prior to adding the chipotle, the flavor was good - fairly standard - but it needed something to make it great. I didn't want the soup to have an intense heat so I only added enough of the chipotle puree juice (the liquid in the canned chipotle chiles) to add some interest without adding noticeable heat.

For the cranberry oil, I had to puree the mixture in a food processor to extract the cranberry flavor and color. After letting the mashed cranberries soak in the oil for a day, the oil remained separated from the fruit and had not seeped in any flavor. The puree was nice with the soup. It added a little bit of rich tartness to the mellow and slightly sweet soup (sweet from the natural flavor of the sweet potatoes).

With tweaking to taste, this is a simple and comforting recipe, requiring only a few ingredients. The cranberry oil isn't necessary but is a welcome addition if you plan ahead.

Gingersnap Streusel Pumpkin Pie


This was perhaps the dish I was most excited about when it came to my homemade Thanksgiving meal. For the past few years, I've been in charge of making a dessert for the great November feast. Almost always I will make an apple pie of some sort, and possible something else if I feel inspired. Of course, I'm not the only one making dessert in these situations so there is always a traditional pumpkin pie that someone else has made - after all, what is a Thanksgiving without pumpkin pie? Though I don't really care for the traditional pumpkin pie and hardly ever partake in it when given the option to select my pie choice, pumpkin pie is one of those staples that must always appear at the dinner table on Thanksgiving. I'll compare it to the boring aunt that's always there - she's not an exciting addition to the table but something would be missing if she were absent. Thus, I opt to make the "exciting selection" and leave the preparation of the old classic to someone else.

This year, however, I was faced with a bit of a dilemma. Thanksgiving took on a whole new shape as my parents flew out from South Carolina and the four of us dined around my small round table in my small box of an apartment. Surely there would be no one else to bring the pumpkin pie other than yours truly. Because most of what I do is a tweak on an original, when I finally decided that it was I who had to make the pumpkin pie, I was not going to bring the "boring aunt" to the table. Nor was the "exciting friend" (apple pie or other) going to show up as there was no way I would be baking two pies for four people, that would be overkill. Thus, I searched the Internet far in wide for a perfect recipe that would turn the traditional pumpkin pie into and interesting and welcome guest at my dining table.

My inspiration was gingersnaps. My favorite pumpkin pie to date had been a frozen pumpkin pie with a gingersnap crust. Hardly a "pumpkin pie" in the traditional sense but so delicious and the flavors just blend together perfectly. I thought of just making a normal pumpkin pie with a gingersnap crust...but then realized that my Mom would be coming in town and she makes such a fantastic butter (or rather, shortening) crust, that I'd have to let her contribute that component to the Thanksgiving meal.

All of these planning obstacles and dilemmas came to a halt when I came across, in my mind, the perfect compromise of a pumpkin pie recipe:

Gingersnap Streusel Pumpkin Pie

1 flaky pie crust, unbaked
2 cups crushed gingersnap cookies (about 40)
1 cup chopped pecans
½ cup powdered sugar
¼ cup melted butter
about 2 cups fresh pumpkin pure (what a difference!!)
1 14 oz can sweetened condensed milk
2 eggs
½ cup sour cream
1 tsp cinnamon
½ tsp vanilla extract
¼ cup ground ginger

Streusel Topping
¼ cup flour
¼ cup brown sugar
2 Tbsp melted butter
¾ cup chopped pecans

Preheat oven to 350F. Fit pie crust into a 9 inch deep pie pan (preferably ceramic). Fold edges under and crimp as desired.

Stir together crushed gingersnaps, chopped pecans, powdered sugar and melted butter. Press mixture on the bottom and ½ inch up the sides of the pie crust.

Bake at 350F for 10 minutes. Let cool completely on a wire rack (about 30 minutes).
Whisk together pumpkin and next 6 ingredients until well blended. Pour into prepared crust. Place pie on an aluminum foil lined baking sheet.

Bake at 350F for 30 minutes. Sprinkle Streusel around the edge of the crust. Bake 40 minutes longer or until set, shielding edges with aluminum foil during last 25 minutes of baking if necessary.


This was one of the best, if not the best, pie I've ever had. And I'm not "tooting my own horn" it was really that fantastic. A flaky crust (I think the recipe my Mom followed was something like: http://allrecipes.com/Recipe/Basic-Flaky-Pie-Crust/Detail.aspx), with a spicy, sweet, almost gooey gingersnap streusel layer, fresh pumpkin pie filling, and a nutty topping...a combination to make me simple melt at first bite.

You may be wondering - what's the difference between canned pumpkin puree and fresh pumpkin puree. Well, the obvious initial difference is time and ease of use. Of course canned pumpkin is certainly easier to use...and it's quite tasty when prepared correctly. However, I took a little bite of canned puree and then some of my fresh puree and WOW - there's a difference. The canned tasted almost bitter in comparison to my sugar pie pumpkin puree. It was much darker in color (which I think is a positive...it gives the traditional pumpkin pie look), and much more dense. The final product was lighter and truly tasty.

There is absolutely nothing that I would change to this recipe. My only concern is...do I have to wait a full year now to make it again??

Thanksgiving Dinner 2010

The full view of our impressive Thanksgiving dinner. It would be far too daunting of a task to provide each and every recipe for the dishes that comprised the meal. In other posts I've provided the directions and comments on the ones that I personally prepared - the rest will have to simply be admired. And just a forewarning - the pictures are not good. To best depict each menu item, I should have individually plated them and taken isolated, artistic pictures. But really...it was Thanksgiving...who really want's to wait to eat just to take some pictures! So bare with me and just imagine that they have potential beauty...and most importantly...were all wonderful.

Welcome to my Thanksgiving Dinner Table (with my Mom as a host)


Our Thanksgiving 2010 Menu:

Appetizer:
1. Sweet Potato Soup with Cranberry Oil (reviewed in another post)


Main Course:

2. Neiman Ranch Heritage Turkey - $70 for a 10 lb turkey...thankfully the best turkey I've had. Roasted with Lemon and Herbs - simple presentation to accentuate the impressive flavor in the meat.


3. Gravy
Something with the turkey juices, a roux, chipotle, chicken broth...my Dad made it


4. Brussels Sprouts with Pancetta and Granny Smith Apples


5. Yukon Gold Mashed Potatoes
I wanted to do something very simple to go with the other exciting flavors on the plate


6. Ciabatta Stuffing with Roasted Chestnuts, Pears, Hot Sausage and Dried Cranberries
also reviewed elsewhere - incredible


7. Pomegranate Cranberry Sauce
a Derek specialty


8. Michel Schlumberger 1997 Chardonnay
Glad this could get put to good use and make some space in our wine refrigerator


9. Pumpkin Gingerbread Streusel Pie
I will make this again...no question


A Dark Meat Plate (Derek's):


A Light Meat Plate (Mine):


Where did all of that food go????

Root Vegetable Pot Roast with Persimmon, Hazelnut Salad

I felt like such a lucky girl when my parents came in town - we went to lunch and then to the best grocery store to pick up the remaining ingredients needed for our Thanksgiving meal then off to the wine club for a tasting and finally home for a comforting meal cooked by Derek. I had all of the fun while he was all alone slaving in the kitchen cooking for myself and my parents. To top it off, I didn't hear one complaint!!

And to top top it off - it was delectable.

Unfortunately, I was not around to supervise the cooking and catch what ingredients went into the meal so recipes are not applicable to this posting.

Persimmon and Toasted Hazelnut Salad with Citrus Champagne Vinaigrette


Pot Roast with Root Vegetables


Thank you Derek!

Tuesday, November 23, 2010

Gnocchi with Spicy Acorn Squash

This meal seems like an odd choice on my part. I've always stated that gnocchi is not my absolute favorite pasta. I see it as a plate full of dense tummy-fillers that sit like concrete in your stomach post-consumption. I prefer dishes that leave me satisfied but somewhat "light" afterward. However, when searching for a unique use for acorn squash, I came across a recipe that seemed intriguing: Mario Batali's Cavatelli with Spicy Acorn Squash. The game plan was to head over to the local Italian shop and pick up the pasta, throw together the quick dish, and enjoy a nice balance between "heavy" pasta and lighter squash.

I had never eaten cavatelli before - at least not to my knowledge. My only impression of it was the picture that accompanied the recipe.

So when I came to the Italian shop and did not find this cavatelli pasta, I had to come up with the next best alternative. The recipe states "cavatelli or shells" but - looking at the picture - those seem to be quite different. I see shells as fairly flimsy and light, likely overpowered by the dense acorn squash. In considering the next best alternative, I could only bring myself to consider gnocchi - freshly prepared, sitting in the refrigerator case at the store. Interestingly enough (unbeknown to me at the time), cavatelli and gnocchi are often compared or confused for each other. I came across this comparison in Wikipedia:

Cavatelli are sometimes confused with gnocchi, another form of pasta. The shapes are similar, however the main difference being in composition. Cavatelli are normally made of flour, semolina and water - they can also be made with ricotta cheese in the dough (principally by manufacturers in the United States); gnocchi are usually made from a softer dough consisting of potatoes and flour.

So I guess I am now satisfied with my substitution decision. With my other substitutions and modifications, the final recipe went as follows:

Gnocchi with Spicy Acorn Squash


Ingredients
3 tablespoons extra-virgin olive oil
3 large garlic cloves, thinly sliced
1/2 red onion, thinly sliced
1 teaspoon crushed red pepper
1 pound acorn squash—peeled, seeded and cut into 1/2-inch cubes
1 teaspoon dried thyme (ideally fresh, and add more - 1 T., we were out)
Salt and freshly ground pepper
10 oz (approx - 1 box) fresh gnocchi
1/2 cup freshly grated pecorino cheese, plus more for serving

Bring a large pot of salted water to a boil. In a large, deep skillet, heat the olive oil. Add the garlic, onion and crushed red pepper and cook over moderately high heat, stirring occasionally, until the garlic and onion are softened, about 5 minutes. Add the squash and thyme, season with salt and pepper and cook for 5 minutes, stirring occasionally. Cover and cook over moderately low heat, stirring occasionally, until the squash is tender, about 7-10 minutes.

Meanwhile, add the gnocchi to the boiling water and cook until al dente. Drain, reserving 1 cup of the pasta cooking water. Add the gnocchi to the squash mixture in the skillet, then stir in 1/2 cup of the pasta cooking water and toss gently to combine. Add the 3/4 cup of caciocavallo, season with salt and pepper and stir gently; add a little more pasta water if necessary. Serve the pasta right away, passing more cheese at the table.


I've opened my mind to gnocchi. I still stand firm in not wanting an entire plate full of the little dumplings, that would be too much. However, it's great for either a small appetizer portion (though a small portion would still probably fill you up too much to where you wouldn't enjoy your dinner - so maybe scratch that comment) or combined with other lighter elements to create a balanced dish. Acorn squash served as the lighter component to this meal. I also think some wilted spinach would be a great addition - adding that needed pop of color.

I would like to try the smaller gnocchi, the ones that we bought were fairly large, better eaten in two bites. If I feel adventurous, maybe I will try to make some on my own - I'm thinking sweet potato gnocchi.

Don't be surprised if you see that recipe come up in this blog within the next few weeks...

Overall, I loved the squash - you can't go wrong with acorn squash. And the pasta was actually good and added some nice substance and variation to the dish. I should also mention that the pecorino made the dish. A little goes a long way. It adds a fantastic saltiness and richness to the dish. After mixing in just a bit of cheese, the dish transformed into a seemingly "creamy" composition with a balance of salty, spicy, richness.

Monday, November 22, 2010

Ancho Spiced Pork Chops with Sauteed Brussels Sprouts and Mashed Sweet Potatoes

In the 9 days and nights that I had to fend for myself while Derek was out of town, I had seafood once, and meat once (turkey lunch meat...does that even count?). The rest was vegetarian. After 9 days, I was craving some real meat. For our first time back in the kitchen together - Derek was thinking fish...I had other ideas.

The fabulous Air Wick cinnamon-apple room freshener at my apartment inspired me to cook fall-flavors - comforting and hearty. A classic combination is pork and apples so some variation of this was what I set my sights on. Through normal creative banter, Derek and I came up with the final menu plan - Ancho Spiced Pork Chops with Sauteed Brussels Sprouts and Mashed Sweet Potatoes. My only task was the sweet potatoes, I guess I got off pretty easy.

Ancho Spiced Pork Chops

Ancho chili spice blend (ancho chili pepper, cinnamon, cumin, brown sugar, salt, pepper, cayenne, etc.)
Fresh pork chops (Derek chose Korobuta, I went for simple bone-in free range - much cheaper)

Liberally coat pork chops with spice blend. Let sit for 30 minutes to 1 hour. Heat EVOO in a pan over medium-high heat. Add the pork chops and brown each side, about 2 minutes per side. Place in a preheated oven at 375 and finish cooking until the internal temperature reaches 140 degrees.

Let pork sit for a few minutes before serving.


Sauteed Brussels Sprouts

2 pieces bacon
18 brussels sprouts (I didn't weigh them but I remember that's how many there were!)
1 shallot, sliced
1 garlic clove, minced
EVOO
1/2 tsp. cinnamon
1/4 tsp. cayenne pepper
1/4 cup chicken broth
1 apple, peeled and diced
1 tsp. apple cider vinegar
salt and pepper

In a saute pan over low heat, add the bacon and render the fat (slow cooking) - cook until the bacon is crisp and the fat has been rendered. Remove the bacon and set aside.

Reserve about 1 T. bacon fat and discard the rest. Add 1 tsp. oil and heat over medium heat. Add the shallots and garlic. Cook until the shallots are softened and translucent. Mix in the cinnamon and cayenne pepper. Meanwhile, prepare the brussels sprouts by cleaning and trimming the ends, removing any leaves that fall or look worn (this shouldn't be the case, but just in case they aren't perfect looking!). Cut into halves and add to the shallots. Add enough chicken broth to cover the bottom of the pan. Saute for about 7-8 minutes. Add the apple and apple cider vinegar. Cook for another 3 minutes. Season with salt and pepper.

Remove from heat and top with crumbled bacon.


Mashed Sweet Potatoes

2 small to medium (individual serving size) sweet potatoes
1/4 cup + 2 Tbsp. whole milk
1 T. butter
1 T. brown sugar
1/8 tsp. cayenne pepper
1/8 tsp. cinnamon
salt and pepper

Peel and chop the sweet potatoes into about 1 in pieces (for quicker cook time). Bring sweet potatoes to boil in a pot of salted water. Boil until tender, about 15-20 minutes depending on size of sweet potato pieces. Drain, and return to pot.

Meanwhile, in a small saucepan, bring milk, butter, and brown sugar to a simmer, stirring to combine; remove from heat. Add to drained sweet potatoes, add cinnamon and cayenne and mash just until smooth; season with salt and pepper.


While consuming this brilliant meal, I commented that I would be very happy to receive it in a restaurant. Sure, I'd probably never order it due to the sheer simplicity of the meal, but everything was very well executed. The pork was very juicy and tender (note - this not common of typical pork preparation). I think we can attribute the flavor and tenderness of the pork to the sheer quality of it. Derek's Korobuta pork cost about $10 for the single chop. Mind you, this is the "kobe beef" of pork - and you can tell when you taste it. The best way to describe the taste is that of a tender pork roast, full of rich, pork flavor. My pork chop, a natural, free-range what-not from the same butcher, came in at around $3 total. Though I knew the Korobuta would probably be superior to my meat selection, you can't argue the price difference. I was extremely surprised when I cut into my chop and came into contact with an extremely tender and juicy piece of meat. Sure, the flavor may not have been quite as rich as the Korobuta, but if you didn't try a bite of the Korobuta, you'd never know there was anything better out there. It was awesome.

As for the brussels sprouts, Derek is making them again in the same week for Thanksgiving. Yep! That's right, they're Thanksgiving worthy. I was originally thinking of doing roasted brussels sprouts for Thanksgiving but with the Turkey and dressing already taking up space in the oven, a stovetop preparation is perfect. And they were delicious. Honestly.

To round out the meal, my mashed sweet potatoes added not only a beautiful color to the plate, but offered a nice balance between sweet and savory. I didn't want dessert sweet potatoes and many preparations call for - butter, sugar, marshmallows, pecans, butter, sugar, butter, sugar....sugar...so I kept this dish simple with accents of sweetness (brown sugar and cinnamon) and spice (cayenne and black pepper) that served to highlight the natural flavor of the sweet potato - I couldn't get enough of them.

For this meal, I licked my plate clean.