Sunday, August 30, 2015

Tomato and Roasted Lemon Salad from "Plenty More"


Throughout my life, I've always surprised people by claiming the yellow lemon Starburst to be my favorite. While the general population would emphatically select pink (which is the worst, in my opinion) or red (which was cherry, not fruit punch, a heated topic of debate just last night), I would gladly scoop up all of the leftover lemons and feel like I'm the best Starburst partner in the world. I never really understood why my taste preferences were so "different." And then, when I got older, I found (and still find) myself continuously ordering one of my favorite cocktails: Caipirinha, Pisco Sour, Daiquiri, Mojito. The common ingredient? Lots of citrusy lime. So I came to the conclusion, I am a true lime and lemon lover.

And for all my fellow lemon lovers, here is a fantastically unique salad recipe for you. And for those not classified as lemon enthusiasts, you will still find this fabulous with perhaps a scaled down quantity of lemon. To put this into perspective, for a recipe that "serves four," we're looking at two full medium lemons...rind and all. But, of course, Ottolenghi know's his lemons and how to make consuming a full lemon a natural experience, void of the sour patch pucker.

The secret? Slice thin (a must - make sure you have a good, sharp knife), boil/blanch, and roast. Who would have thought?


The blanched lemon slices are tossed with olive oil, salt, sugar and sage before mellowing out in the oven for 20 minutes. After this process, you no longer have you traditional lemon that you may reserve for squeezing into a glass of water or for zesting up your salad dressing. Now that lemon has transformed into an almost rich and tangy ingredient that adds both depth and understated brightness to a dish full of fresh and juicy ingredients.

Tomatoes are still in season and I'm doing my best to soak up their summer sweetness. The "brown" ones tend to be my favorite but I love buying the mixed varieties for added color and flavor variety.


Mix the fresh tomatoes and rich, roasted lemons together, add a fresh layer of herbs and some pungency of sliced red onions (again, thin is key) and you've got a relatively easy and refreshing summer dish that travels and keeps quite well!


Tomato and Roasted Lemon Salad
p. 54 in Plenty More
serves four

Ingredients:

  • 2 medium onions, halved crosswise, seeds removed, and cut into paper-thin slices (9 oz/260 g)
  • 3 tbsp olive oil
  • 1/2 tsp superfine sugar
  • 8 sage leaves, finely shredded
  • 2 2/3 cups/400 g baby tomatoes, yellow or red or a mixture of both, halved
  • scant 1/2 tsp ground allspice
  • 1/3 cup/10 g flat-leaf parsley leaves
  • 1/2 cup/15 g mint leaves
  • seeds of 1 small pomegranate (2/3 cups/120 g)
  • 1 1/2 tbsp pomegranate molasses (note: Whole Foods was out so I made my own using Alton Brown's simple method found here - just use pomegranate juice, lemon and sugar and cook down)
  • 1/2 small red onion, thinly sliced (about 1/2 cup/50 g)
  • salt and black pepper
Directions:
  1. Preheat the oven to 325 F/170 C.
  2. Bring a small saucepan of water to a boil, add the lemon slices, and blanch for 2 minutes. Drain well, place the lemon in a bowl and add 1 tablespoon of the oil, 1/2 teaspoon of the oil, 1/2 teaspoon salt, the sugar and the sage. Gently mix and then spread the lemon mixture out on a baking sheet lined with parchment paper. Place in the oven and cook for 20 minutes, until the lemons have dried out a little. Remove and set aside to cool.
  3. In a bowl, combined the tomatoes, allspice, parsley, mint, pomegranate seeds, pomegranate molasses, onion, the remaining 2 tablespoons oil, 1/4 teaspoon salt, and some freshly ground pepper. Add the lemon slices, stir gently, and serve.


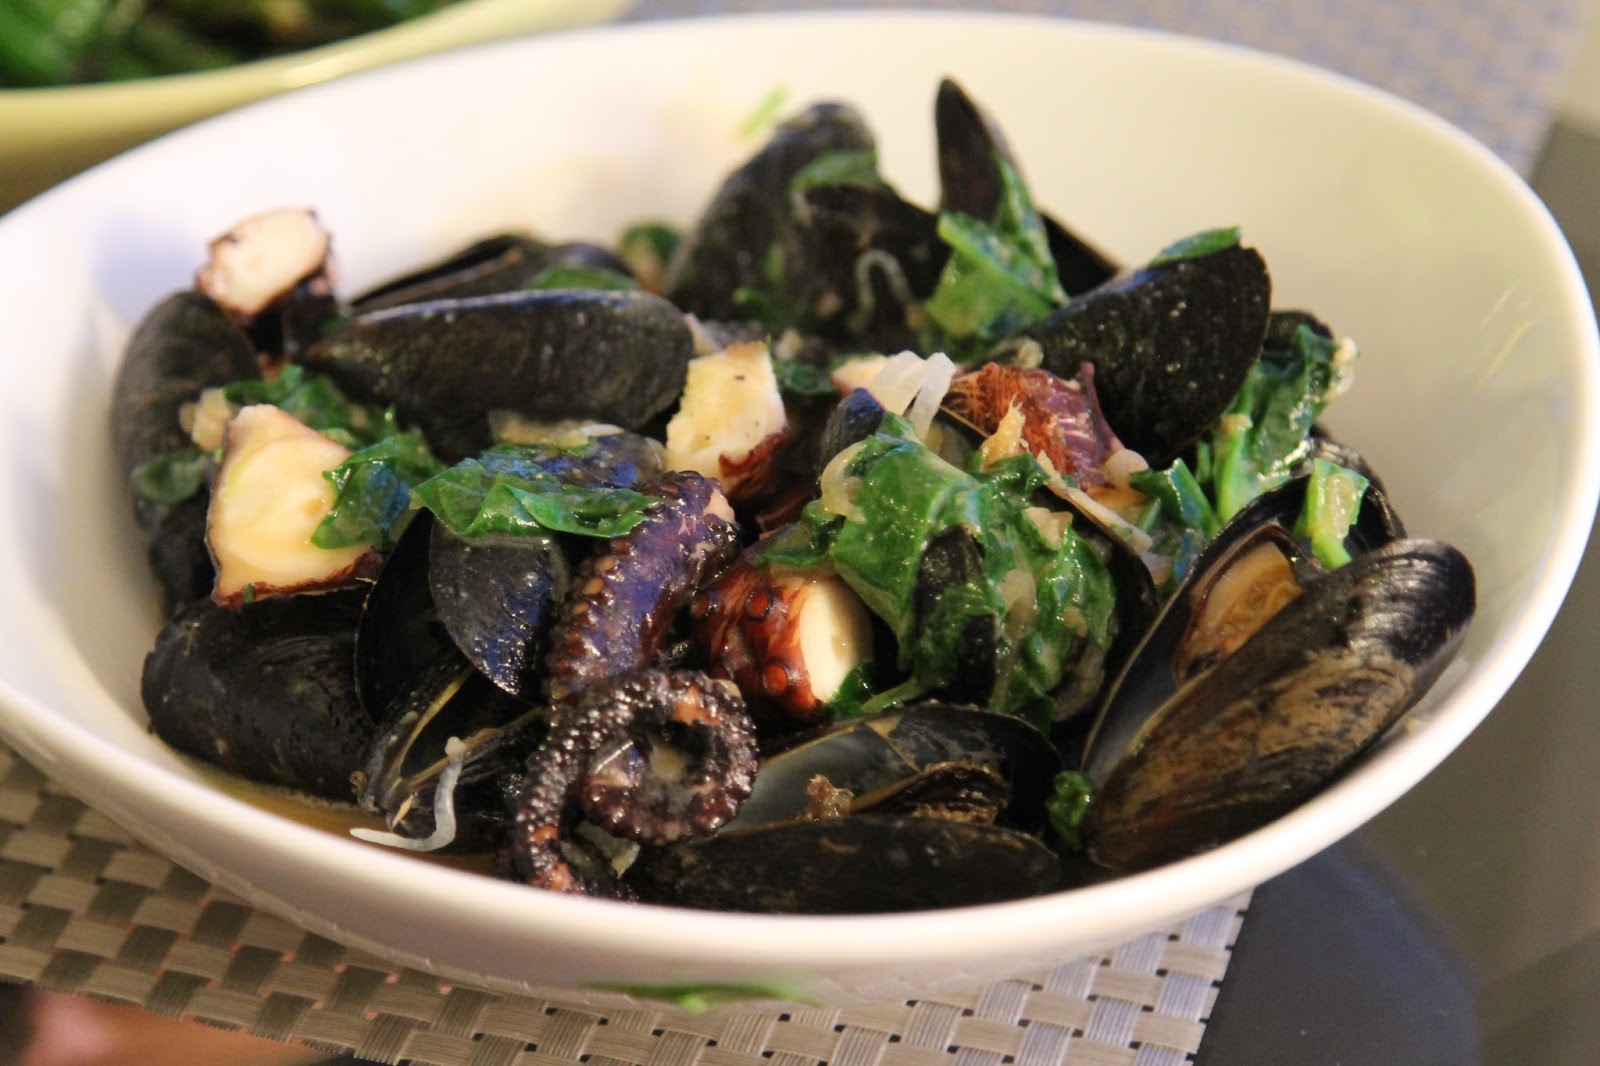
We served this with a simple pan-fried fish and quinoa. The fish was Onaga which is a Hawaiian Red Snapper and came highly recommended by the guy at the fish department at Eately. We were not disappointed. It was flakey and meaty and sweet and perfectly cooked (thanks to Derek). That, served with a bright Rose wine was a beautiful Sunday night meal that bright and satisfying.


Sunday, August 23, 2015

Fig Salad from "Plenty More"


When figs are in season and I'm popping one of those fresh and sweet treats in my mouth - I feel like a queen. There is an air of luxury surrounding the fabulous fruit and when they are at their peak, there is nothing better. Their season is short, from about late June to September - so when you see them in the store, treat yourself - even if the price tag seems a bit steep. Or, if you are really lucky, you can find a friend that has a  fig tree or grow them yourself - now that's what I call luxury.

I was at my parent's place a few weeks back and found out that, among all of the other produce that they have in their garden, they have a fig tree as well! I can't tell you how many fresh figs I ate over those 24 hours. Probably an unhealthy amount. But when I had just paid about 3 dollars for 6 figs a few days prior, I felt like a kid in a candy store just popping the figs off the tree and right into my mouth - at no charge.


While we all can enjoy this fabulous fruit in dried form throughout the year, there is no comparison to its fresh, most natural self. And the best way to eat them to enjoy their pure fabulousness is raw.

This salad from Plenty More accentuates the perfection of the raw fig by placing it alongside a mixture of fresh, bitter, sweet and nutty ingredients. I couldn't stop eating it.


The base for the salad is not your typical selection of greens. Here we essentially have two "bitter" green in the radicchio and watercress plus the added brightness of fresh basil (another summer love of mine).  While radicchio and watercress can sometimes be a bit daunting due to the bitterness/peppery-nature of the leaf, they work so well here to balance out the natural sweetness that is built into the complementary salad ingredients. They have enough backbone to stand up to the figs and roasted, caramelized onions, while adding in their own unique flavor and texture to the perfectly composed salad.


I added in some sliced pluot as well when I realized I didn't have quite as many figs as the recipe called for. And while I can say that the pluot also went really well with the salad, adding its own delicate sweetness with a hint of tartness in the skin, and if you wanted to, you could simply substitute the figs for something akin to a pluot, if figs are available, treat yourself. Motto of the month.


This salad was, to me, perfection in every bite. If I were you, I'd go out to the store right away and pick up some figs so you can see what I'm talking about.


Fig Salad
p.16 in Plenty More
serves four

Ingredients:

  • 2 small red onions (7 oz/200 g)
  • 3 tbsp olive oil
  • 1/3 cup/50 g hazelnuts, with skin
  • 2 oz/60 g radicchio leaves (about 7), coarsely torn
  • 1 1/3 cups/40 g basil leaves
  • 1 1/3 cups/40 g watercress leaves
  • 6 large ripe figs (10 1/2 oz/300 g)
  • 1 tbsp balsamic vinegar
  • 1/4 tsp ground cinnamon
  • salt and black pepper
Directions:
  1. Preheat the oven to 425 F/220 C.
  2. Peel the onions, halve lengthwise, and cut each half into wedges 1 1/4 inches/3 cm wide. Mix together the wedges with 1 1/2 teaspoons of the olive oil, a pinch of salt, and some black pepper and spread out on a baking sheet. Roast in the oven for 20 to 25 minutes, stirring once or twice during cooking, until the onions are soft and golden and turning crispy in parts. Remove and set aside to cool before pulling the onions apart with your hands into bite-size chunks.
  3. Turn down the oven temperature to 325 F/160 C. Scatter the hazelnuts in a small roasting pan and toast for 20 minutes. Remove from the oven and, when cool enough to handle, roughly crush with the flat side of a large knife.
  4. Assemble the salad on 4 individual plates. Mix the radicchio, basil, and watercress together and place a few on the bottom of each plate. Cut each fig lengthwise into 4 or 6 pieces. Place a few fig pieces and some roasted onion on the leaves. Top with more leaves and continue with the remaining fig and onion. You want to build up the salad into a small pyramid.
  5. In a small cup, whisk together the remaining 2 1/2 tablespoons olive oil, the vinegar, and cinnamon with a pinch of salt and some black pepper. Drizzle this over the salad, finish with the hazelnuts, and serve.


Sunday, August 16, 2015

Sake Miso Mussels with Wilted Greens and Crispy, Oven Baked Fries


Check this out for an insanely delicious meal that is impressive enough to deserve a spot on the Sunday night menu but simple enough to make an appearance during the week.

What's funny about this meal selection is that I'm the one who chose it and, until very recently, I was still weary of mussels. While over the years I have exponentially expanded my palate, mussels never quite made their way to the top of my list. I was fine with clams, loved oysters, but couldn't quite bring myself to becoming a mussels fan. But then something changed. All of a sudden, I found myself actually enjoying these little meaty sauce vessels. They can be messy but if cooked right, they are a true delight. And I've learned that they are actually really easy to cook correctly! Mussels are one of the only foods that actually tell you when they are done! Just watch out for the moment they open and voila, you should have a perfectly cooked mussel!

One of the trickier preparations is in the side dish: crispy baked french fries - emphasis on the crispy. I can't tell you how many times I have popped fry-cut potatoes into the oven only to result in a limp roasted product. Only recently have I figured out the secret: boiling the potatoes before baking.


Cut Russet potatoes into your desired shape (no need to remove the skin) and place them in a pot of salted, boiling water for around 4-6 minutes (depending on the size of the fry) until the potato just begins to soften. What you are doing here is essentially pulling out the starch which can prevent the fries from getting crispy. Then, use a slotted spoon to remove the fries and place them on a towel or rack to "dry out." (You don't want water to stay in the potato before roasting). After a toss in olive oil and about 25 minutes in a 400F degree oven, you have yourself perfectly crispy and guiltless baked french fries. All ready for dipping in the mussel broth!


I also picked up some shishito peppers from, surprise, Trader Joe's! These are one of my favorite simple treats. Preparation is simple and the result is addicting. Heat some oil in a heavy pan until almost smoking. Then add the peppers, stirring during cooking until you see even blistering (beautiful browning) of the pepper. This only takes a few minutes. This serves to soften the pepper and bring a beautiful depth of flavor with the quick stir-fry.

And now for the key to the preparation: coarse sea salt (or regular if that's all you have). Sprinkle the salt liberally over the peppers. Pop them in your mouth and you won't be disappointed. Only a few peppers will be "spicy" so it's a bit of a gamble which adds to the fun of the dish.


And if the crispy bakes fries or blistered shishito peppers weren't excitement enough - we made a fabulously simple, Asian-inspired mussel dish.

We had sake and miso already in our refrigerator and were thinking of our typical preparation of a miso-glazed fish. But that is usually best refrigerated and marinated overnight so I had the idea of using those ingredients in a simple mussel dish. I found a perfect recipe online and was super-pleased with the result. The broth is full of umami (think depth) with a hint of velvety sweetness. I could (and did) just drink it. Take a mussel, fill up the shell with the broth, and enjoy!


Sake Miso Mussels with Wilted Greens
original recipe found here

Ingredients:
  • 2 tablespoons neutral oil or coconut oil
  • 2 medium garlic cloves, thinly sliced
  • 1 tablespoon freshly grated ginger (from 1-inch piece)
  • 2 medium shallots, thinly sliced
  • 2 pounds mussels 
  • 1 1/4 cups dry sake or white wine
  • 2 tablespoons unsalted butter
  • 3 tablespoons white (or other mellow) miso
  • 4 ounces baby spinach or other delicate leafy green (i.e. not kale), thinly sliced
Directions:
  1. Heat oil in a medium 3-quart saucepan or cast iron pot over medium heat. When oil is warm and shimmers, add shallots, turn to coat and cook until just softened. Add ginger and garlic and cook until fragrant, about 1 minute. Add mussels, stir to coat, then add sake or wine and cover. Cook until mussels open, about 3 to 5 minutes.
  2. Using a slotted spoon, remove mussels to a serving plate (discard any mussels that don't open). Add miso and butter to the saucepan and stir until smooth. Immediately remove from heat, stir in greens until just wilted, pour over mussels (avoiding any grit at the bottom of the pan), and serve with crusty bread or french fries.
Note: we had some octopus that had been prepped (boiled) the previous night so we broiled that (to add crispiness), cut it, and added it to the mussels to a) be resourceful and use up leftovers and b) add some additional interest and texture to the dish.


Friday, August 14, 2015

Tomato Watermelon Gazpacho from "Plenty More"


It's tomato season. The fabulous time of the year when tomatoes actually are enjoyable to eat raw. Their pithy, tasteless winter counterparts pale in comparison to the luscious, sweet and juicy summertime superstars. 

I was at my parents' house in South Carolina last weekend and my mom had a bowl of cherry tomatoes, picked fresh from her garden, just sitting out on the counter, like a healthy version of a candy jar. I popped one of those in my mouth and experienced the most fabulously sweet burst of tomato that I think I have ever tasted in my life. They were literally like candy. That's what you get when you eat fresh fruits and vegetables, in season, from reputable sources (like my parents' garden). 

One of my favorite uses of fresh, in season tomatoes is in gazpacho. This is a dish that is purely reserved for summertime when tomatoes are in season as it relies on tomatoes for the base of its flavor. It's basically a blended tomato soup, kicked up a notch with additional vegetables and flavors - so you better believe it is important to use good tomatoes if you want a good result!

I typically gravitate toward Alton Brown's Gazpacho recipe (found here) but in flipping through Plenty More, I found a recipe that used watermelon - another one of my summertime favorites. I've been really excited to make this recipe and I am incredible pleased with the result. It's perfect.


One of the keys to any gazpacho recipe (tomato-based, of course) is peeling the tomatoes. Don't even try to get out your vegetable peeler and expect the skin to come off without making a terrible mess. A quick boil is the best way to easily separate the skin from the tomato. If you mark an X on both ends of the tomato and place in in boiling water for 30-90 seconds, then shock it in ice water, you should be able to slip the skin right off.


Another fabulous addition to this soup was some homemade croutons (gluten free in my case). A little pan frying for browning before popping them in the oven to bake resulted in a lovely little comfort to top the healthy, fresh soup. The most unique aspect of the croutons is the addition of red wine vinegar to the traditional oil/salt coating. This adds a nice depth of flavor.


Perhaps I should have featured the truly exciting part of this dish - the watermelon. I think I was too busy snacking on it though to take a picture. I'm pretty sure I could eat a full one. In this dish, the watermelon added a subtle sweetness and complexity that was a perfect complement to the tomato. Here's to summer in a bowl.


Tomato and Watermelon Gazpacho
p. 90 in Plenty More
serves six

Ingredients

  • 4 1/2 lb/2 kg tomatoes (about 20), blanched, peeled, and coarsely chopped (10 1/2 cups/1.9 kg)
  • 5 cloves garlic, coarsely chopped
  • 6 celery sticks, white parts and leaves finely chopped (about 3 cups/450 g)
  • 1 small onion, finely chopped (1 cup/140 g)
  • 2 2/3 cup/400 g seeded and coarsely chopped watermelon flesh
  • 3 1/2 oz/100 g crustless white bread (about 4 slices), broken into small chunks
  • 2/3 cups/150 ml passata (tomato puree) or tomato juice
  • 1/2 cup/15 g basil leaves
  • 2 tbsp red wine vinegar
  • scant 1 cup/200 ml olive oil, plus extra to finish
  • salt and black pepper
  • coarse sea salt, to serve
Croutons
  • 5 oz/150 g crustless white bread (about 5 slices), broken into 3/4 to 1 1/4-inch/2 to 3-cm chunks
  • 3 tbsp olive oil
  • 1 1/2 tbsp red wine vinegar
  • salt
Directions
  1. First make the croutons. Preheat the oven to 400 F/200 C. Place the bread in a bowl along with the oil, vinegar, and 1/2 teaspoon salt. Place a grill pan over high heat, add the croutons, and cook for 2 minutes, turning until all sides are slightly charred and starting to crisp. Transfer the croutons to a baking sheet and place in the oven for about 12 minutes, until golden brown and crispy. Set aside to cool.
  2. Place the tomatoes, garlic, celery, onion, watermelon, bread, passata, and two-thirds of the basil in a blender (or large bowl, if using a handheld blender) along with 3/4 teaspoon salt and a good grind of black pepper. Blend until smooth and then, with the blender still going, add the vinegar and olive oil. Refrigerate until needed.
  3. To serve, pour the soup into individual bowls and top with the croutons. Scatter the remaining basil leaves over each portion, along with a final drizzle of oil. Finish with a little coarse salt and serve at once.


Sunday, August 2, 2015

Corn Slaw from "Plenty More"


It's time to re-think coleslaw. I have never been a fan of the "sorry excuse for a vegetable" side-dish. The crunchy and crisp cabbage base is wonderful and refreshing. But then it is traditionally masked by a thick blanket of mayonnaise - and there's nothing healthy about that. If done right, that creamy layer acts merely as a binder to bring the dish together - and that I can stomach. But many times the cabbage is simply lost in the sea of white goop.

Sure, there are options to substitute yogurt for mayonnaise and that works out well to cut down on the fat-content. But the real problem here is the fact that we ultimately still masking the fresh vegetables beyond a necessary level.

In Plenty More, Ottolenghi features a slaw that reads more like a dressed salad than a clumsy coleslaw. He uses mayonnaise but balances it properly with vinegar and mustard and uses just enough to gently coat the fresh vegetables, allowing their summer freshness to shine through.

One technique that I find brilliant is the basic "pickling" of the cabbage and carrots. By boiling water, vinegar and salt and then pouring it over the freshly cut vegetables, you achieve a near marinating effect that serves to infuse a subtle complexity and flavor into the raw cabbage and carrots while at the same time, softening them a bit. This softening of the vegetables allows the dish to naturally come together and ultimately requiring less dressing to bind it all together.


And my favorite addition to this slaw is the true star, corn. What says summer more than a fresh ear of corn (except perhaps a nice juicy slab of watermelon)? The grilled corn adds a juicy sweetness to the slaw that adds interests to the dish and keeps you wanting more. 

Just a side note here. I actually did chop everything by hand - cabbage and carrots. Sure, it would have been easier to grate the carrots but the texture would have been totally different. Carefully chopping the carrots into thin, uniform slices really added to the overall appeal of the dish. So if you have a good knife and time, I suggest you make the extra effort here.


Corn Slaw
p. 145 in Plenty More
serves six

Ingredients:
  • 7 tbsp/100 ml white wine vinegar
  • 1/4 white cabbage, shredded (4 1/4 cups/300 g)
  • 3 small carrots, peeled and cut into fine strips (1 1/2 cups/175 g)
  • 1 medium red onion, thinly sliced (scant 1 1/2 cups/140 g)
  • 4 ears corn (1 1/3/600 g), lightly brushed with olive oil
  • 2 red chiles, finely chopped
  • 1 1/3 cups/20 g cilantro leaves
  • 2/3 cup/20 g mint leaves 
  • olive oil
  • salt and black pepper
Dressing:
  • 3 1/2 tbsp/50 g mayonnaise
  • 2 tsp Dijon mustard
  • 1 1/2 tsp sunflower oil
  • 1 tbsp lemon juice
  • 1 clove garlic, crushed
Directions:
  1. Place the vinegar and a scant 1 cup/200 ml water in a small saucepan along with 1 tablespoon salt. Bring to a boil and then remove from the heat. Place the cabbage and carrots in a bowl and pour in two-thirds of the salty liquid. In a separate bowl, pour the remaining liquid over the onion and set both bowls aside for 20 minutes. Rinse the vegetables and onion well, pat dry, place together in a large bowl and set aside.
  2. Place the ridged grill pan over high heat, and when it starts to smoke, lay the corn on it. Grill fro 10 to 12 minutes, turning so that all sides get some color (this will create quite a lot of smoke, so put the exhaust fan on, if you have one). Remove from the heat and, when cool enough to handle, use a large knife to shave off the corn in clumps and add to the salad bowl.
  3. Whisk together all the dressing ingredients, pour over the salad, and stir gently. Add the chile, cilantro, and mint, along with a grind of black pepper, give everything another gentle stir, and serve.
What better dish to serve this with than a grilled chicken with barbecue sauce. So easy, so delicious and so summery. 

Thursday, July 9, 2015

Squash with Chile Yogurt and Cilantro Sauce from "Plenty More"


It's mid-July but it feels like springtime in Chicago so I don't think it is inappropriate to feature a beautiful winter vegetable smack dab in the middle of summer. If I'm wearing a jacket, then butternut squash has a place on my table.

This is perhaps one of the simplest recipes featured in Plenty More (surprise - that book again).

Often paired with rich and comforting spices and flavors, Ottolenghi provides a refreshing take on the butternut squash. He let's the vegetable shine and become vibrant with the addition of fresh herbs and cool yogurt spiked with a touch of heat. By the way, adding sriracha to Greek yogurt is pretty darn fantastic...why didn't I think of that before?

Probably my favorite thing about this recipe is the fact that the butternut squash does not require peeling. I'd like to think I know my way around the kitchen and am relatively comfortable completing a variety of tasks. But peeling a butternut squash? My goodness that is stressful!! It doesn't just peel off with your standard vegetable peeler. And taking a sharp knife to the sides is satisfying only when you are able to scrape off a large strip at one time. But forget about it when you only manage to remove a small chunk at a time. Ah the frustration......

But this recipe had no frustration. None. Just a lovely learning that you can keep the skin on, and consume it, and it's great. Phew!


The only "work" with the butternut squash is cutting it in half! That requires a decent knife and some precision. I love the cleaver for that job. Scoop out the seeds and cut it into wedges and voila! you have prepped the squash.


I mentioned that this is a more "refreshing" and zesty take on butternut squash. Still, it retains some of the basic comforts of the traditional winter-preparation with a sprinkle of cinnamon atop each wedge. I put cinnamon on pretty much everything (within reason) so you will never see me complain about this. The wintry spice actually lends a deeper complexity and warmth to the dish.

This dish is perfect served warm(ish)/room temperature but is also delicious when cold. I think it's just pretty darn good in general. And easy!  Enjoy!


Squash with Chile Yogurt and Cilantro Sauce
p. 181 in Plenty More
serves four

Ingredients:
  • 1 large butternut squash (3 lb/1.4 kg)
  • 1 tsp ground cinnamon
  • 6 tbsp/90 ml olive oil
  • 1 3/4 oz/50 g cilantro, leaves and stems (about 22 sprigs), plus extra leaves for garnish
  • 1 small clove garlic, crushed
  • scant 2 1/2 tbsp/20 g pumpkin seeds
  • 1 cup/200 g Greek yogurt
  • 1 1/2 tsp Sriracha or another savory chile sauce
  • salt and black pepper
Directions:
  1. Preheat the oven to 425 F/220 C
  2. Cut the squash in half lengthwise, remove and discard the seeds, and then cut into wedges 3/4-inch/2-cm wide and about 2 3/4-inches/7-cm long, leaving the skin on. Place in a large bowl with the cinnamon, 2 tablespoons of the olive oil, 3/4 teaspoon salt, and a good grind of pepper. Mix well so that the squash is evenly coated. Place the squash, skin side down, on 2 baking sheets and roast for 35 to 40 minutes, until soft and starting to color on top. Remove from the oven and set aside to cool.
  3. To make the herb paste, place the cilantro, garlic, the remaining 4 tablespoons oil, and a generous pinch of salt in the bowl of a small food processor, blitz to form a fine paste, and set aside.
  4. Turn down the oven temperature to 350 F/180 C. Lay the pumpkin seeds on a baking sheet and roast in the oven for 6 to 8 minutes. The outer skin will pop open and the seeds will become light and crispy. Remove from the oven and allow to cool.
  5. When you are ready to serve, swirl together the yogurt and Sriracha sauce. Lay the squash wedges on a platter and drizzle the spicy yogurt sauce and then the herb paste over the top (you can also swirl the yogurt sauce and herb paste together, if you like). Scatter the pumpkin seeds on top, followed by the extra cilantro leaves, and serve.


Saturday, July 4, 2015

Spring Salad from "Plenty More"


In my last post, I talked about the importance of eating nourishing and satisfying - particularly when life speeds up its pace on you. If that dish, the Rice Noodles with Green Onions and Edamame was step in the right direction, this dish, is ALL IN.

You can just tell from the abundance of green that it is packed full of amazing nutrients and the beautiful bounty that the warmer weather provides. Technically called a 'Spring' salad (and I did happen to make this before the official kick off to Summer), the recipe highlights vegetables at the peak of their freshness.

  • Asparagus: In Season February to June - peak month: April
  • Spinach: Available all year round but at its peak in Spring: April-June
  • Fava Beans: Late Spring - Summer
  • Green Beans: Available year round but peak in May-September


For those of you less familiar with fava beans, they are odd looking and incredibly deceiving in size. They probably think it is funny how many layers they make us humans peel off in order to get to the true "meat" of the bean.


Don't try biting into that large bean - you will forever dislike this beautiful produce.


Even if you try eating the beans shown above, you won't be very happy as you'll quickly find it difficult to swallow the casing that covers the final bean product. It's like a sunflower seed, they are horrible if you try to eat the shell. But the seed naturally slips out from the shell (if you do it right) so you can then enjoy the small but satisfying seed. Same story here with these favas. Trust me, there is true deliciousness if you have the patience to peel the layers.


Blanching the favas aids the separation of the casing from the bean. Here you see the final product, mixed in with some edamame. Looks like the size of the favas were deceiving to me as well as I didn't pick up enough! (Note: edamame was a fabulous addition).


Spring Salad
p. 28 in Plenty More
serves 4 to 6

Ingredients:
  • 10 asparagus spears (12 oz/350 g - or 1 bunch), trimmed and each spear sliced on a sharp diagonal into 3 or 4 thin pieces
  • 7 oz/200 g haricots verts (or green beans), trimmed 
  • 2 3/4 cups/300 g shelled fresh or frozen fava beans (note: I used half fava half edamame)
  • 1 2/3 cups/50 g baby spinach leaves
  • 1 banana shallot, or 2 regular shallots, very thinly sliced (1/2 cup/50 g)
  • 1 red chile, finely diced
  • 1/2 tsp sesame oil
  • 2 tbsp olive oil
  • 1 tbsp lemon juice
  • 1 tbsp/10 g mixed black and white sesame seeds, toasted
  • 1 tsp nigella seeds (I couldn't find those so used cumin seeds)
  • salt
Directions:
  1. Bring a large pan of water to a boil, add the asparagus, and blanch for 3 minutes. Use a slotted spoon to transfer the asparagus to a bowl of ice-cold water. Add the haricots verts to the boiling water and blanch for 5 minutes. Use the slotted spoon to transfer them to the bowl with the asparagus, drain both, and then set aside to dry. Add the fava bans to the boiling water and blanch for 2 minutes. Drain, refresh under cold water, and then remove and discard the skins by pressing each bean gently between your finger and thumb.
  2. Place both beans and the asparagus in a large bowl. Add the spinach, shallot, chile, oils, lemon juice, sesame seeds, nigella seeds, and 1/2 teaspoon salt, stir gently and serve at once.


I love leftovers! Though I have to say, this salad, because it is dressed, is best fresh!