Sunday, August 2, 2015

Corn Slaw from "Plenty More"


It's time to re-think coleslaw. I have never been a fan of the "sorry excuse for a vegetable" side-dish. The crunchy and crisp cabbage base is wonderful and refreshing. But then it is traditionally masked by a thick blanket of mayonnaise - and there's nothing healthy about that. If done right, that creamy layer acts merely as a binder to bring the dish together - and that I can stomach. But many times the cabbage is simply lost in the sea of white goop.

Sure, there are options to substitute yogurt for mayonnaise and that works out well to cut down on the fat-content. But the real problem here is the fact that we ultimately still masking the fresh vegetables beyond a necessary level.

In Plenty More, Ottolenghi features a slaw that reads more like a dressed salad than a clumsy coleslaw. He uses mayonnaise but balances it properly with vinegar and mustard and uses just enough to gently coat the fresh vegetables, allowing their summer freshness to shine through.

One technique that I find brilliant is the basic "pickling" of the cabbage and carrots. By boiling water, vinegar and salt and then pouring it over the freshly cut vegetables, you achieve a near marinating effect that serves to infuse a subtle complexity and flavor into the raw cabbage and carrots while at the same time, softening them a bit. This softening of the vegetables allows the dish to naturally come together and ultimately requiring less dressing to bind it all together.


And my favorite addition to this slaw is the true star, corn. What says summer more than a fresh ear of corn (except perhaps a nice juicy slab of watermelon)? The grilled corn adds a juicy sweetness to the slaw that adds interests to the dish and keeps you wanting more. 

Just a side note here. I actually did chop everything by hand - cabbage and carrots. Sure, it would have been easier to grate the carrots but the texture would have been totally different. Carefully chopping the carrots into thin, uniform slices really added to the overall appeal of the dish. So if you have a good knife and time, I suggest you make the extra effort here.


Corn Slaw
p. 145 in Plenty More
serves six

Ingredients:
  • 7 tbsp/100 ml white wine vinegar
  • 1/4 white cabbage, shredded (4 1/4 cups/300 g)
  • 3 small carrots, peeled and cut into fine strips (1 1/2 cups/175 g)
  • 1 medium red onion, thinly sliced (scant 1 1/2 cups/140 g)
  • 4 ears corn (1 1/3/600 g), lightly brushed with olive oil
  • 2 red chiles, finely chopped
  • 1 1/3 cups/20 g cilantro leaves
  • 2/3 cup/20 g mint leaves 
  • olive oil
  • salt and black pepper
Dressing:
  • 3 1/2 tbsp/50 g mayonnaise
  • 2 tsp Dijon mustard
  • 1 1/2 tsp sunflower oil
  • 1 tbsp lemon juice
  • 1 clove garlic, crushed
Directions:
  1. Place the vinegar and a scant 1 cup/200 ml water in a small saucepan along with 1 tablespoon salt. Bring to a boil and then remove from the heat. Place the cabbage and carrots in a bowl and pour in two-thirds of the salty liquid. In a separate bowl, pour the remaining liquid over the onion and set both bowls aside for 20 minutes. Rinse the vegetables and onion well, pat dry, place together in a large bowl and set aside.
  2. Place the ridged grill pan over high heat, and when it starts to smoke, lay the corn on it. Grill fro 10 to 12 minutes, turning so that all sides get some color (this will create quite a lot of smoke, so put the exhaust fan on, if you have one). Remove from the heat and, when cool enough to handle, use a large knife to shave off the corn in clumps and add to the salad bowl.
  3. Whisk together all the dressing ingredients, pour over the salad, and stir gently. Add the chile, cilantro, and mint, along with a grind of black pepper, give everything another gentle stir, and serve.
What better dish to serve this with than a grilled chicken with barbecue sauce. So easy, so delicious and so summery. 

Thursday, July 9, 2015

Squash with Chile Yogurt and Cilantro Sauce from "Plenty More"


It's mid-July but it feels like springtime in Chicago so I don't think it is inappropriate to feature a beautiful winter vegetable smack dab in the middle of summer. If I'm wearing a jacket, then butternut squash has a place on my table.

This is perhaps one of the simplest recipes featured in Plenty More (surprise - that book again).

Often paired with rich and comforting spices and flavors, Ottolenghi provides a refreshing take on the butternut squash. He let's the vegetable shine and become vibrant with the addition of fresh herbs and cool yogurt spiked with a touch of heat. By the way, adding sriracha to Greek yogurt is pretty darn fantastic...why didn't I think of that before?

Probably my favorite thing about this recipe is the fact that the butternut squash does not require peeling. I'd like to think I know my way around the kitchen and am relatively comfortable completing a variety of tasks. But peeling a butternut squash? My goodness that is stressful!! It doesn't just peel off with your standard vegetable peeler. And taking a sharp knife to the sides is satisfying only when you are able to scrape off a large strip at one time. But forget about it when you only manage to remove a small chunk at a time. Ah the frustration......

But this recipe had no frustration. None. Just a lovely learning that you can keep the skin on, and consume it, and it's great. Phew!


The only "work" with the butternut squash is cutting it in half! That requires a decent knife and some precision. I love the cleaver for that job. Scoop out the seeds and cut it into wedges and voila! you have prepped the squash.


I mentioned that this is a more "refreshing" and zesty take on butternut squash. Still, it retains some of the basic comforts of the traditional winter-preparation with a sprinkle of cinnamon atop each wedge. I put cinnamon on pretty much everything (within reason) so you will never see me complain about this. The wintry spice actually lends a deeper complexity and warmth to the dish.

This dish is perfect served warm(ish)/room temperature but is also delicious when cold. I think it's just pretty darn good in general. And easy!  Enjoy!


Squash with Chile Yogurt and Cilantro Sauce
p. 181 in Plenty More
serves four

Ingredients:
  • 1 large butternut squash (3 lb/1.4 kg)
  • 1 tsp ground cinnamon
  • 6 tbsp/90 ml olive oil
  • 1 3/4 oz/50 g cilantro, leaves and stems (about 22 sprigs), plus extra leaves for garnish
  • 1 small clove garlic, crushed
  • scant 2 1/2 tbsp/20 g pumpkin seeds
  • 1 cup/200 g Greek yogurt
  • 1 1/2 tsp Sriracha or another savory chile sauce
  • salt and black pepper
Directions:
  1. Preheat the oven to 425 F/220 C
  2. Cut the squash in half lengthwise, remove and discard the seeds, and then cut into wedges 3/4-inch/2-cm wide and about 2 3/4-inches/7-cm long, leaving the skin on. Place in a large bowl with the cinnamon, 2 tablespoons of the olive oil, 3/4 teaspoon salt, and a good grind of pepper. Mix well so that the squash is evenly coated. Place the squash, skin side down, on 2 baking sheets and roast for 35 to 40 minutes, until soft and starting to color on top. Remove from the oven and set aside to cool.
  3. To make the herb paste, place the cilantro, garlic, the remaining 4 tablespoons oil, and a generous pinch of salt in the bowl of a small food processor, blitz to form a fine paste, and set aside.
  4. Turn down the oven temperature to 350 F/180 C. Lay the pumpkin seeds on a baking sheet and roast in the oven for 6 to 8 minutes. The outer skin will pop open and the seeds will become light and crispy. Remove from the oven and allow to cool.
  5. When you are ready to serve, swirl together the yogurt and Sriracha sauce. Lay the squash wedges on a platter and drizzle the spicy yogurt sauce and then the herb paste over the top (you can also swirl the yogurt sauce and herb paste together, if you like). Scatter the pumpkin seeds on top, followed by the extra cilantro leaves, and serve.


Saturday, July 4, 2015

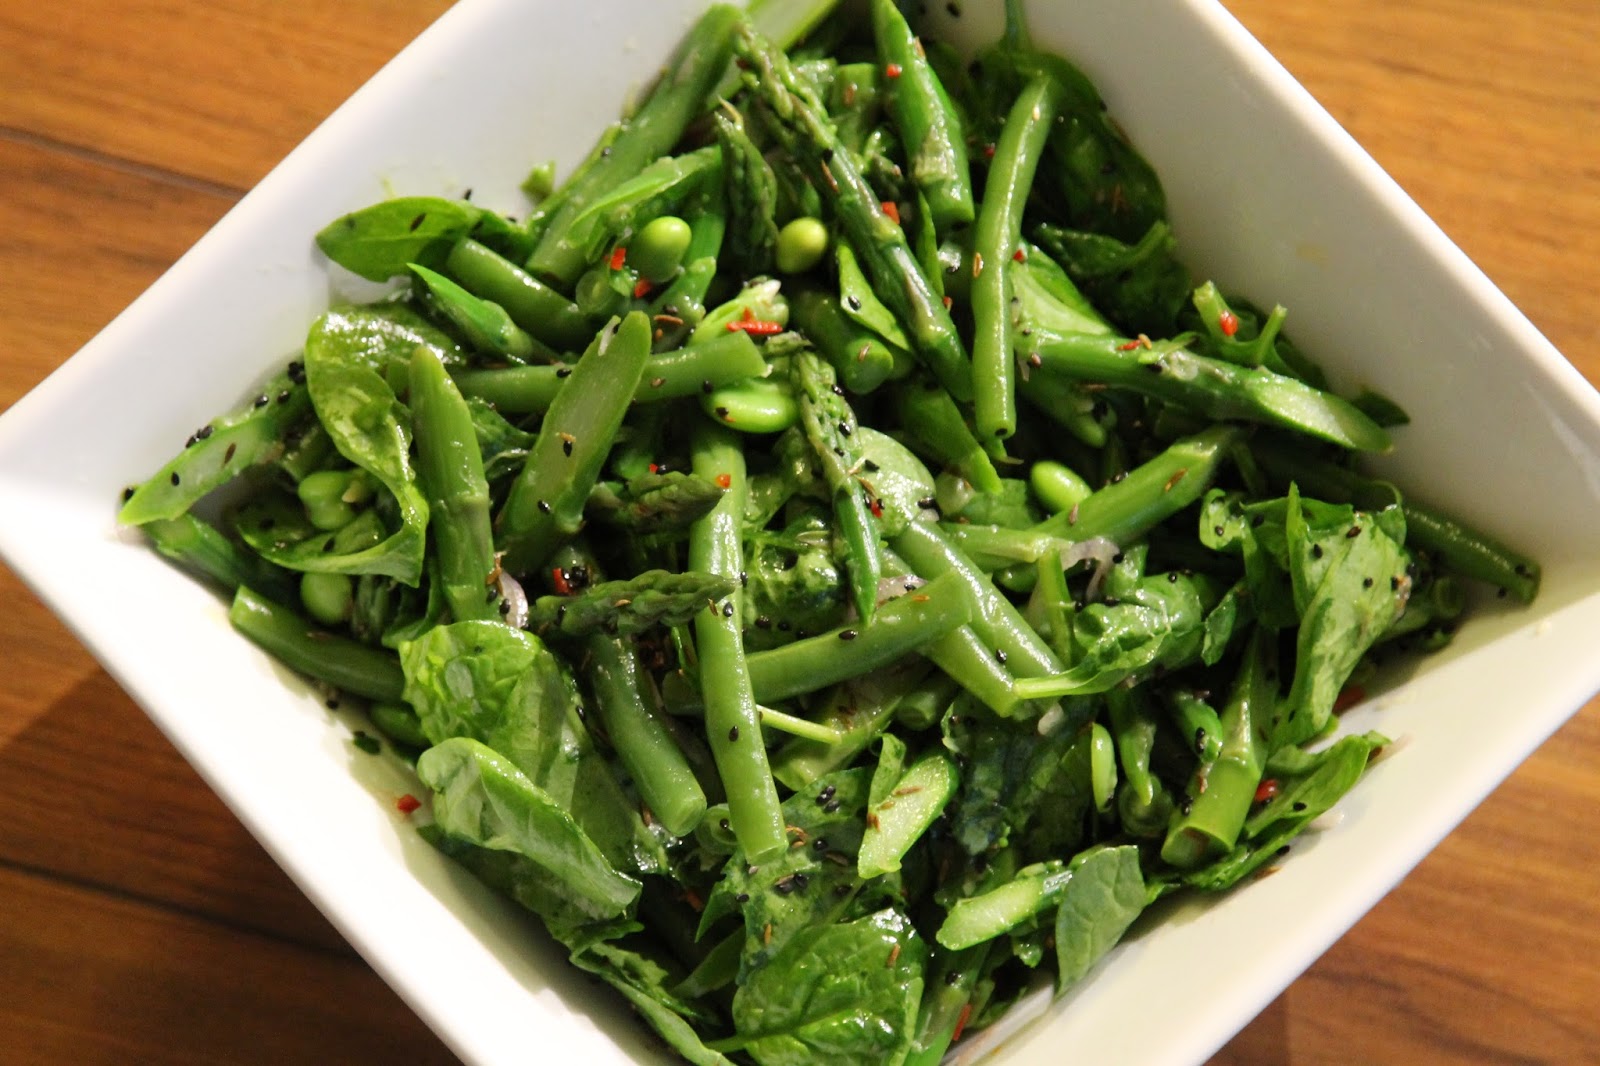
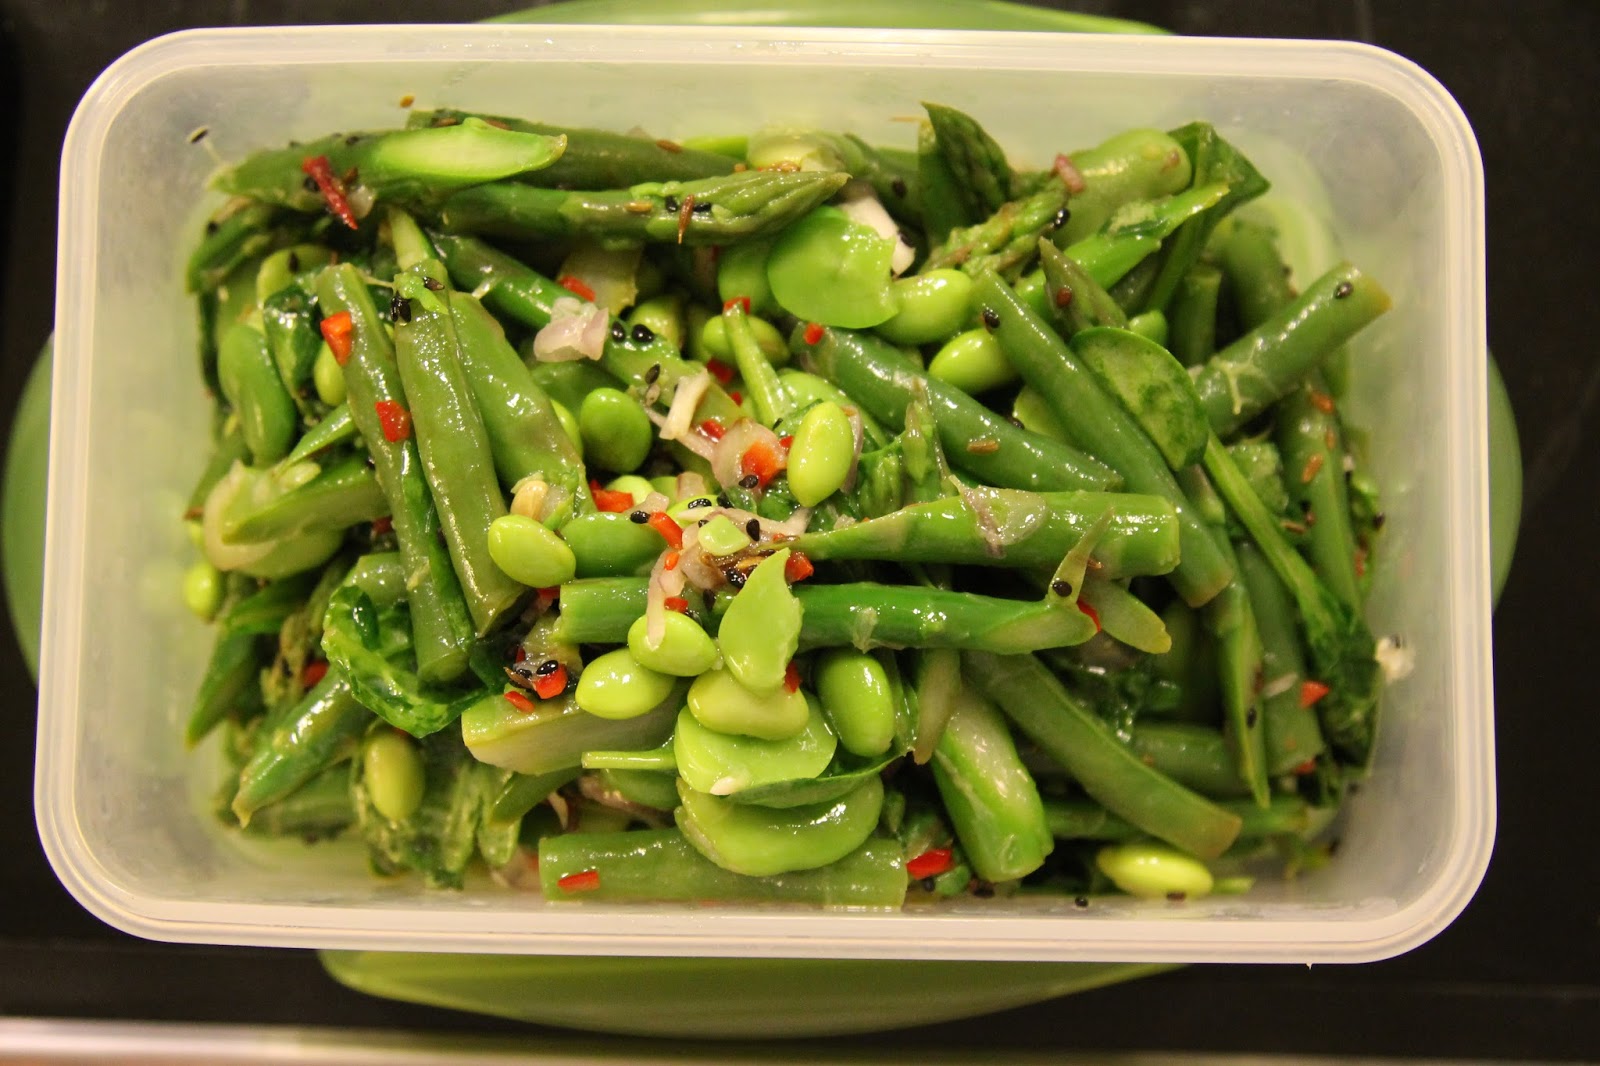
Spring Salad from "Plenty More"


In my last post, I talked about the importance of eating nourishing and satisfying - particularly when life speeds up its pace on you. If that dish, the Rice Noodles with Green Onions and Edamame was step in the right direction, this dish, is ALL IN.

You can just tell from the abundance of green that it is packed full of amazing nutrients and the beautiful bounty that the warmer weather provides. Technically called a 'Spring' salad (and I did happen to make this before the official kick off to Summer), the recipe highlights vegetables at the peak of their freshness.

  • Asparagus: In Season February to June - peak month: April
  • Spinach: Available all year round but at its peak in Spring: April-June
  • Fava Beans: Late Spring - Summer
  • Green Beans: Available year round but peak in May-September


For those of you less familiar with fava beans, they are odd looking and incredibly deceiving in size. They probably think it is funny how many layers they make us humans peel off in order to get to the true "meat" of the bean.


Don't try biting into that large bean - you will forever dislike this beautiful produce.


Even if you try eating the beans shown above, you won't be very happy as you'll quickly find it difficult to swallow the casing that covers the final bean product. It's like a sunflower seed, they are horrible if you try to eat the shell. But the seed naturally slips out from the shell (if you do it right) so you can then enjoy the small but satisfying seed. Same story here with these favas. Trust me, there is true deliciousness if you have the patience to peel the layers.


Blanching the favas aids the separation of the casing from the bean. Here you see the final product, mixed in with some edamame. Looks like the size of the favas were deceiving to me as well as I didn't pick up enough! (Note: edamame was a fabulous addition).


Spring Salad
p. 28 in Plenty More
serves 4 to 6

Ingredients:
  • 10 asparagus spears (12 oz/350 g - or 1 bunch), trimmed and each spear sliced on a sharp diagonal into 3 or 4 thin pieces
  • 7 oz/200 g haricots verts (or green beans), trimmed 
  • 2 3/4 cups/300 g shelled fresh or frozen fava beans (note: I used half fava half edamame)
  • 1 2/3 cups/50 g baby spinach leaves
  • 1 banana shallot, or 2 regular shallots, very thinly sliced (1/2 cup/50 g)
  • 1 red chile, finely diced
  • 1/2 tsp sesame oil
  • 2 tbsp olive oil
  • 1 tbsp lemon juice
  • 1 tbsp/10 g mixed black and white sesame seeds, toasted
  • 1 tsp nigella seeds (I couldn't find those so used cumin seeds)
  • salt
Directions:
  1. Bring a large pan of water to a boil, add the asparagus, and blanch for 3 minutes. Use a slotted spoon to transfer the asparagus to a bowl of ice-cold water. Add the haricots verts to the boiling water and blanch for 5 minutes. Use the slotted spoon to transfer them to the bowl with the asparagus, drain both, and then set aside to dry. Add the fava bans to the boiling water and blanch for 2 minutes. Drain, refresh under cold water, and then remove and discard the skins by pressing each bean gently between your finger and thumb.
  2. Place both beans and the asparagus in a large bowl. Add the spinach, shallot, chile, oils, lemon juice, sesame seeds, nigella seeds, and 1/2 teaspoon salt, stir gently and serve at once.


I love leftovers! Though I have to say, this salad, because it is dressed, is best fresh!

Friday, July 3, 2015

Rice Noodles with Green Onions and Edamame from "Plenty More"


My goodness, how time flies when you are having fun and working long days. That was my June. It was quite possibly, the busiest time of my life. I had a lot of excitement to look forward to - two weddings and a bachelorette/bridal shower weekend (all a flight away). I also had a massive workload that I had to push through at the same time. So it was certainly mentally and physically taxing but I did my best to maintain my sanity by adhering to a healthy(ish) diet and keeping exercise a priority. It's amazing how your mind can be so bogged down and "stressed" but just a short break of physical exertion can bring an incredible level of clarity.

Staying nourished is also key in a time of stress. And by using the term "nourish" I do not mean "full" from a satiation perspective, but rather, "full' of the right nutrients to keep your body running at close to 100% percent.

This recipe, from "Plenty More" fits the bill on providing a fantastic balance of essential nutrients and some level of comfort with the noodle base. It is also naturally gluten free - hurrah.

Think of this as a refreshing pasta dish with a subtle Asian flair. It would be wonderful for a picnic as it is served at room temperature or cold.


Rice noodles provide the base and a good bit of the heft of the dish. Though rice noodles aren't inherently a health food - there are worse ways to do pasta. And with the mix-ins, the rice noodles take on the role of the vessel for serving up the rest of the healthy spring veggies.


I was a bit weary about the quantity of green onions that the recipe called for. I'm used to using them more as a garnish or in lesser quantities for cooking. Here, green onions are one of the stars. And they weren't overpowering. Ottolenghi surprised me again.


The dish has a beautiful mix of summer flavors (cilantro and lime) with the umami factor of Asian cuisine (sesame oil and rice vinegar). The nutrition powerhouse, edamame, also is prominently featured in the well-balanced dish. Did you know that a cup of edamame has at least 6% of all of the daily recommended vitamins except for Vitamin D? It is low in fat and calories and high in protein and nutrients. So if you were feeling a little bit bad about the rice noodles - here's the redeeming ingredient.

I think this is best served as a side dish or topped with a protein (tofu would be delicious). The dish itself may get a bit boring if it was your only dinner dish. Lunch is another story though.

We served this with a beautifully cooked piece of salmon. It was refreshing and satisfying. And leftovers were fabulous as well.


Rice Noodles with Green Onions and Edamame
p. 57 in Plenty More
serves 4

Sunday, May 31, 2015

Goan Shrimp and Spinach


Why not treat myself on a solo Friday night in? Large, succulent shrimp, a deep, zest curry, and lightly sauteed spinach rounded out a fabulous dinner for one (not to mention a few glasses of wine).

I was feeling a bit adventurous to go beyond my standard solo dinner of a buddha bowl of sorts. But I didn't want to go too adventurous to where I would spend my whole night in the kitchen. So when I ran across this recipe in my Food & Wine magazine, I was intrigued as I already had most of the ingredients and with a "total time" of 20 minutes to prepare, I was sold.

This isn't your normal curry in the sense that it is not a "saucy" dish per se. Curry actually doesn't have to be! The definition (or A definition) of curry is "a food, dish, or sauce in Indian cooking that is seasoned with a mixture of spices." So here you go - a dish that is seasoned with a mixture of spices. Curry.

What I loved about this recipe was the beautiful incorporation of tang, heat and sweetness. You've got coconut, coriander, cumin, chile and brown sugar as the "spice base" for the dish. Using whole spices really helps to take the depth of flavor to another level. And always, ALWAYS, toast your spices if preparing a curry. Your tastebuds will thank you.


The toasted spices go into the blender with water, tamarind (hello TANG), garlic and ginger. The result is a beautiful paste that serves as the base for the dish.

If you are ever amazed at the complexity of flavors in Indian cuisine, it is because they have really figured it out when it comes to blending spices and flavors, and marrying them in such a way that no single ingredient overpowers the dish. Instead, they work together in beautiful harmony.


The curry base is then added to sauteed onions that have been "heated" by the jalapenos (to be discarded, unless you are a true Indian and able to take on a ridiculous heat index).


Finish it up with a quick cook of the shrimp (less is more) and spinach and you've got a fabulous dish with complex flavors, without the complex cooking process. Easy enough for a weeknight meal - enjoyable enough for a solo Friday night.

Goan Shrimp and Spinach

Monday, May 18, 2015

Peas with Sorrel and Mustard from "Plenty More"


Peas are totally underrated.

Most people revert to memories of their childhood days when they think of peas. For me, they usually found their way to the convenient shelf underneath the table - my "not so secret" hiding spot for the food that I didn't want to eat off of my plate.

True story.

The adverse reaction to peas is often due to the common use of frozen peas, cooked simply with some butter, salt and pepper, and then put on a plate - hopefully with mashed potatoes so the peas don't slide around too much! And while this is quite a delicious combination, I can see how it could get monotonous.

It's time to give peas a makeover! Fresh or frozen, this recipe from Plenty More (of course) adds a new dimension to the often overlooked vegetable.

Mustard three ways and a unique herb, sorrel, bring peas to another level.


Speaking of sorrel - what the heck is that anyway?

I had no clue. But I went looking for it at Whole Foods! I found it in the simple plastic herb pack, coupled with more familiar herbs such as basil, thyme and rosemary. As this recipe called for a decent amount of sorrel, I had to buy two packs.

When I brought it home - I was expecting something akin to a bold spinach - just by judging the look of the leaves. That hypothesis on flavor was incorrect! Sorrel surprised me with its "sour" acidic taste with a hint of lemon. It is not something you want to eat a whole bowl of but I can see why Ottolenghi decided to let it shine amongst the soft and nearly sweet peas. Then you hit it with some mustard and yogurt - both with an odd contrast of sharp and smooth and you've got a complex (but simple to prepare) pea side dish.


Peas with Sorrel and Mustard
Plenty More p. 70
serves four

Ingredients:

Sunday, May 17, 2015

Steamed Eggplant with Sesame and Green Onion from "Plenty More"


My latest attempt from Plenty More was a simple side dish that highlights an ingredient that rarely takes center stage in my side dish repertoire: Eggplant. Typically, this ingredient is reserved for main dish staples such as Eggplant Parmesan or as a part of a vegetable medley in Asian curry dishes.

The thing that I love and hate about eggplant is that it soaks us so much liquid that it achieves a fantastic tenderness and takes on the flavor profile of whatever it is cooking in. The "hate" comes in when that "soaking up" effect is primarily driven by oil. These suckers can be deceptively unhealthy when they act as an oil sponge - but that's also what helps them achieve their silky, tender texture.

So how does one cook eggplant in a way that minimizes fat and retains moisture? I suppose Ottolenghi would know a thing or two about "healthy" eggplant techniques. Sure enough, he had a brilliantly simple technique that I had never tried before - but it makes perfect sense.

Steaming. Using indirect moisture to cook and tenderize the eggplant. Brilliant!

The oil is then used as a dressing rather than a cooking ingredient.

The result is a tender eggplant, lightly dressed with a rich, Asian-inspired concoction that is slightly sweet (from the maple syrup and mirin), a bit nutty (sesame oil), with a ting of acid (rice wine vinegar) and a whole lot of umami (soy sauce). It's decadent and light at the same time.

I used a bamboo steamer which adds a slight "bamboo" flavor. Ottolenghi simply calls for using a regular steamer or colander set over a pan of water. Either way works.

And just a side-note. The dish is served "cooled" or at room temperature. So that got me thinking about how perfect this would be to bring for a picnic or a potluck. Something unique and easy that will be sure to impress.

Enjoy this healthy method for cooking eggplant!


Steamed Eggplant with Sesame and Green Onion
Plenty More p. 40
serves four

Ingredients:

  • 2 medium eggplants, topped and peeled (scant 1 1/2 lb/650 g)
  • 5 green onions, white and green parts, thinly sliced on the diagonal (3/4 cup/70 g)
  • 1 tbsp/10 g mixed black and white sesame seeds, toasted
Dressing:
  • 2 1/2 tsp mirin
  • 1/2 tsp sesame oil
  • 1 1/2 tbsp light soy sauce
  • 2 1/2 tsp rice vinegar
  • 1 1/2 tsp maple syrup
  • 2 tsp peeled and finely chopped fresh ginger
  • 1 clove garlic, crushed
  • salt
Directions:
  1. Fill a large pot (for which you have a lid) with water to a quarter of the way up the sides and bring to a boil. Place the eggplants in a steamer or a colander hovering over the water, making sure the water doesn't touch the base of the steamer. Alternately, you could use a bamboo steamer placed in a wide pot. Cover tightly, using foil to seal the edges if you need to, and steam for 30 minutes, turning the eggplants once. When the eggplants are cooked, remove the steamer from the pot and leave the eggplants to cool and drain inside the steamer. Shred the flesh by hand into long, thin strips 1/4 inch/5 mm wide, then continue to drain for another 20 minutes.

Saturday, May 16, 2015

Parchment Baked Halibut with White Wine and Fennel


This is quite simply one of the easiest and most impressive dishes that I know: fish baked in parchment paper. There are fancy names for this such as "______ [insert name of fish] en papillote (French)" or "en cartoccio (Italian)" - all which really just mean cooking in a folded parcel. I ordered this at an Italian restaurant recently - Halibut en cartoccio - and spent nearly $30 on it (work dinner, so I technically did not pay). Knowing how simple it is to make this dish at home certainly did not take away from my enjoyment of the restaurant dish as it was quite fantastic. Instead, it made me even more excited to try more variations of this dish in the comfort of my own home (for a much cheaper price).

The concept of cooking fish in paper is basically to serve as a vessel for trapping juices and steaming the fish - keeping it nice and moist and infused with the flavors included in the pouch. One of my favorite flavor combinations is with fennel, lemon and white wine. Fresh flavors that delicately infuse into the fish (halibut is my preferred go-to) and work beautifully together.


It's a good idea to cook your vegetables (if using) for a bit before bundling them with the raw fish in the parchment. This just ensures that your vegetables will be cooked through when your fish is ready. Additionally, beginning the cooking process allows for the vegetables to start breaking down and releasing their own natural juices which allows for a great depth of flavor infusion.

This time, we cooked thinly sliced fennel and shallot with olive oil and seasoned simply with salt and pepper. The vegetables were then mixed with lemon zest, lemon juice and white wine. Then scattered over a raw piece of fish (halibut) and sprinkled with thinly sliced garlic and thyme. Simple and fabulous.


We used an inexpensive (around $12) bottle of wine that we picked up at the local grocery store to "steam" the fish in. Come to find out - this is a really decent Sauvignon Blanc and a good value at a low price point. We always want to cook with something that we will want to drink alongside the meal so that's why you won't find any bottles of 2 buck chuck (or an equivalent) in our kitchen. Quality ingredients = quality food. Bad wine does not lead to good food. So a $12 bottle is cheap enough that we don't feel bad using it for cooking - but we also can enjoy a glass with the end result. The Sauvignon Blanc was a great choice because it was crisp and has a tart fruitiness and hints of lemon. The brightness goes beautifully with fennel and lemon.


Roasted baby purple potatoes added the "heft" to the dish, bringing a nearly creamy and indulgent texture wrapped in a crisp and slightly salty skin. Fabulous. If you haven't tried purple potatoes - you are missing out. They are packed with more antioxidants that your standard white potato and also add a wonderful pop of color to a dish.