Showing posts with label Meat. Show all posts

Sunday, January 8, 2012

Herb Crusted Lamb Chops


Herb-Crusted Rack of Lamb with Honey Mustard Glaze 
(from Thomas Keller’s Ad Hoc at Home)
Yields:  8 servings 

Ingredients:
  • 2 frenched, 8-bone racks of lamb (2 to 2 1/4 pounds each)
  • Kosher salt
  • Freshly ground pepper
  • Canola oil
  • 1/4 C Dijon mustard
  • 3 T honey
  • 6 T (3 oz) unsalted butter, at room temperature
  • 4 cloves Garlic Confit
  • 3 to 5 anchovy fillets, salt-packed or oil-packed, rinsed, dried, and minced
  • 1 1/2 C ground panko bread crumbs
  • 3 T finely chopped flat-leaf parsley
  • 1 T minced rosemary
  • Gray salt or coarse sea salt

Directions:
Score the fat covering the lamb in a cross-hatch pattern, taking care not to cut into the meat. Season the racks on all sides with salt and pepper.
Set a roasting rack in a roasting pan.  Heat some canola oil in a large frying pan over medium-high heat until it shimmers.  Put one rack fat-side down in the pan and sear until golden brown, 1 1/2 to 2 minutes.
Carefully move the lamb as it sears to brown as much of the fat as possible.  (It is best to sauté one rack at a time, so the temperature of the pan doesn’t drop dramatically.)  Transfer the lamb to the roasting rack, meat side up.  Drain the fat, and reheat the pan, adding fresh oil.  Repeat with the remaining rack.
Combine the butter, garlic confit and anchovies in a small food processor and puree until smooth.  Transfer the puree to a medium bowl, and stir in the bread crumbs, parsley and rosemary to combine.  Do not overmix; the mixture should be moist, but it may not all come together.
Brush the mustard mixture over the fat and meat, but do not coat the underside of the racks.
Spread the bread crumbs evenly over the racks, pressing gently and patting them so the crumbs adhere.  (The lamb can be refrigerated on the rack in the roasting pan for up to 6 hours, but remove it from the refrigerator 30 minutes before roasting.)
Position the oven rack in the bottom third of the oven and preheat the oven to 425° F.  Put the lamb in the oven, meat-side toward the back, and roast for 25 to 35 minutes, until the temperature in the center of the meat registers 128° F to 130° F.  Let the racks rest on the rack in a warm place for 20 minutes for medium-rare.
Carve each rack into four 2-bone chops, and arrange them on a platter.  Sprinkle with gray salt or sea salt and serve.


Ok so the chops are a little over (should be more pink) but they were still amazing


Tuesday, October 4, 2011

Chicken Chile Verde

I told Derek that I was just going to make my poached eggs/english muffin standard dinner and that he should figure out something simple to make or purchase for himself that night. Then I came home to this:


How could I resist. It smelled amazing - cinnamon...cilantro...yes please. So I forfeited my dinner for this fantastic surprise which ended up being a truly winning recipe.

The chicken portion was cooked in a good amount of liquid which resulted in an almost soupy consistency. For the tacos, Derek simply strained the chicken and placed it on top of a homemade tortilla with some salsa fresca. I, on the other hand, saw the soup consistency and immediately wanted it in that original form. How could I strain that delicious liquid. So for me, this was soup...or a chili really - for Derek it was a taco. How perfect.

Chicken Chile Verde

1 pound skinless boneless chicken thighs, cut into 1/2-inch pieces
2 tablespoons all purpose flour
2 tablespoons olive oil

1 cup chopped onions
1 tablespoon chopped garlic
3 fresh Anaheim chilies, seeds removed, minced
1 green bell pepper, cut lengthwise into 1/4-inch-thick strips
1.5 cups frozen corn kernels, thawed

2 cups canned low-salt chicken broth
4 tomatillos,** husked, coarsely chopped
2 teaspoons chopped fresh oregano or 1 tablespoon dried
1.5 teaspoons chili powder
1/2 teaspoon ancho chili powder
1 teaspoon ground cumin
1/2 teaspoon paprika
1 cinnamon stick

1/3 cup chopped fresh cilantro

Preparation

Sprinkle chicken with salt and pepper. Coat with flour. Heat 1 tablespoon oil in heavy large skillet over medium-high heat. Add half of chicken to skillet and sauté until golden brown, about 10 minutes. Transfer to large pot. Repeat with 1 tablespoon oil and remaining chicken.
Heat 2 tablespoons oil in same skillet over medium-high heat. Add onions and garlic; sauté until onions are tender, about 5 minutes. Transfer to pot with chicken. Heat 1 tablespoon oil in same skillet over medium-high heat. Add Anaheim chilies and green bell peppers. Sauté until tender, about 4 minutes. Transfer to pot with chicken. Heat 1 tablespoon oil in same skillet. Sauté half of corn until tender, about 2 minutes. Transfer to pot with chicken. Repeat with remaining 1 tablespoon oil and corn.

Add chicken broth, tomatillos, oregano, chili powder, cumin, paprika and cinnamon sticks to pot. Bring liquid to boil. Reduce heat and simmer until mixture thickens and flavors blend, stirring occasionally, about 2 hours. (Can be prepared 1 day ahead. Refrigerate until cool. Cover and keep refrigerated. Rewarm over medium heat before continuing.)

Mix cilantro into chili.

Heirloom tomato salsa fresca:

3/4 of cup of chopped assorted heirloom tomatoes
1/4 of cup of red onion diced finely
1/2 serrano pepper (seeded; seeds for more heat)
few stalks of cilantro (stems and leaves) chopped
season with salt and pepper
1 teaspoon (or more) of lime juice (about 1/3 of a lime)

Sit at room temperature to meld flavors for about 30 minutes.


Homemade corn tortillas:

1 cup of masa harina
3/4 cup (up to 1 cup if needed) of hot water
1/2 teaspoon of salt (mixed with masa flour first)

Mix ingredients, pouring water slowly. Batter should have a bounce feel to it (not too sticky, not too dry). Cover and sit out for an hour. Make 1/2 inch in diameter balls. Form tortillas. Heat for 1-2 minutes (should start to dry a bit around edges) on cast iron skillet with very small amount of oil. Flip and cook for a minute.

Friday, September 16, 2011

Pasta with Goat Ragu and Ricotta

We revisited a previous recipe that we had used from Epicurious when I had a craving for some lamb and fresh pappardelle. I forwarded the recipe along to Derek and let him take the reigns and gather the ingredients for the masterpiece. And while his intentions were good, he came home with goat (healthier option) and linguini of some sort (they were out of pappardelle). Though I was slightly disappointed, I couldn't complain when I had this delicious creation placed in front of me.


He and I both agreed that lamb would have been better as it is more flavorful adds some fantastic depth. And the pasta is by personal preference, there's just something fun about some wide noodles every once in a while. Still, it was quite fantastic.

Here's the original recipe that we used and modified.

INGREDIENTS:

2 pounds boneless lamb shoulder, cut into 2-inch cubes or 3 pounds bone-in lamb stew meat
2 teaspoons ground coriander
1 teaspoon ground fennel seeds
1/2 teaspoon ground cumin
Kosher salt
1/4 cup olive oil
1 carrot, finely diced
1 rib of celery, finely diced
1 onion, finely diced
1 tablespoon tomato paste
1/2 cup dry red wine
2 branches of fresh rosemary
5 sprigs fresh thyme
1 bay leaf
1 28-ounce can diced tomatoes
2 cups chicken stock
3/4 pound pappardelle
3/4 cup fresh whole-milk ricotta cheese
1/4 cup chopped mint

METHOD:

Preheat the oven to 300°. In a small bowl, combine the coriander, fennel and cumin to create a fragrant spice rub. Lighly season the lamb on both sides with Kosher salt and sprinkle the meat evenly with the spice rub.

Heat olive oil in a large dutch oven over moderately-high heat. In batches sear the lamb on all sides until richly browned, about 10 minutes per batch. Remove the browned meat to a plate and repeat with the remaining lamb.

Add the carrot, onion and celery to the reserved oil/fat in the pan and sauté the vegetables until just beginning to brown, about 7-8 minutes. Stir often to prevent scorching. Push the vegetables to the side of the pot to create a hot-spot in the center. Add the tomato paste and stir constantly until it becomes a few shades darker and releases its bright red oils, about 3 minutes. Stir to combine the tomato paste and vegetables.

Add the wine to deglaze the pot, scraping up any browned bits with a wooden spoon. Allow the wine to reduce until almost completely evaporated before adding in the tomatoes, stock, rosemary, thyme and bay leaf. Return the browned lamb to the pot along with any accumulated juices. Bring the pot to a boil and then reduce the heat to a simmer. Cover tightly and place the pot in the oven. Braise the lamb for 3 hours, checking periodically to make sure that the liquid is not reducing too quickly. Replinish the pot with additional stock or water if the lamb looks like it is getting too dry.

Remove the pot from the oven and allow the sauce to cool slightly before skimming off any accumulated fat. Now is the time to remove any bones. Season the sauce to taste with Kosher salt. The ragù can be refrigerated overnight at this point.

Meanwhile, in a large pot of boiling, salted water, cook the pasta until al dente. Drain well and add the pasta to the sauce. Toss gently to dress the pasta with the ragù, breaking up any large chunks of lamb into smaller, bite-size pieces. Serve the pasta in bowls and top with ricotta cheese and chopped mint.

Serves 6

Thursday, August 11, 2011

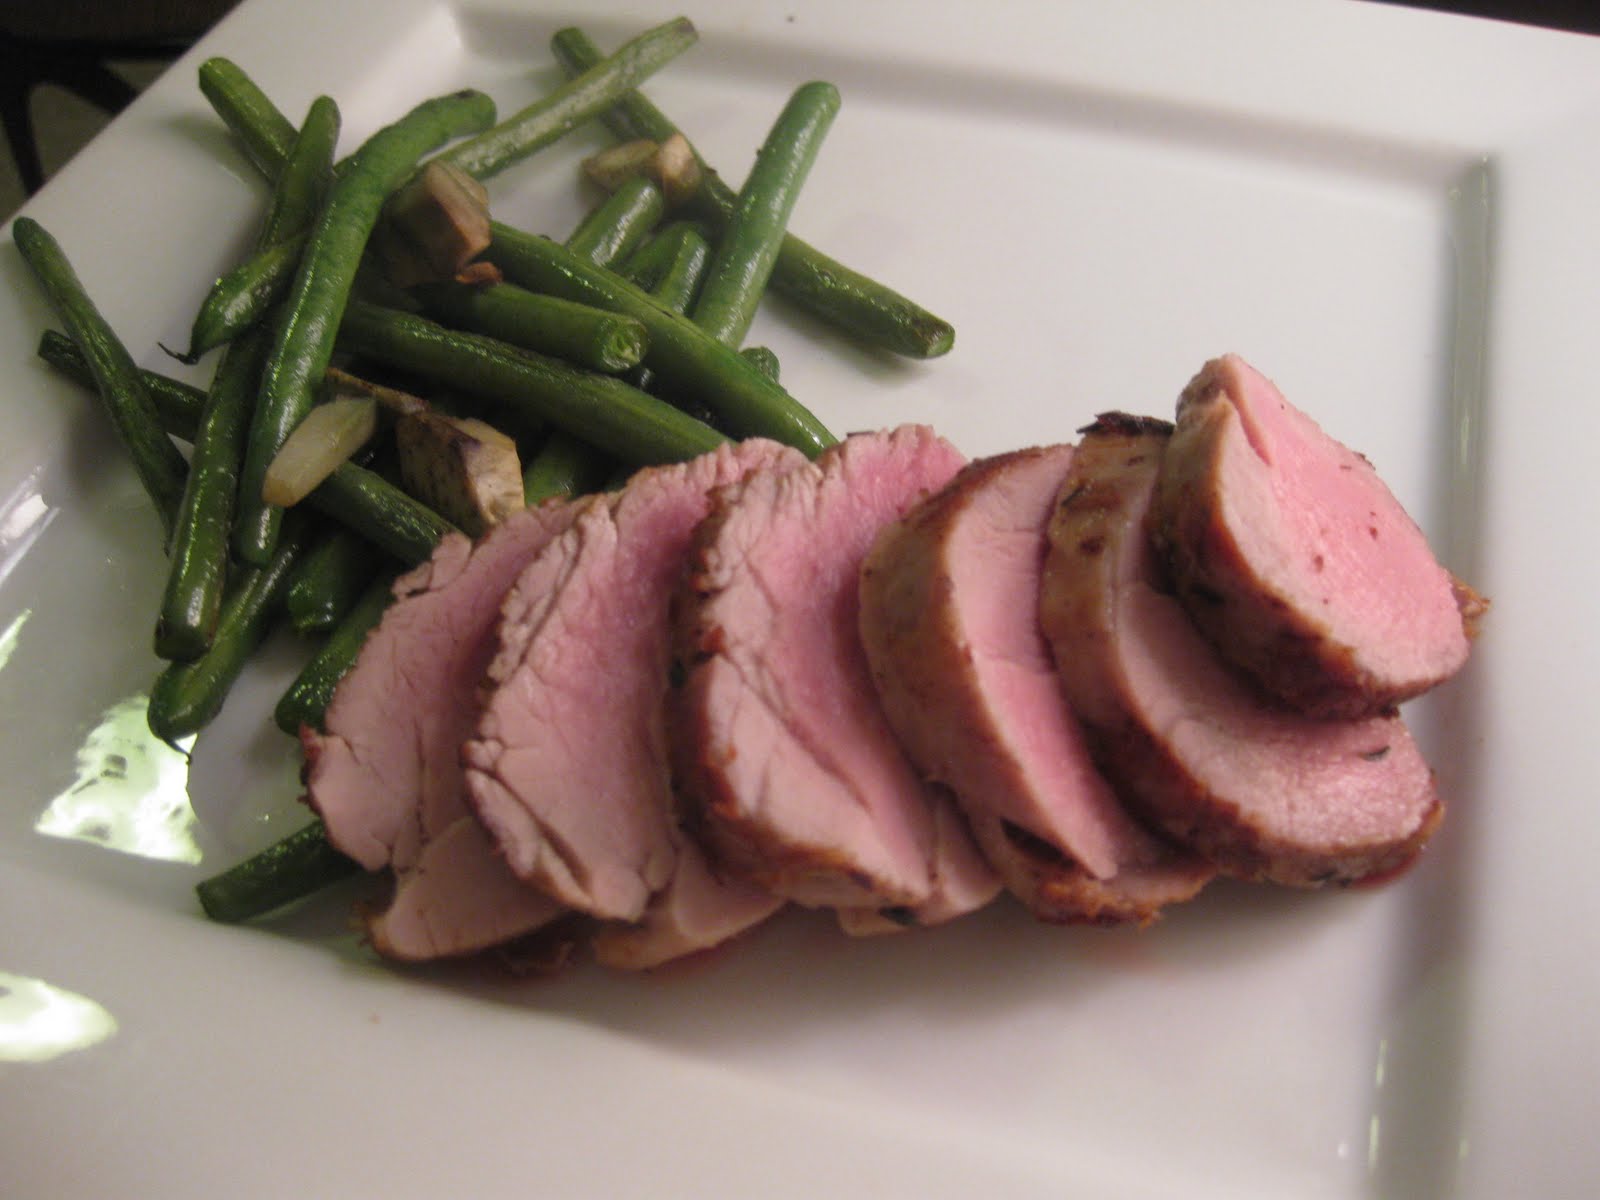
Perfect Pork Tenderloin (Ad Hoc) and Green Beans and Artichoke


Ad Hoc at Home really has the perfect recipe for pork tenderloin. We had made this and noted the technique in a previous post.

But for a refresher - here is a detailed description from another site: http://agoodappetite.blogspot.com/2010/03/ad-hoc-brined-pork-tenderloin.html

Just notice how tender the pork looks. Not like its commonly dried out self. How fantastic! And you wouldn't believe how much flavor is packed into one little bite!

Wednesday, June 1, 2011

Goat Meatballs with Tzatziki

Goat Meatballs with Tzatziki and Quinoa with Cherry Tomatoes and Green Peppers:


My Presentation:

Derek's Presentation:

Regardless of presentation, a really delicious and surprisingly each meal to prepare.


Meatball Ingredients:
Ground Goat
Mint
Cilantro
Allspice
Cumin
Cayenne
Salt
Pepper
Panko
Egg
Pomegranate Juice
Chicken Broth
EVOO

Combine all ingredients (use your judgement on the amounts based on other meatball recipes - I don't have the exact quantities!). Divide mixture into evenly sized balls (you choose how big or small). In a heated pan with some EVOO, add meatballs and brown on each side. You'll have to do this in batches, most likely. Once browned, put in the oven at 350 F until cooked through.


Tzatziki Sauce:

7 oz ounces plain Greek yogurt (Fage 2% is my favorite)
1/2 medium cucumber, peeled, seeded, and finely chopped
Pinch kosher salt
2 cloves garlic, finely minced
2 teaspoons olive oil
1 teaspoon red wine vinegar
3-4 mint leaves, finely minced

Directions

Place the yogurt in a tea towel, gather up the edges, suspend over a bowl, and drain for 2 hours in the refrigerator (though I only had about 30 minutes for this step).

Place the chopped cucumber in a tea towel and squeeze to remove the liquid; discard liquid.

In a medium mixing bowl, combine the drained yogurt, cucumber, salt, garlic, olive oil, vinegar, and mint.

Tuesday, May 24, 2011

Surf and Turf with Creamed Corn and Spring Vegetable Medley


Thomas Keller’s Ad Hoc at Home Creamed Summer Corn Recipe
serves 2, generously

2 ears of supersweet corn, shucked
1 large lime
1 1/2 tablespoons unsalted butter
salt
1/4 cup and 2 tablespoons heavy cream (Derek used whole milk)
pinch of cayenne
3/4 tablespoon finely chopped chives

With a sharp knife, cut vertically down each ear of corn to slice off the kernels. Put the kernels in a large bowl, then hold each cob over the bowl and use a spoon or the back of a knife to scrape any remaining corn and the milk from the cob.

Grate the zest of the lime and set aside. Cut the lime in half.

Melt the butter in a large frying pan over medium heat. Add the corn, squeeze about 1 tablespoon of the lime juice, or to taste, over the corn, and season with salt.

Reduce the heat to medium-low and cook until all of the liquid has evaporated, concentrating the flavour, and the corn is beginning to sizzle, 15 to 17 minutes.

Stir in the cream, the cayenne, and lime zest. Continue to cook for 6 to 8 minutes, until the cream is absorbed by the corn. Add salt to taste, stir in the chives and enjoy hot.

Wednesday, May 18, 2011

Roasted Chicken with Summer Vegetable Gratin


Summer Vegetable Gratin
(adapted from Thomas Keller’s Ad Hoc at Home)

2 Roma (plum) tomatoes
1 medium zucchini
1 Japanese eggplant
Canola oil
2.5 cups chopped onion
2 garlic cloves, grated or minced
1 T plus 1 tsp chopped fresh thyme
2 Tbsp. EVOO (approximately)
freshly ground black pepper
1/3 cup freshly grated Parmigiano-Reggiano
1/3 cup dried bread crumbs

Preheat oven to 350 degrees. Slice vegetables with a mandoline as close in size as possible and toss with olive oil and a lite sprinkling of sea salt.

Heat some canola oil in a large frying pan over medium heat, reduce to low, add onions and garlic and season with salt. Cook without browning stirring occasionally, until the onions are translucent, about 20 minutes. Stir in 1 tbs of the thyme.

Combine parmesan and bread crumbs and remaining thyme in a small bowl.

Spread onion mixture in the bottom of a 13.5x9.5 gratin dish or 13 inch round shallow baking dish. Arrange a layer of overlapping slices of 1/3 of the squash around the outside edge of the dish. Sprinkle 2-3 tbs of the breadcrumb mixture over the top. Add a row of tomatoes, eggplant, yellow squash, zucchini until you the pan is filled adding a layer of breadcrumbs ontop of each layer. Sprinkle the top with any of the remaining breadcrumb/cheese mixture and a light sprinkling of salt.

Bake for 60-90 minutes until the vegetables are completely tender when pierced with a knife. Remove from the oven and allow to rest for 10 minutes.

Tuesday, May 10, 2011

Pork Chops with Chipotle Peach Sauce and Quinoa Stuffed Poblano Peppers


Rub for the pork chops:
Cumin
Coriander
Brown Sugar
Salt
Pepper

Grind spices and blend.

Chipotle Peach Sauce:
Peach, peeled and chopped
Chipotle puree and pepper
EVOO

Cook over medium low heat until the peach has softened. Puree.

For the pork chops, rub generously with spice mixture. Heat EVOO in a pan and pan sear both sides of the pork chops until golden brown. Stick pan in 350 degree oven until the pork has reached about 140 degrees. Let sit for 5-10 minutes before serving with the peach chipotle sauce.


For the Quinoa Stuffed Poblano Peppers:

Quinoa cooked in vegetable broth according to package directions
Zucchini, finely diced
Onion
Garlic
Poblano Peppers, roasted, peeled and slit open
Cilantro, for garnish
Lime wedges, for garnish

Cook zucchini, onion, and garlic in a pan over medium heat until tender. Add in quinoa. Season to taste. Divide quinoa mixture between roasted peppers. Garnish with lime and cilantro.

Monday, April 25, 2011

Red-Wine Braised Short Ribs over Parmesan Polenta

When hosting a dinner for other people, I find it best to make something that involves preparation ahead of time but minimal effort as serving time nears. A simple example of this plan of attach is enlisting the use of a Crockpot. However, I wouldn't call a Crockpot impressive and would consider it more appropriate for a weekday meal and not a method for entertaining. A dutch oven, on the other hand, allows for a little more sophistication and with the typical long-cook times associated with using a dutch oven, it is a perfect vehicle for creating something delicious and impressive for your friends.

Derek and I have gotten so much use out of our Le Creuset Dutch Oven - it was such a fantastic investment - everyone should have one.

To utilize the dutch oven, I thought short ribs would fit the bill. They typically have to marinate for quite sometime and then cook for hours. This means the legwork is done hours before the guests arrive! Only the finishing touches and polenta have to be tended to prior to serving.

This extra time frees up a cook to make even more food - in our case:

Appetizer: Roasted Tomato Bruschetta
Drink Pairing: Basil Gimlet

First Course: Hazelnut-Crusted Goat Cheese Salad
Drink Pairing: Frick Winery Cinsaut

Main Course: See below
Drink Pairing: Napa Cabernet Sauvignon

Dessert: Pavlovas with Lemon Curd and Berries (see other post)

Red Wine Braised Short Ribs with Creamy Polenta

(Serves 6)

1 bunch of leeks
1 white onion
3 carrots
½ bunch of celery
6 short ribs

1 bay leaf
1 bulb of garlic, skin removed, cloves separated
1 bunch of thyme
½ teaspoon black peppercorns
6 cups red wine
3 Tablespoons butter, divided
Salt and Pepper
Grapeseed Oil
4 cups veal stock (we used beef)
6 cups prepared polenta
½ cup Parmigiano-Reggiano, grated
4 Tablespoons chopped Italian parsley, divided


Set aside 1 leek, ¼ onion, 1 carrot and 1 stalk of celery. Cut the remaining vegetables into large mirepoix, which are ½ inch pieces. Place the short ribs into a deep baking dish and cover with the mirepoix, bay leaf, garlic, thyme and peppercorns. Cover with the red wine and place in the refrigerator for 24-48 hours.

Cut the reserved leek, onion, carrot and celery into 1/8-inch cubes. Place 1 tablespoon of butter into a sauté pan. Over medium heat, sweat the vegetables for 5 minutes, or until soft. Set aside.

Preheat the oven to 250º-300º F. Remove the short ribs from the red wine and pat them dry with a paper towel. Pour the wine through a strainer and reserve the vegetables. Place the wine into a pan and reduce by half.

Season the short ribs generously with salt and pepper. Place a skillet over medium-high heat. When the pan is hot, add the grapeseed oil and sear the short ribs on all sides. Be very careful not to burn the ribs because the color is difficult to distinguish because of the red wine.

Place the seared ribs into a roasting pan and cover with the vegetables reserved from the marinade. Then pour the reduced red wine on top of the ribs. Cover with the veal stock and place the roasting pan in the oven. Cook for 3 hours at no more than a simmer. If the ribs are allowed to boil, they will be tough, no matter how long they are cooked!

When ready to serve, cook the polenta according to the directions and stir in 2 tablespoons of butter, the Parmigiano-Reggiano and half of the parsely at the end. Remove the ribs from the cooking liquid and discard the vegetables. Place the cooking liquid into a pan and reduce slightly. Add the remaining parsley and the 1/8-inch cut vegetables. Place a generous spoonful of the polenta down in a bowl and place a rib on top. Cover with the vegetables and sauce mixture.


Tender - flavorful - succulent...these hit a home run and kept the impressive progression of the meal going (if I do say so myself). I also get a little wary when we serve a main dish to guests as so many things can go wrong and Derek and I can seem to pick out faults with such ease it is making dining out annoying at times. I have to remember, though, that my guests aren't always as particular so I shouldn't worry as much. However, I think these short ribs would please even the most discerning diner.

I even saved the red wine jus that the meat was cooked it. I couldn't bare throwing away such incredible, developed flavor. I'm hoping to find a use for it so I don't have to toss it - anywhere where beef broth would fit the bill, I'd add it on in.

All four courses of the meal turned out really well - I was pretty impressed with ourselves! And sufficiently full afterward...

Thursday, April 21, 2011

Sloppy Joes with a Candied Kumquat, Blood Orange, and Almond Salad

I don't know how many times I've brought up making sloppy joes in the last few months but the thought of this childhood dish crossed my mind enough times to push me to finally take the plunge and make it for dinner. My craving was not for a gourmet-fied sloppy joe - in fact, that seems to be a complete contradiction. The essence of a sloppy joe is the simplicity in down-home flavors and messy executive - this would be lost if someone tried to add posh ingredients - no, that just doesn't work. I wanted the simple meat and sloppiness (those are the two ingredients in a sloppy joe, right?)

Though I never even thought to buy the sloppy joe mix from the store, I realized that this was the flavor that I was craving and I hoped that my homemade version would be reminiscent of that simple McCormick's mix of spices and whatever else is in it. In fact, the McCormick's site lists the ingredients as:

SUGAR, ONION, SALT, CORN STARCH, PAPRIKA, SPICES (INCLUDING CHILI PEPPER), RED AND GREEN BELL PEPPERS, GARLIC, MALTODEXTRIN, MODIFIED CORN STARCH, CITRIC ACID, VINEGAR SOLIDS, CIDER VINEGAR, AND NATURAL FLAVORS.

Okay, so sugar is the first ingredient, probably not ideal but otherwise, OK.

What we ended up making certainly had some different ingredients but I guess it's time to refine my sloppy joe tastebuds a little bit - not to the point of "gourmet" but just enough to branch beyond the meal in a bag approach.

Slightly-More-Refined Sloppy Joes

INGREDIENTS

1 Tbsp olive oil
2 medium carrots, peeled diced
1/2 large onion, chopped
2 stalks celery, chopped
2 cloves garlic, minced
Salt
2/3 lb ground bison
1/4 lb ground turkey
1/2 cup ketchup
2 cups tomato sauce
1 Tbsp Worcestershire sauce
1 Tbsp red wine vinegar
2 Tbsp brown sugar
Pinch ground cloves
1/2 teaspoon dried thyme
Pinch (or two) cayenne pepper
freshly ground black pepper
fresh bakery hamburger buns (we used ACME)

METHOD

1. Coat saute pan with a little olive oil and add the ground bison and turkey, crumbling the meat while adding it to the pan. Season with some salt and pepper and cook until meat is just browned, stirring occasionally. Remove from heat and set ground meat aside.

2. Using the same saute pan (without the meat) heat olive oil n on medium high heat. Add the carrots, onion and celery. Cook, stirring occasionally until onions are translucent and carrots have started to soften, about 10 minutes. Add the minced garlic and cook for 30 more seconds.

3 Return the cooked ground beef and vegetables to the pan. Add the ketchup, tomato sauce, Worcestershire sauce, vinegar and brown sugar to the pan. Stir to mix well. Add ground cloves, thyme, and cayenne pepper. Lower the heat to medium low and let simmer for about 15 minutes. Adjust seasonings to taste. Serve on sliced bun - with napkins!


We served this with a fantastic salad of mixed spring lettuce, candied kumquats that Derek made forever ago (they keep just fine!), minced up, blood orange segments, and blanched almond slices. The dressing was some blood orange juice, a little bit of the kumquat syrup, white wine vinegar, EVOO.


Okay so the fact that we used bison and turkey may elevate this recipe slightly - but it wasn't on purpose. We had some mystery ground meat in our freezer that we thawed out (yes, we actually had and USED something from our freezer) and it turned out to be bison! And it wasn't quite enough so we used a little turkey we had just bought (just in case the mystery meat was freezer-burned). So using the two meats wasn't intentional, but I found it to be a nice combination. Any ground meat will work.

It was certainly different to have little chunks of vegetables in the mix - not something I remember in a sloppy joe - but I liked the slight variation in texture and didn't feel like the dish was AS meaty as it would be if it were solid meat (genius comment, I know - even worse now that I had to use auto-correct to spell genius correctly....it's Friday)

The flavors were a bit more sophisticated and bold than the traditional mix and I loved the addition of the clove - a little goes a long way. I only added a small pinch and could still pick it out.

It is also key to use good bread. I'm not sure I would have enjoyed this as much if the filling had been slopped between a standard smushy hamburger bun from a grocery store - but luckily, I went to ACME bread and picked up two fantastic rolls that were simply divine.

Even though this version is not a direct representation of my childhood memory, that's probably a good thin and now my sloppy joe craving has been thoroughly satisfied.

Thursday, March 31, 2011

Beer-Marinated Flank Steak with Aji and Guacamole

When I heard that we had a very special visitor coming in town, I wanted to show some San Francisco hospitality and prepare a meal that we could share together. The catch was, the dinner was going to be late (around 9:30) and it was a Wednesday night which typically means, spin class until 8 PM. If Derek were left 100% in charge of the menu, we would likely not have a dinner on the table until after 10 PM because certainly the meal would take "longer than expected." So I took control of the menu and thought of a simple piece of meat that could be prepared ahead of time and cooked quickly.

This Beer-Marinated Flank Steak with Aji and Guacamole seemed to perfectly fit the bill as I was craving some guacamole and wanted to incorporate it into the dish somehow.

I went and picked everything up at Berkeley Bowl - including the beautiful grass-fed beef that ended up living up to its $3.50/lb extra price tag. Then I got to cooking and, besides the guacamole, I made everything! Derek can take credit for the terrible butchering of my beautiful piece of meat as I asked him to score the steak as it calls for in the recipe. When I came into the kitchen post-Derek score...I was horrified! There, in front of me, was a piece of meat with scores so deep into the meat that you could see light through it if you held the piece up. Yes, Derek scored THROUGH the meat in many parts. He blamed it on the sharp knife, I blame it on carelessness. Regardless - I was a little peeved but I was told that it would work out - and I guess I couldn't do anything at that point but hope that was true!


Original recipe found here

Steak
1 1 1/2-pound grass-fed flank steak
2 teaspoons dried oregano
1.5 teaspoon ground cumin
Coarse kosher salt
1/8 cup extra-virgin olive oil
1/4 cup thinly sliced green onions (about 3)
6-ounces dark beer
1/4 cup Worcestershire sauce
Aji Sauce
Guacamole (homemade with tomatoes, cumin, cilantro, etc.)
Arugula

Using sharp knife, lightly score flank steak about 1/8 inch deep on both sides in a crisscross pattern at 1/2-inch intervals. Place steaks in 13x9x2-inch glass baking dish. Sprinkle steaks on both sides with oregano and cumin and generous amount of coarse salt and freshly ground pepper. Drizzle olive oil over both sides of steaks, rubbing oil and spices into meat. Add green onions, beer, and Worcestershire sauce, turning steaks several times to coat both sides. Cover and chill at least 3 hours, turning occasionally. DO AHEAD: Can be made 1 day ahead. Keep chilled. We marinated it overnight.

Prepare barbecue (medium-high heat). Brush grill rack lightly with oil. Grill steaks to desired doneness, 3 to 4 minutes total per side for medium-rare, turning steaks 1/4 turn after 1 1/2 minutes to form crisscross grill marks, if desired. Transfer steaks to cutting board; let rest 5 minutes. Thinly slice steaks across grain. Transfer to platter and serve with Aji Sauce and Colombian Guacamole.

Aji Sauce
we did a half recipe - full recipe is below

1/2 cup coarsely chopped seeded jalapeño chiles (about 4 large)
1/2 cup coarsely chopped green onions (about 2 large)
1/3 cup coarsely chopped sweet onion (such as Maui or Vidalia)
1/4 cup coarsely chopped fresh cilantro (I added more)
2 tablespoons (or more) red wine vinegar or fresh lime juice (I used a little white wine vinegar and more lime juice)
3/4 teaspoon coarse kosher salt
1/4 teaspoon freshly ground black pepper

Combine jalapeño chiles, green onions, sweet onion, and cilantro in processor; puree until paste forms, scraping down sides of bowl with rubber spatula several times. Add 2 tablespoons vinegar and process until mixture is blended but some texture still remains. Transfer to small bowl. Stir in 3/4 teaspoon coarse salt, 1/4 teaspoon pepper, and more vinegar to taste, if desired. DO AHEAD: Can be made 1 day ahead. Cover and refrigerate.


This recipe would have been great as a fajita, wrapped in tortillas. I opted for over a bed of arugula served with a little bit of corn tortilla on the side. That way I had some bites of "salad" and some bites of a wrapped up tortilla "taco." The meat was so tender and juicy - not always characteristic of flank! I could really pick out the grass-fed flavor profile as well as the beer - a dark German beer.

For company, this is a fantastic make-ahead meal that comes together in just minutes once it's time to cook!

Friday, March 25, 2011

Chicken with Smoked Mozzarella, Prosciutto and Mushrooms with Lemon Roasted Broccoli

A stuffed/rolled chicken breast is a fabulous way to use a combination of ingredients left lying around in the refrigerator. Our classic is probably a prosciutto with roasted red pepper and goat cheese. This time around - we opted for a smoky theme with prosciutto, smoked mozzarella, and sauteed mushrooms.

Preparation is quite simple and can be open to interpretation.

The basic steps that we took were:

1) Make sure chicken is not straight out of the refrigerator - it should sit out at least 15 minutes before preparing the meal.

2) Place chicken on a flat surface and cover with saran wrap or wax paper. Pound meat with a mallet or other heavy tool so that the meat is thin (but not broken) and even throughout.

3) Season both sides with salt and pepper.

4) Meanwhile, saute sliced mushrooms (we used cremini) with a little bit of butter and thyme (if you have white wine, that would be a good addition as well) until the mushrooms have released their liquid and are tender. Set aside.

5) On the inner 2/3rds of each piece of chicken, lay a piece (or two) of prosciutto. Top with a layer of mushrooms. Sprinkle liberally with grated smoked mozzarella.

6) Carefully roll the chicken breast from top to bottom (versus length-wise) and secure the ends with toothpicks. Alternatively, if you do not have toothpicks (we did not) use kitchen twine to wrap the chicken so that it is secure and will not fall apart during cooking.

7) Dip chicken pieces in flour and pat of excess flour so that there is a light coating around the entire chicken breast.

8) In a skillet, heat some EVOO and add the chicken pieces to brown each side but not cook through - about 1.5 minutes on each side.

9) Place chicken (either in the same skillet or on a baking sheet) in a pre-heated oven at 325 degrees to finish cooking the chicken so that the internal temperature reads around 160 degrees (accepted temp is 165 - but the chicken will rest and likely continue to heat).

10) Let the chicken sit for about 5-7 minutes before serving.

Best presentation would have been to slice the chicken in 3-4 pieces - but clearly, we did not do that for the photo.

We served the chicken with some roasted broccoli that we blanched for 2 minutes and then dried and roasted, coated in EVOO and salt and pepper, until it started to turn brown. Then I added some lemon zest and lemon juice to finish it off.


not the best foodie picture, I know. oh well.

The smokiness of the chicken was stellar. The prosciutto with the smoked mozzarella was a perfect pairing - and then the mushrooms added a nice extra burst of texture. And I can't forget the broccoli (which was my task) that was so fabulous with the lemon. It adds a fantastic bright element that really brings out the best in the vegetable.

Sunday, March 13, 2011

Gnocchi with Boar Ragu

Funny thing. I suggested the boar ragu. My-oh-my, how things have changed!! Derek's parents were in town and we wanted to cook at least one decent meal during their stay (the rest of the cooking was left to the wonderful San Francisco restaurants). For some reason, a trip to the Ferry Building meat market to pick up some "exotic" meat sounded like a fun experience for all - and boar was the first meat that came to mind. Along with it, I was thinking a great ribbon-like pappardelle pasta - but Derek had another idea - homemade gnocchi!

After watching numerous episodes of Top Chef - seeing the judges cite gnocchi as being the critical flaw that sends chefs packing - I was a bit weary of having Derek take on this challenge, one that he nor I had ever attempted before. We all know that a dense gnocchi is like a heavy dumpling that falls straight to the pit of your stomach. And then there's the other end of the spectrum where the gnocchi is mushy and blends into the sauce. My comment to Derek: Good Luck!

I figured I'd help with the boar ragu and leave the rest to him since I didn't want to get blamed for anything that didn't work out - quite the partnership we have :)

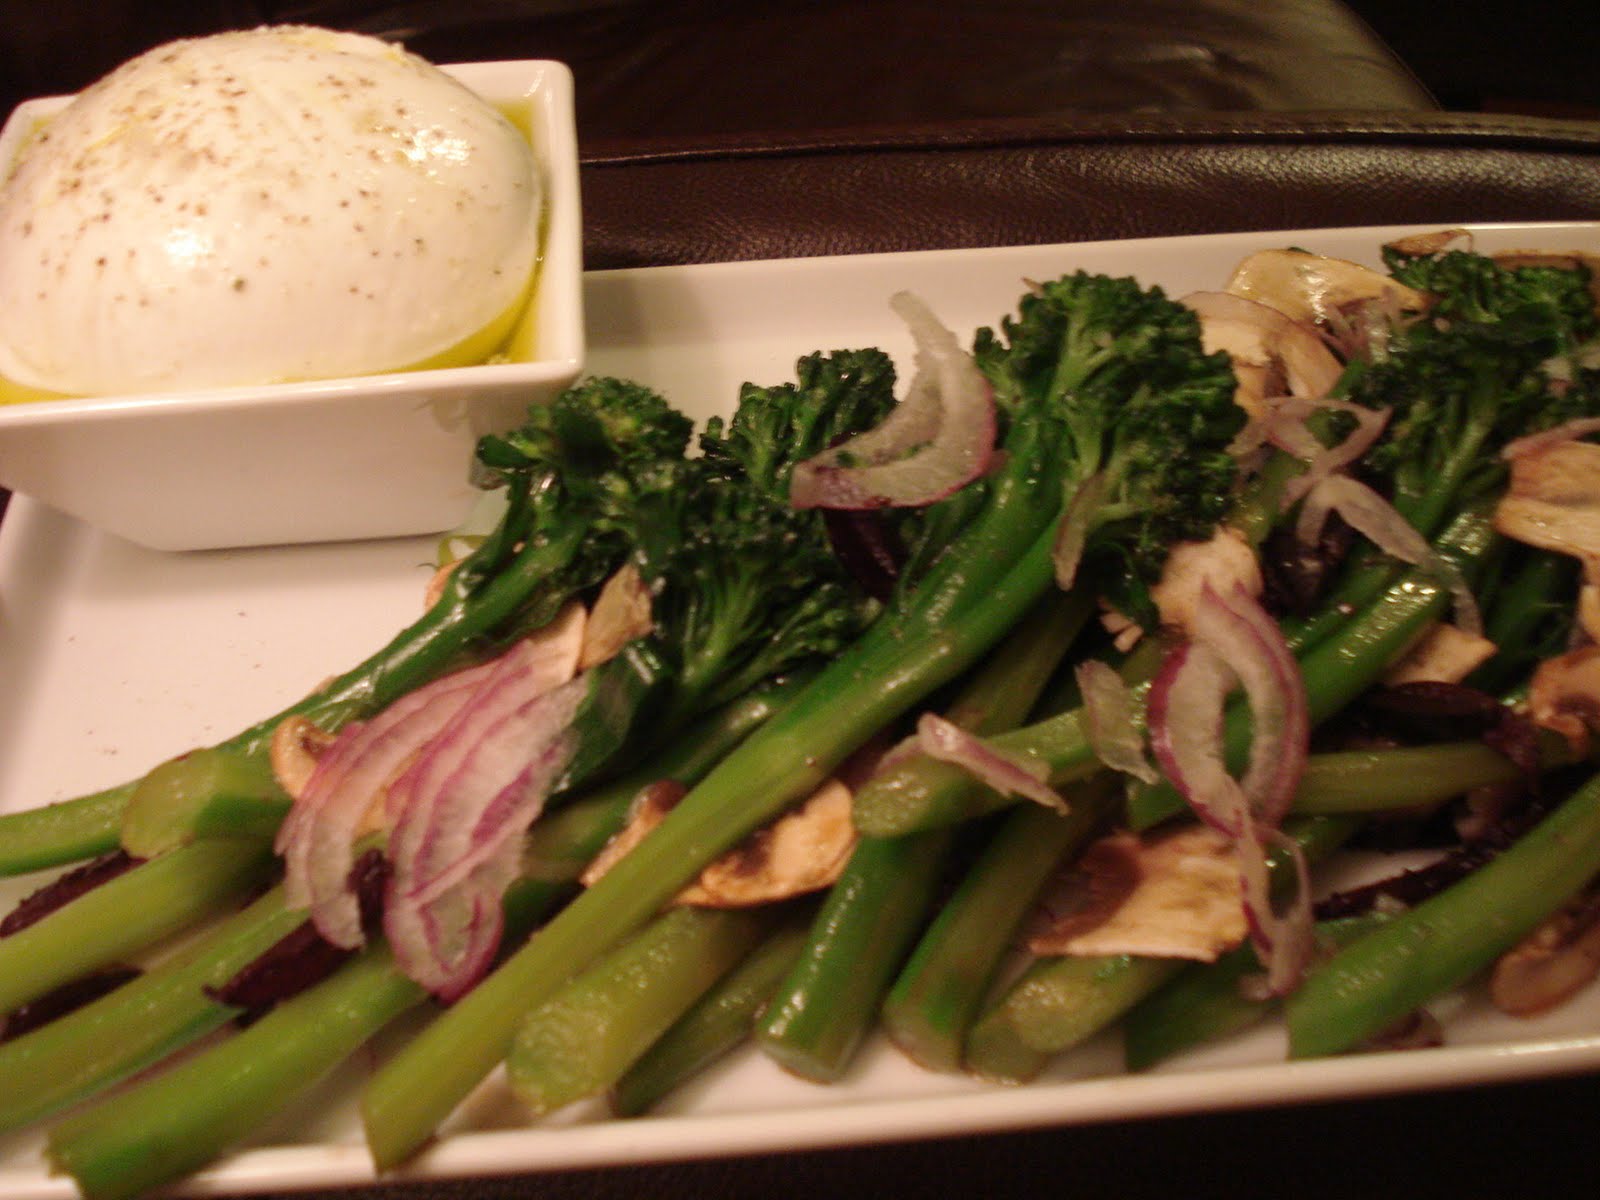
For starters, Derek made the Broccolini Salad from Ad Hoc that he had previously made. Simply blanched broccolini, ends peeled and trimed, with some EVOO, salt and pepper. Garnished with thinly sliced mushrooms and red onion. Topped with a homemade balsamic vinaigrette and served alongside a mound of fresh mozzarella with some EVOO and salt on top. A good way to start the evening off.

Emeril supplied us with the fantastic boar ragu recipe that we tweaked ever so slightly.

Emeril's Boar Ragu

original recipe HERE

2 tablespoons olive oil
1/4 pound pancetta, cut into small dice
1 1/2 pounds wild boar shoulder, cut into 1/2 inch cubes
2 tablespoons Emeril's Essence (this should be a staple in every kitchen!)
1 cup finely chopped yellow onions
1/2 cup finely chopped celery
1/2 cup finely chopped carrots
1 pound portobello mushrooms, stems removed, wiped clean, and chopped
1 tablespoon minced garlic
1 cup dry white wine
1 (14-ounce) can diced tomatoes and their juices
2 tablespoons tomato paste
1 cup dark chicken stock, or chicken broth
1 teaspoon salt
1/2 teaspoon freshly cracked black pepper
1 tablespoon chopped fresh sage leaves
1 tablespoon chopped fresh thyme leaves

In a large heavy pot, heat the oil over medium-high heat. Add the pancetta and saute, stirring often, until the fat is rendered and the pancetta is light brown and crispy, 2 minutes (we cooked it for a bit longer - our pancetta chunks were probably a little bit larger than what the recipe calls for, on purpose). Season the boar with the Essence, and add to the pan. Cook, stirring, until browned on all sides, 7 to 10 minutes. Add the onions, celery, carrots, and mushrooms and cook, stirring often, until very soft and starting to caramelize, 10 to 12 minutes (note: we had a lot of liquid in the pan at this point - from the meat and mushrooms...therefore, there wasn't much "caramelization" on the onions). Add the garlic and cook, stirring, for 1 minute.

Deglaze (again, not much "deglazing" to do as there was still liquid in the pan) the pan with the white wine and reduce until nearly evaporated, 3 to 4 minutes (...and it didn't totally reduce). Add the diced tomatoes, tomato paste, chicken stock, salt, pepper, sage and thyme and bring to a boil. Reduce the heat to medium-low, cover, and simmer, stirring occasionally, until the meat is very tender and the sauce is thick and fragrant, about 1 1/2 hours. (NOTE: Here the recipe calls for 1/2 cup of cream to be added, we omitted this ingredient, the sauce was rich enough!). Adjust the seasoning, to taste, and cover to keep warm while preparing the pasta.


Homemade Gnocchi

original recipe HERE

Gnocchi dough:
3 pounds russet potatoes (we used 2 lb)
2 cups all-purpose flour (scaled to 1 1/3 cup - but we then added more)
1 extra large egg (minus a little bit of yolk and white)
Pinch kosher salt

Directions
Place the potatoes in a large pot and just cover with cold water. Boil the whole potatoes until they are soft, about 45 minutes. While still warm, peel the potatoes and pass them through a food mill onto a clean pasta board (we don't have a food mill so I grated them on a stand-up food grater, not on the largest setting).

Make a well in the center of the potatoes and sprinkle with the flour. Place the egg and salt in the center of the well and, using a fork, stir the egg into the flour and potatoes. Bring the dough together, kneading gently until a ball is formed, and continue to knead for another 4 minutes, until the dough is dry to the touch. Cut a tennis-ball sized hunk of dough off the main ball and roll it into a dowel about 3/4-inch thick. Cut across the dowel to form pellets about 1 inch long. Flick each pellet down the tines of a fork to form the traditional gnocchi shape. Repeat with the remaining dough.

When you are ready to serve the gnocchi, bring 6 quarts of water to a boil and add 2 tablespoons salt. Drop the gnocchi into the boiling water and cook until floating aggressively, 4 to 5 minutes.

Drain and serve with boar ragu. Top with parsley and freshly shaved parmesan cheese.


So how did Derek do? For a first try, I'll give him a B for the gnocchi - I think that's pretty fair - perhaps a little on the soft side as we could tell that the dough simply needed more flour than the recipe called for. The second batch deserved a B+, it was cooked for a little bit longer I believe, and really yielded a nice texture. Soft, pillowy, a perfect partner to the killer boar ragu - that one gets an A. It was awesome. I nearly licked the bowl clean before I washed it...the boar was tender (not always characteristic of boar - Derek's first boar attempt back when we were living in NYC was less than successful and pretty tough), and the mushrooms added another meaty layer in addition to the pancetta.

I really understand and appreciate now how gnocchi is such an art - the success of the little potato dumplings relies on several factors that all need to align to produce a perfect product. I read in one article that they recommend baking the potato rather than boiling it - this reduces any excess moisture that would seep into the potato, throwing off the flour-potato ration. I think I'll try that next time, and then I may take a stab at sweet potato gnocchi as well...

Friday, February 18, 2011

Ad Hoc Chicken and Dumplings

When Derek says he wants to make chicken and dumplings, I immediately go into my memory box and pull out one of my favorite childhood comfort foods. A chicken soup with carrots and celery, only slightly thickened, with large puffy flour dumplings cooked right in the soup. The dumpling recipe, passed down from my grandma, is simple perfection:

Grandma’s Dumplings

2 cups all-purpose flour
1 teaspoon salt
4 teaspoons baking powder
3 tablespoons shortening
1/3 cup milk
2 eggs

Mix together the dry ingredients. Cut in the shortening. Add the milk and eggs. Drop onto boiling soup and cover pot while the soup continues to boil for 15 minutes.


Easy enough!

However, it's no surprise that Derek was talking about a completely different creature when he spoke of chicken and dumplings. Leave it to Thomas Keller to complicate one of the most simple comfort foods!

Ad Hoc Chicken Soup with Dumplings

slightly adapted and scaled down to feed 2

1/2 tbsp butter
1/2 cup thinly sliced carrots
1/2 cup coarsely chopped celery
1/2 cup coarsely chopped onion
1/2 cup coarsely chopped leeks
salt

Melt the butter over medium heat in your stock pot and add the carrots, celery, onions and leeks. Place a cut out circle of parchment paper on top, reduce the heat and cook for 30-35 minutes, stirring occasionally.

When the vegetables are done, add the chicken stock and simmer for about 30 minutes, then strain the soup base into another pot and discard the vegetables.

Dumplings
1/4 cup water
2 tbsp butter
1/2 tsp and 1/4 tsp salt
1/3 cup all purpose flour
1/2 tsp Dijon Mustard
1 large egg
1/2 tablespoon finely chopped flat-leaf parsley

Fill a large pot with salt and water and bring it to a simmer.

Combine the 1/4 cup water, butter and 1/2 tsp salt in a medium saucepan and bring it to a simmer over medium-high heat. Add the flour all at once, reduce the heat to medium and stir rapidly. The dough will come together in a glossy ball. Continue to cook the dough for about 4-5 minutes, stirring constantly. A thin coating of dough will form on the bottom of the pan.

Transfer the dough to a stand mixer and add the mustard, 1/4 tsp salt and mix to incorporate and release some heat. With the mixer on the lowest speed, add the egg and beat until it is completely incorporated. Add the flat-leaf parsley and stir in. If you don’t have a stand mixer, you can do this all by hand, it will just take longer for the egg to mix into the dough.

Shape the dumplings into quenelles using two soup spoons to scrape the dough into oblong football shapes or just drop into the simmering water. Once the dumplings rise to the surface, cook them for 5-6 minutes to ensure that they are cooked. Cut one open to make sure. Set aside.

1 qt chicken stock
3/4 cup peeled celery diagonally sliced into 1 1/2 inch long pieces
3/4 cup carrots, cut into quarters then diced into bite sized pieces
1/2 tsp honey
1 bay leaf
1 sprig of thyme
1 small garlic clove, crushed, skin on
salt and pepper
roux – 4 tbsp butter, 1/4 cup + 1 1/2 tbsp flour (we cut this down by a little more than half)
1 cup cooked, shredded chicken
1/8 cup chopped chives

Melt the butter in a small saucepan over medium heat. When it is nearly melted, whisk in the four and cook, whisking constantly and adjusting heat as necessary so the roux bubbles but does not brown, about 3 to 4 minutes. Set aside to cool.

Blanch the celery briefly and put in an ice bath. Cover the carrots with water and add the honey, bay leaf, thyme, garlic clove and salt and pepper. Simmer for about 4-5 five minutes, drain and set aside.

Bring the soup base up to a simmer and whisk in the roux a little at a time until the soup is thick enough to coat the back of a spoon. Simmer and skim for 30 minutes. Season to taste and add 1 tsp. champagne vinegar (we used white wine as we are out of champagne) and stir in chopped chives, reserving some for garnish.

Prepare each serving bowl with a portion of chicken, celery, carrots, and dumplings.


Pour the soup into the dumplings, chicken, carrots, celery; garnish with chives.


As you can see, no fluffy dumplings here and it's quite a bit more composed than what I grew up with. However, the mix of flavors was really fabulous. The mustard in the dumplings (essentially potato-less gnocchi) really brought a nice complexity to the otherwise simple flavor of the dish. The vegetables were not cooked down to a point of soft texture but rather, were quite "al dente." Derek said that he would have like the carrots cooked just a few minutes more since a crunchy vegetable isn't ideal in a soup - though it was interesting.

We also wish that there had been more broth - it was good and we were left wanting more. I especially liked that we did not thicken the broth up as much as the recipe called for. In the cookbook images, it seems as though the broth is more like a gravy. While it may have been equally as good - or even better - I voted for a healthier more soup-like texture to the dish.

For all of the time and effort of this dish, I'd probably still keep it second to my typical, easier, chicken and dumplings. However, for guests or a weekend that we have some time to prepare it, this was certainly a unique variation on a classic, comforting dish.

Tuesday, February 15, 2011

Carne Asada Tacos or Salad

A break from the Ad Hoc at Home recipe binge!! This time Derek went back to his "roots" and opted for a Bobby Fly recipe instead. This post is following suite with several of my recent posts that are void of the true recipe that was followed to make the final product. Why? Because I had very little to do with it.

Derek wanted to make tacos and I opted for a salad using similar base ingredients:

Carne Asada Tacos (or Salad)
http://www.foodnetwork.com/recipes/tyler-florence/tacos-carne-asada-recipe/index.html

Ingredients

1 pound flank steak, trimmed of excess fat, cubed
1 recipe Mojo, recipe follows
Olive oil, for coating the grill
Kosher salt and freshly ground black pepper
"Red Sauce"

Directions
(steak portion mainly Bobby Flay's Recipe) Lay the flank steak in a large baking dish and pour the mojo over it. Wrap tightly in plastic wrap and refrigerate for 1 hour or up to 8 hours, so the flavors can sink into the meat. Don't marinate the steak for more than 8 hours though, or the fibers break down too much and the meat gets mushy.

When ready to cook, heat a little olive oil in a pan and saute the beef until cooked medium to medium well (your call). Add salt and pepper if desired. Stir in enough red sauce to coat the meat - heat for about a minute.

Mojo:
2 garlic cloves, minced
1/2 jalapeno, minced
1 handful fresh cilantro leaves, finely chopped
Kosher salt and freshly ground black pepper
1 lime, juiced
1/2 orange, juiced
1 tablespoons white vinegar
1/4 cup olive oil

Place all ingredients except the olive oil in a blender and blend until a paste is formed. Slowly stream in the olive oil while continuing to blend the mixture.


Pico De Gallo:
2 vine-ripe tomatoes, chopped
1/4 medium red onion, chopped
1 green onion, white and green parts, sliced
1/2 Serrano chile, minced
1 small handful fresh cilantro leaves, chopped
2 garlic cloves, minced
1/2 lime, juiced
2 Tbsp. extra-virgin olive oil
1 teaspoon kosher salt

In a mixing bowl, combine all ingredients together. Toss thoroughly. Let it sit for 15 minutes to an hour to allow the flavors to marry.


"Red Sauce"

In addition to Bobby Flay's recipe, Derek made a red sauce - I do not know of any other term to classify it - but it was incredible. After cooking the steak, which he cut into cubes, he tossed the beef with the just enough of the red sauce (maybe 2-3 Tbsp.) in the pan to coat the steak and warm the sauce. The rest of the sauce was reserved for topping the tacos or salad, or eating with a spoon as I couldn't help but do...

2 large tomatoes, chopped
2 jalapeno peppers, chopped
1 white onion, quartered
4 cloves garlic, peeled
4 dried New Mexico chile pods
1 pinch salt and pepper to taste
about 1/4 tsp. each of cumin, cayenne, ancho chili powder, onion powder
2 Tbsp. EVOO

Place the tomatoes, 1 onion, jalapenos, and 4 cloves of garlic onto a baking sheet. Roast in the oven for about 20 minutes, until toasted but not burnt. Place the roasted vegetables, soaked chile pods, and spices into a blender or food processor, along with salt and pepper. Puree until smooth. Stream in the EVOO and blend.


For Tacos:
Homemade corn tortillas (used a recipe off of the masa flour bag)
Carne Asada
1/2 cup Pico de Gallo, recipe follows
2 limes, cut in wedges for serving
sour cream
avocado slices
"red sauce"


For Salad:
Torn butter lettuce, washed and dried
Corn Salsa (corn, lime juice, minced red onion, chopped cilantro, salt)
Pico de Gallo
avocado slices
Carne Asada
red sauce
jicama matchsticks
orange vinaigrette


That red sauce was to die for - it was certainly my surprise favorite of the meal. There's not much else to comment on - fairly standard meal components that went together beautifully.

Roasted Breast of Chicken and Vegetables (adapted from Ad Hoc)

And so Derek continues to plow through the Ad Hoc cookbook for guidance and meal perfection. Next stop: Chicken.

Rather than buying a whole chicken, he simply purchased a full chicken breast - bone-in, skin on - which has two full chicken breast servings on it. For two people, it's perfect, potentially with a little bit of leftovers to boot.

We didn't have turnips or rutabagas like the recipe called for so we just modified the roasted vegetable portion to include what we already had on hand. Don't be confused with the actual directions - they are for a whole chicken and the original vegetables. Cook time for a chicken breast needs to be based on internal temperature and not the time listed below so a thermometer is key - best to have on that can keep a constant read on the temperature while the meat is in the oven.

ROAST CHICKEN WITH ROOT VEGETABLES
(adapted from Thomas Keller’s Ad Hoc)

INGREDIENTS ARE WHAT WE USED, MODIFIED FROM WHAT THE ORIGINAL RECIPE STATED

1 whole chicken breast
1 clove garlic, mashed
fresh thyme sprigs
salt and pepper
5 medium carrots, peeled and chopped
2 cippolini onions, peeled and wedged (we used part of a red onion too)
1 medium potato (we had russet), skin-on and chopped
2 Tbsp. canola oil
1 T butter
1/2 lemon

RETURN TO THOMAS KELLER'S ORIGINAL RECIPE:

Remove the chicken from the refrigerator 1.5 hours before roasting.

Heat the oven to 475F.

Season the chicken inside and out with salt and pepper, add the garlic, 4 thyme sprigs, and the lemon half in the cavity. For a nicer presentation, truss the chicken.

Cut the rutabagas and turnips in similar sized pieces, about 3/4 inch wedges. Cut the carrots in half crosswise and again lengthwise. Keep the young potatoes whole, or, if they are a bit too big cut them in half. Place all veggies in a large bowl, add 1/4 cup of canola oil, 2-3 thyme sprigs, salt, pepper, and toss well. Transfer them to a roasting pan, make a small space in the center to place the chicken. Rub the remaining canola oil all over the skin of the chicken, seasoning it again with salt and pepper.

Just before roasting, add pats of butter over the breast, or brush with some duck fat (it gives a deeper flavor to the chicken,).

Roast at 475F for 25 minutes, lower the temperature to 400F and roast for 1 hour, but check the internal temperature after 45 minutes, if it reaches 160F remove the chicken from the oven. Allow the chicken to rest under an aluminum foil tent for 20 minutes before carving.

A few minutes before serving, place the roasting dish on the stove and heat the vegetables, moving them around to coat with the juices accumulated during roasting.


The vegetables were to die for. Why? because they were cooked in all of the chicken goodness for a long period of time. Therefore, they were probably not the healthiest version of the vegetable possible, but they were incredible. I don't see how any anti-vegetable person could not like them.

As for the chicken, due to the shape of the chicken breast, one part of the breast was super tender and moist while the other was probably equivalent to a normal piece of chicken that you'd be happy with but is just a little bit on the dry side. Both were tasty but when biting into a tender piece after a slightly dry one - wow, the difference is apparent.

This recipe is best eaten skin on. I was amazed by how crispy the skin was - like potato chip crispy. though I tried a few bites with the skin and realize that it's definitely the way to go taste-wise, for health reasons, I removed most of the skin and have to then season the actual meat with a little salt, pepper, and lemon juice to add a little more flavor. The chicken with the skin is certainly flavorful enough on its own.

Another restaurant quality meal compliments to Thomas Keller and Derek for interpreting his directions!

Saturday, January 22, 2011

West Indian Curried Chicken Roti with Curried Collard Greens

Through our exploration of Indian flavors in homemade cooking we have had a lot of ups and downs, learning new lessons along the way. Some of these lessons include:

1. Know your spices. Indian food is based on the perfect blend of spices - consisting of several elements foreign to most American dishes. The mentality of "throwing a little bit of this and a little bit of that" is not as forgiving when it comes to Indian cooking.

2. Similar to #1 but deserving of its own bullet point - turmeric: do not overdo it. Though it has great health benefits - it can completely make or break a dish (as I have learned the hard way). According to Whole Foods' description, turmeric has a peppery, warm and bitter flavor and a mild fragrance slightly reminiscent of orange and ginger, and while it is best known as one of the ingredients used to make curry, it also gives ballpark mustard its bright yellow color. Key word: BITTER. If you use too much, your Indian dish that is supposed to be well rounded will instead be bitter.

3. Release the flavor of the spices by first heating them up in some oil to make a quasi-spice paste. You will be amazed by how much flavor will come out of a little bit of powder.

4. Use whole spices and grind them yourself - again, much more flavor will come out.

5. If using chilies in the dish, give them a little taste test first before adding them in, some are far more spicy than other, even within the same family, so you will want to adjust the amount that you add to the dish based on the spice level and your own personal tolerance.

6. Spices, spices, spices (see #1) - just have to reiterate the fact that this is what Indian cooking is all about. Stock up on the key Indian spices and make your own curry mixtures, you'll be AMAZED by how you can create a meal that tastes much like what you would get in an Indian restaurant with the key being your homemade curry powder!

FYI - curry powder isn't only that yellow stuff you buy in the store but rather a blend of Indian spices with nearly limitless variations. We've had a good time trying them out - each version creating a totally unique and wonderful flavor for the dish.

Our source (well Derek's source, he made the entire meal) was not an Indian cooking guru, but rather our beloved Emeril who has a knack for spices of his own (i.e. Emeril's entire line of fabulous blends that seem to truly kick each dish up on notch.)

West Indian Curried Chicken Roti

Original Link on FoodNetwork.com
(we used about a half recipe)


Ingredients
2 tablespoons ground turmeric
1 tablespoon crushed dried chili flakes
1 tablespoon cumin seeds
1/2 tablespoon coriander seeds
1/2 tablespoon ground cloves
1/2 tablespoon ground ginger
1/2 tablespoon garlic powder
1/2 teaspoon yellow mustard seeds
1/2 teaspoon ground black pepper
1/2 teaspoon ground allspice
1/8 teaspoon ground cinnamon
2 teaspoons salt
1/4 cup vegetable oil
1 chicken, cut into 8 pieces
2 cups chopped onion
1 tablespoon minced garlic
2 teaspoons minced fresh ginger
2 sprigs fresh thyme
1/2 hot pepper, such as Scotch bonnet or serrano, seeded and finely chopped, or to taste
2 cups chicken broth
1 can unsweetened coconut milk
1 tablespoon light brown sugar
2 tablespoons finely chopped fresh cilantro
1 recipe West Indian Bread for Roti, recipe follows, breads kept covered and warm

Directions
In a medium skillet or saute pan combine the turmeric, chili flakes, cumin seeds, coriander seeds, cloves, ginger, garlic powder, mustard seeds, pepper, allspice, and cinnamon and cook, shaking the pan frequently, until spices are fragrant and just beginning to smoke. Remove from the heat, transfer to a shallow plate and allow to cool completely. Transfer to a coffee grinder or spice mill and process until very finely ground. Reserve 6 tablespoons of the spice mixture separately and transfer the remainder to an airtight container and save for another purpose.

In a mixing bowl combine the chicken, 2 tablespoons of the curry powder, 1 teaspoon of the salt and 2 tablespoons of the vegetable oil and set aside, covered, for 20 minutes.

In a large Dutch oven, heat the remaining 2 tablespoons vegetable oil, and, when hot, add the chicken pieces and cook, turning occasionally, until golden brown on all sides, about 8 minutes. Add the onion, garlic, ginger, thyme, hot pepper if using, and remaining 4 tablespoons curry powder and cook, stirring, until the vegetables are soft, about 4 minutes. Add the chicken broth, coconut milk, and brown sugar and bring to a simmer. Add the remaining teaspoon of salt, and cook, stirring occasionally, until chicken is very tender and falling from the bone and the sauce has reduced enough to coat the back of a spoon, about 1 1/2 hours. Stir in the cilantro and adjust seasoning, if necessary.

(Note: traditionally, curried chicken roti is eaten with the chicken still on the bones. If you prefer otherwise, at this point you can remove the chicken from the sauce and remove the meat from the bones and then return the meat to the sauce before serving.)

Serve the chicken and sauce ladled into the center of the roti breads, then fold both sides over the filling. Fold the top and bottom ends over the sides to form a neat square package, and serve.

West Indian Bread for Roti:
4 cups all purpose flour
2 tablespoons baking powder
1 teaspoon salt
1 tablespoon vegetable oil, plus more for cooking roti
1 cup water
To make the breads, combine the flour, baking powder and salt in a mixing bowl and make a well in the center. Combine the oil and water and add this mixture to the well. Using your hands, mix to form a dough. Knead for about 5 minutes, or until the dough is smooth. Divide the mixture into 6 balls of dough and set aside for about 2 hours, covered with a damp kitchen towel. On a lightly floured surface, roll each ball of dough into a thin, flattened circle about 9 inches in diameter. Set aside, covered, until ready to cook the breads to serve. (Do not stack.)

Heat a large griddle or 12-inch skillet over high heat and add 2 teaspoons of vegetable oil. When hot, add the bread dough and cook until brown spots form on the bottom, about 1 minute. Turn the bread and cook on the second side, about 1 minute longer. Transfer to a large plate or baking sheet and cover with a damp towel to keep warm while you prepare the remaining breads.

Yield: 6 large roti breads


Ever since we started making our own curry powders, the level of authenticity to our Indian dishes has sky-rocketed. Once again Derek commented (and I agreed) that this was a dish that we'd likely receive from a restaurant - and a good one at that. The sauce (curry) was just incredible, so many flavors jam packed into one bite. And the chicken was so moist and tender. Nicely done Derek.

The roti was a little bit less successful. It tasted like pancakes. Perhaps that was what it was supposed to taste like, but they were just a bit thick and reminiscent of pancakes for my taste...but then again, with the curry, it went pretty well.

We also braised some collard greens with shallots, garlic and vegetable broth and added some curry powder leftover from another recipe we had made. This one was a bit sweeter and therefore, went really well with the fairly spicy chicken curry. Though our goal isn't necessarily to master the art of Indian cuisine, I don't think that is a realistic goal, I think we're getting pretty successful at creating fairly authentic basic recipes - and that's good enough for me.

Sunday, January 9, 2011

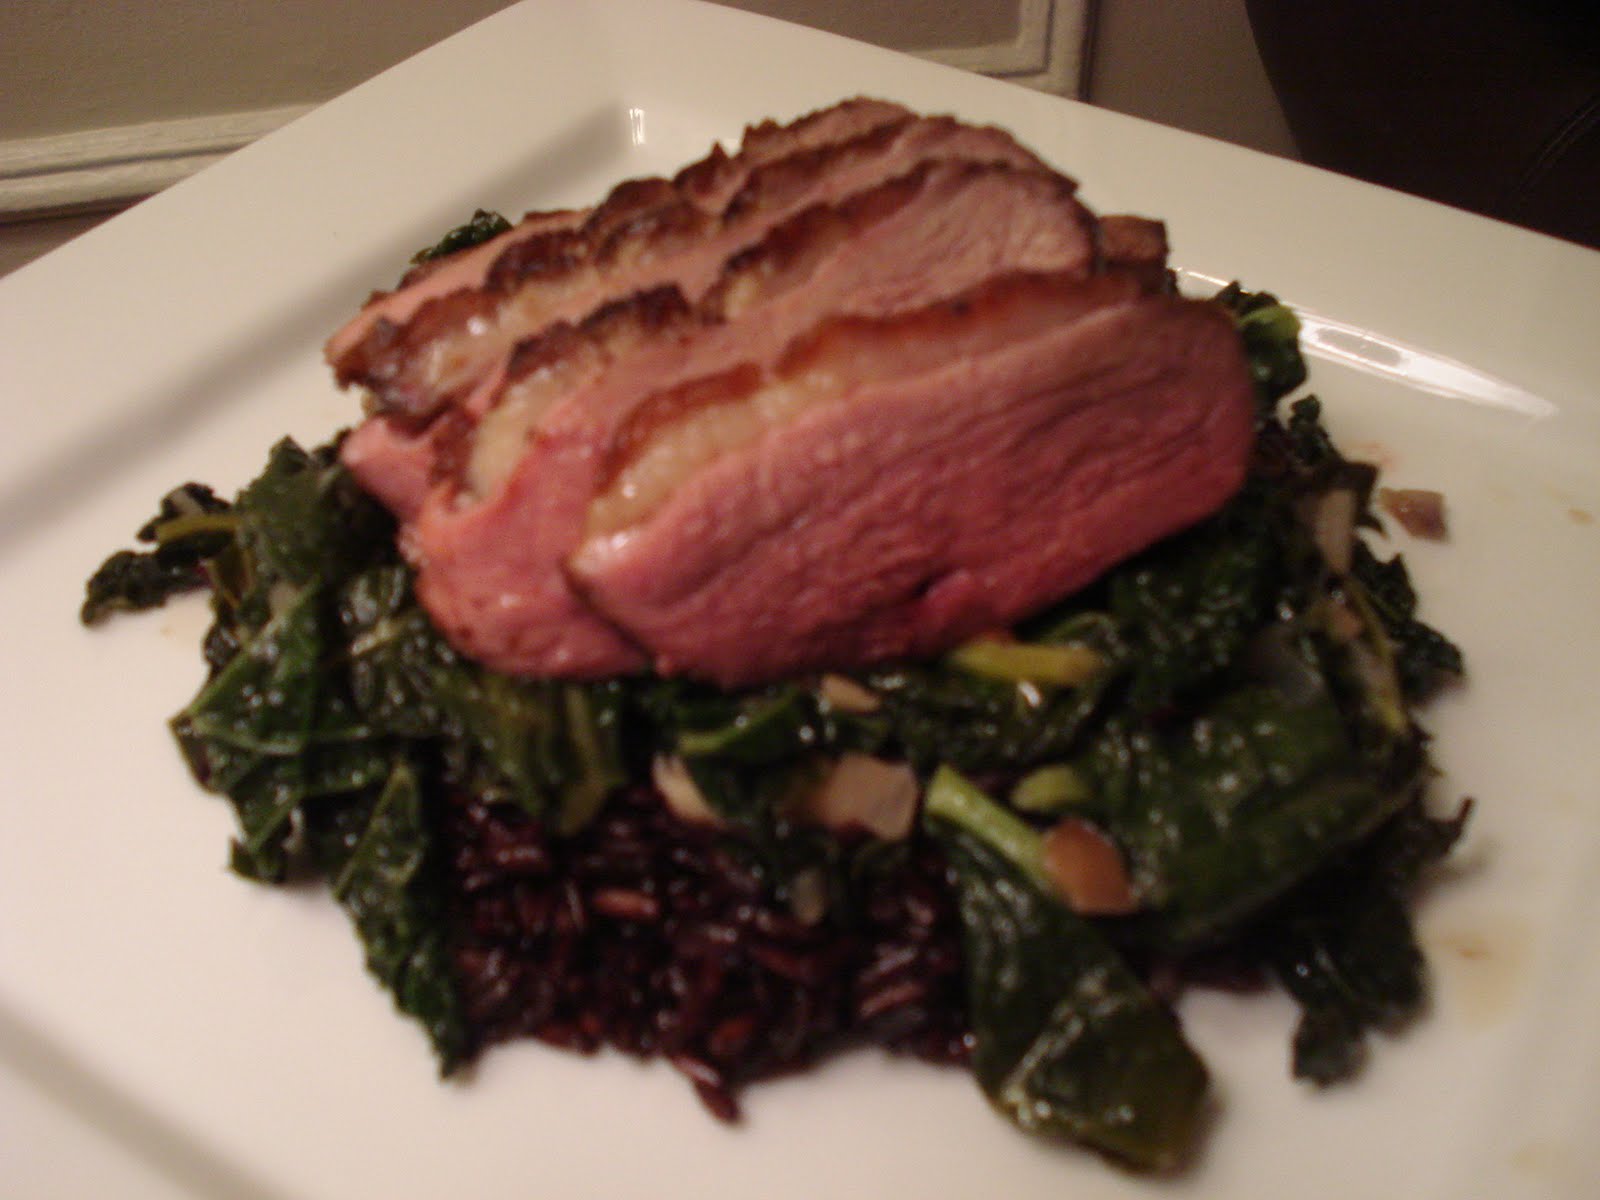
Pan Roasted Five Spice Duck with Asian Kale and Black Jasmine Rice

This meal was designated as Derek and my "Christmas Dinner" since we made it on the night that we celebrated Christmas - only a few weeks after the actual day. Since I had already had prime rib, I opted out of make that. When Derek came up with duck, I though "perfect!" with a nice Christmas-y Chinese Five Spice - that will be very holiday like. Though the meal still had a hint of Christmas, it evolved into a clearly Asian dish, a feature I wouldn't necessarily associate with my fond memories of celebrating a Christmas in the US. No complaints, though, it was delicious.

Pan-Roasted Five Spice Duck Breasts
adapted from Thomas Keller's Ad Hoc at Home

Ingredients
2 duck breasts
Kosher salt and ground black pepper
Chinese Five Spice Powder
1 orange
Balsamic vinegar
2 thyme sprigs
2 bay leaves
Canola oil


1. Using a sharp knife, cut a 1/4-inch crosshatch pattern in the skin of each breast, being careful not to pierce the meat. Do this while the duck is cold, since it's difficult to make such precise cuts at room temperature.

2. Turn the duck breasts skin-side-down on the baking sheet. If the tenderloins, the smaller piece of meat that runs along the bottom of the breast, are still attached, leave them on the breasts. Use a paring knife to remove the small white tendon that runs through each tenderloin. You will see a vein that runs the length of each breast. Run your finger down the length of each vein, and if any blood comes out, wipe it away with a paper towel.

3. Season the flesh side of each breast with salt, pepper, and a sprinkle of five spice powder. Grate a little orange zest over each breast and sprinkle with a few drops of balsamic vinegar. Lay a sprig of thyme running lengthwise down the center of each breast and cover with a bay leaf. Turn over and season each breast with a generous pinch of salt and a grating of nutmeg. Refrigerate, uncovered, for at least 1 hour, or up to 12 hours.

4. Preheat the oven to 400 degrees F.

5. Set a cooling rack over a baking sheet. Set a metal bowl or other container near the stove. With a paper towel, blot any moisture from the duck breasts. Season both sides of each breast with a pinch of salt.

6. Pour some canola oil into a large ovenproof frying pans over medium-low heat. Add the duck skin-side-down. Move the duck breasts every few minutes to help them brown evenly. As the fat is rendered, carefully remove the excess from the frying pan (there will be more than you would expect!): move the pan away from the heat when you remove the fat, since if any fat hits the flame it will cause flare-up.

7. Cook the duck for a total of 20-25 minutes, until the skin is an even rich brown and very crisp; the internal temperature of the breasts should be approximately 115 degrees F. Flip each breast and just "kiss" the meat side for about 30 seconds.

8. Put the duck skin-side-down in the oven and cook for about 5 minutes. The internal temperature should be 125 degrees F for a rosy medium-rare.

9. Put the duck breasts skin-side-down on the cooling rack and let rest for 5-10 minutes before slicing. Cut each piece of duck lengthwise into 3 slices. Sprinkle meat with salt and pepper.


This is probably one of the only dishes that I will happily eat fat. Typically it is not my thing - on steak? no thank you. on duck? yes please - but not TOO much. It really is where all the flavor it and it simply melts in your mouth. Think of it as slathering butter on a piece of bread. Sure, bread is fine by itself but when you put some butter on top, it transforms the simple bread into simple decadence. Same idea with the fat on the duck breast. It has transforming powers. It is also topped with the fantastic crust with the five-spice powder that I am a huge fan of. Ginger, Cinnamon, Nutmeg, Star Anise, Cloves...or some variation following similar flavors. It is essentially Christmas in a powder form..ahh.

The duck was tender and delicious and I don't need to say anything else positive about it - just look at the blurry picture, it does it enough justice.

My contribution to the meal was the Asian Kale that I braised with ginger, sesame oil, onion, garlic, vegetable stock - and maybe some soy sauce, I cannot remember precisely. Needless to say I did not follow a recipe but it turned out fantastic.

Finally, the black jasmine rice added a nice roundness to the dish.

Merry Christmas #2.

Monday, January 3, 2011

Christmas Dinner: Blow Torch Prime Rib and Popovers

Yes, I had a Thomas Keller recipe show up all the way in South Carolina for my family's Christmas dinner. Every year we do a roast or a nice cut of beef so while I was flipping through Ad Hoc and came across a recipe using a blow torch on a roast, I was excited to give it a try and hoped my Dad would be OK with using this method as our base recipe for Christmas. Luckily I didn't have to do much convincing - perhaps because what guy would not want to torch a piece of meat with a man tool?

As with most Thomas Keller recipes - the product is fairly simple, leaving some room for creative variation. In this case, rather than seasoning the roast with just salt and pepper (which I'm sure is fine on its own) - we decided to make a simple rosemary and garlic rub to introduce some unique complimentary flavors to the roast.

Given that I'm not a meat master, I kept the prime rib under my Dad's control while I focused on making some of the side dishes. He knows what he's doing so I knew that the combination of my Dad and Thomas Keller was sure to produce a wonderful product.

Blow Torch Prime Rib Roast

Ingredients
One 2-bone center-cut rib roast (about 4½ pounds), trimmed of excess fat
Kosher salt
Coarsely ground black pepper
coarse sea salt
Rosemary Garlic Rub
Horseradish Cream (recipe follows)
Directions for Prime Rib Roast

Position an oven rack in the lower third of the oven and preheat the oven to 275°F.

Put the roast on a roasting rack in a roasting pan. Hold a blowtorch about 1 inch from the roast and turn to lightly brown the fat on all sides; the idea is to start the fat rendering and to torch the meat just until the surface begins to turn gray. Season the roast generously with salt and pepper.


Transfer to the oven, with the meat toward the back of the oven, and cook until the roast registers 128°F in the center. The total cooking time will be about 2 hours, but begin to check the temperature after 1½ hours. Remove from the oven and let rest in a warm spot for at least 30 minutes for medium-rare.

To carve, cut the meat away from the bones. Separate the bones and put them on a serving platter. Cut the roast in half through the center, turn each piece cut side down, and slice straight down into slices that are about ½ inch thick. Arrange the meat on the platter and sprinkle with gray salt and pepper.
Serve with the horseradish cream on the side.


Horseradish Cream Recipe

makes about 1 cup
Ingredients for Horseradish Cream

½ cup very cold heavy cream
2 tablespoons sherry vinegar
About ¼ cup drained prepared horseradish
½ teaspoon fleur de sel, or to taste
½ teaspoon freshly ground black pepper, or to taste
Directions for Horseradish Cream

This is a basic, and very easy, horseradish sauce—prepared horseradish and cream, seasoned with salt and pepper and a little bit of sherry vinegar. It goes especially well with grilled or roasted beef, like this prime rib roast, and the Peppercorn-Crusted Beef Tenderloin (page 47).
Put the heavy cream and vinegar in a medium bowl and whisk until the cream holds a soft shape. Whisk in the horseradish, salt, and pepper.
Refrigerate in a covered container for up to 1 week.

served with Balsamic Glazed Cippolini Onions, Speck Wrapped Asparagus, and Popovers


I am not a fan of horseradish so I can't say I tried the sauce. I ate my prime rib all on its own - no sauce needed. It was certainly flavorful enough on its own - the meat was tender and juicy - with a nicely browned crust despite the low cooking temperature - I think this was the biggest benefit of using the blow torch - allowing for the beautiful crust.

As with most Christmases, the popovers failed. Typically they either burn or do not pop enough. This year, the latter was the case. It's comical - because it is a tradition to have no-so-perfect popovers! Now I must give my Dad credit, I have had a perfect popover during some Christmas dinner - but the ratio of good to bad makes it laughable that we still make them!! Mind you even the unpopped popovers taste really great - and the burnt ones are fine if you peel away any part that is too black - but after this Christmas dinner I was on a quest to try my hand at making these difficult little creature. A few nights after Christmas we had a lamb dinner and I requested to take charge of the popovers and see just how hard they were!

Here's the basic recipe that I used:

Popovers

Ingredients:
1 cup sifted all-purpose flour
1/2 teaspoon salt
1/4 teaspoon pepper
2 large eggs - room temperature
1 cup milk - room temperature
melted unsalted butter for brushing the popover pan

Directions:
Into a bowl sift together the flour and the salt. In a small bowl whisk together the eggs and the milk. Add the milk mixture to the flour mixture, stirring, and stir the batter until it is smooth. In a preheated 450°F oven heat a six-cup popover pan for 5 minutes, or until it is hot, brush the cups with the melted butter, and fill them half full with the batter. Bake the popovers in the middle of the 450°F. oven for 20 minutes, reduce the heat to 375°F., and bake the popovers for 20 minutes more, or until they are golden brown and crisp (mine needed only about 12 of the 20 minutes).


As you can see - they popped! You can only imagine my excitement when I watched them grow through the oven window. They were light and fluffy and crisp on the outside. I was pleased.

I think the key to popovers is following the nit-picky instructions such as room temperature eggs, room temperature milk, pre-heated popover pans - greased. I also read some recipes that called for chilled batter which I decided not to do. I had already left the butter and milk at room temperature so I thought that chilling the batter would then counteract that feature. However, I'd be open to trying it with another batch - maybe they would pop up even more!

Regardless - these were a success and fairly easy to make. Though I will not knock my Dad for producing "poor" popovers from time to time because I realize that he's been in charge of putting together the entire Christmas dinner. When you have a roast and have to make a sauce/gravy, and sides, and time everything perfectly - it's completely understandable that something as testy as popovers may not always cooperate. Now that I know my way around the kitchen, I'll help alleviate my Dad's responsibilities and perhaps take on the Christmas popovers again next year!

Sunday, December 19, 2010

Ad Hoc Peppercorn Filet Mignon with Broccolini and Bufala Mozzarella Salad

In just one week I had the best pork tenderloin of my life (see Ad Hoc Brined Pork Tenderloin) and also one of the best steaks of my life. Thank you Thomas Keller for creating such a fabulous, technically perfect cookbook with your Ad Hoc at Home. And thank you Derek for being able to follow directions. Yes, the steak recipe came from Ad Hoc at Home as well. As did the broccolini salad that accompanied it – just brilliant.

Derek’s newfound love interest in the kitchen…this cookbook…has been making posting about the meals quite simple in that he actually follows the recipe rather than creating a beautiful meld of several recipes and techniques found online. I think that the style of the recipes also fits in nicely with my preferred style of cuisine – taking quality ingredients and treating them with respect, bringing out the naturally exquisite flavors. Of course my other style of cuisine is a mishmash of vegetables and whatever is in my refrigerator…so that seems slightly contradictory – but then again it could just be the difference in wanting to take time and create a masterpiece and wanting to use up ingredients and create something easy and comforting – for my tastebuds at least.

This meal – one prepared by Derek certainly falls in the simple and perfect category. After all, the steak was a simple filet prepared with three ingredients – salt, pepper, canola oil. That’s it!! Seems like anyone could make it perfect, right? The key, though, is in the preparation. Simple, perfect, preparation.

Ad Hoc Peppercorn Filet Mignon

1/2 cup black peppercorns
Canola oil
6 8oz beef tenderloin steaks 1 and 1/2 inches thick
Kosher salt

Put peppercorns in a small saucepan and cover with 2 cups of canola oil. Bring oil to a simmer over medium high heat. Remove from heat and let peppercorns steep for 1 hour.

Drain peppercorns and crush with a mortar and pestle. Spread crushed peppers on work surface. Coat both sides of steaks and let sit for 30 minutes.

Preheat oven to 350.

Heat oil in cast iron pan over medium high heat. Season steaks with kosher salt. Add steaks to pan and sear for 4 minutes. Turn steaks and sear other side for 4 more minutes.

Transfer steaks to oven and cook for about 18 minutes for medium rare and 24 minutes for medium well. Remove from oven and let rest before serving.


Not wanting a ton of steak – I picked out the smallest one that the meat guy had – probably about 5 oz…maybe even 4.5 oz. It wasn’t large. But let me tell you…the flavor that came out of that little guy…wow. It was so much more satisfying than a 12 oz ribeye that you order at a restaurant. It was rich and tender and so evenly cooked – that was what surprised me the most. Oftentimes when you have a steak, you cut into the middle to see how it is done…because obviously the ends are more well done than you care. I wish I had taken a picture of the inside of my steak (would have been much better than the blurry image above…that was Derek’s steak). The end was as perfectly medium to medium rare as the middle was. And you could cut it with a butter knife (or so I assume…I didn’t try). The amount of pepper that Derek put on seemed very generous prior to cooking…we both expected a good hit of spicy black pepper when we took a bite. Instead the black pepper flavor was infuse into the steak but the spice and “kick” was gone! It was miraculous. And heavenly…and with a Frank Family Cabernet, for a moment in time I was elevated to a level of divinity.

And though I would have been thoroughly happy and satisfied with just my little steak in the middle of a big plate…savoring each morsel for dinner – I was even more fortunate to have an incredible side dish/salad – also coming from Ad Hoc – and actually the initial inspiration for the meal. While flipping through Ad Hoc contemplating what we should have for dinner, a picture of broccolini and mushrooms with some fresh burrata cheese caught my eye. I’m a sucker for burrata. I figured that the vegetables were boiled and/or sautéed…as were the mushrooms…so when I bit into what Derek delivered as the side dish, I was surprised – it really was a broccolini salad! Served cold! How fantastic!!! The mushrooms – not even cooked! The broccolini, briefly blanched to bring out the beautiful natural green – but still crisp to the tooth. Wow.

Broccolini and Bufala Mozzarella Salad

1 pound broccolini, thick ends removed and remaining stems peeled slightly, as in photo above
3 large cremini mushrooms, stemmed and cleaned
1/2 cup black Cerignola olives (it’s pretty important to get this particular kind because they are milder than most other olives. Whole Foods carries them on the olive bar.)
Kosher salt and fresh black pepper
Burrata cheese (the smallest round you can find, but you will definitely have leftovers)
Extra virgin olive oil
Sherry vinaigrette (see recipe below)
instructions

1. Bring a large pot of water to a boil. Salt generously before adding broccolini. While water is coming to a boil, prepare a large bowl of ice water. When water boils, add the broccolini and blanch until crisp-tender, about 4 minutes. Submerge broccolini in bowl of ice water to stop the cooking, then drain and pat dry with paper towels.

2. Cut the mushroom caps into paper-thin slices. I used a sharp paring knife, but the book suggests that a Japanese mandoline also works well. Place in a small bowl.

3. Cut all 4 sides of each olive away from the pit in flat slices. Lay the slices flat-side-down and cut into thin slices, as seen in photo above.

4. Lay the broccolini in a single layer on a plate and drizzle with about 2 Tbsp. vinaigrette (see recipe below). Toss with your hands to coat. Sprinkle with additional salt or pepper if desired. Add 1 Tbsp. vinaigrette to the bowl with the mushrooms, and toss to coat, adding a bit more if needed. Move broccolini to serving platter and top with marinated mushrooms, then sliced olives.

5. Place the burrata in a small serving bowl. Using kitchen shears, cut a small X in the top of the burrata to expose the creamy center. Drizzle with a little olive oil and sprinkle with pepper. Add the bowl of burrata to the serving platter. Serve salad with tongs and a spoon for the burrata. Each person can top their own serving with the burrata.

Sherry vinaigrette

Whisk together 2 Tbsp. sherry vinegar and 2 Tbsp. red wine vinegar in a small bowl. Stream in about 1/2 cup olive oil (the dressing will still look slightly broken – do not emulsify completely), and season with salt and pepper to taste. Whisk in more olive oil if dressing is too tart.


Unfortunately the cheese shop did not have burrata. Sure, I was a little bit sad, but we substituted it with Bufala Mozzarella which we were told is essentially the same as Burrata but without the creamy center. It was still fantastic. The key to the salad is making the mushrooms and red onion so thin that they blend into the salad rather than stand out in their raw state. I could have had this alone for dinner…with a piece of good bread…but clearly I was happy with my steak and would have fought someone if they tried to take it away from me after I had taken my first bite.

What I loved about the broccolini was that it brought the thought of salad to a different light. Cooked a little bit longer it would be considered more of a side dish, but as the broccolini was barely cooked…and the rest of the ingredients were raw…it truly was a salad!

You know sometimes when you have a really good meal you just get kind of giddy (or am I alone here…)? This was one of those meals…and I cannot wait to try out some more delicious discoveries from Chef Derek-Thomas Keller.