Showing posts with label Dessert. Show all posts

Thursday, April 30, 2015

Stewed Blackberries with Bay Custard and Gin from "Plenty More"


Blackberries - a sign that warmer weather is nearly here. They are such and odd, intricate fruit if you really look at it. If I had a choice, I typically will choose a raspberry over a blackberry due to the tougher texture and seeds within the blackberry. But with this recipe from Plenty More, the firmness of the blackberry is just it it needed. Stewing blackberries releases juices without fully compromising the shape and texture. This dessert stood out to me as it highlights the highly photogenic fruit while incorporating the unique flavors of bay leaves and gin into a dessert. Yep! I said gin.

Think of this as an awesome, adult ice cream sundae. And for my purposes, it is a simple make-ahead dinner party dessert that will "wow" guest because it's not just your ordinary ice cream sundae. You've got this beautiful incorporation of textures and flavors.

The base is a simple vanilla ice cream - something neutral (but still amazing) to allow the rest of the flavors to shine. You then top it with a homemade bay leaf-infused custard that doesn't scream savory bay leaf but rather introduces a subtle uniqueness that leaves you pondering "what is that?" (in a good way). Then you have the blackberry/gin/rose or orange-blossom water soaked cookies (ladyfingers preferably if you aren't GF) that act as delicate sponges to soak up the mind-blowing juicy/sweet/earthy/floral combination of juices. Top it all off with the stewed blackberries and you've got a dessert that is pretty freaking awesome if I do say so myself.

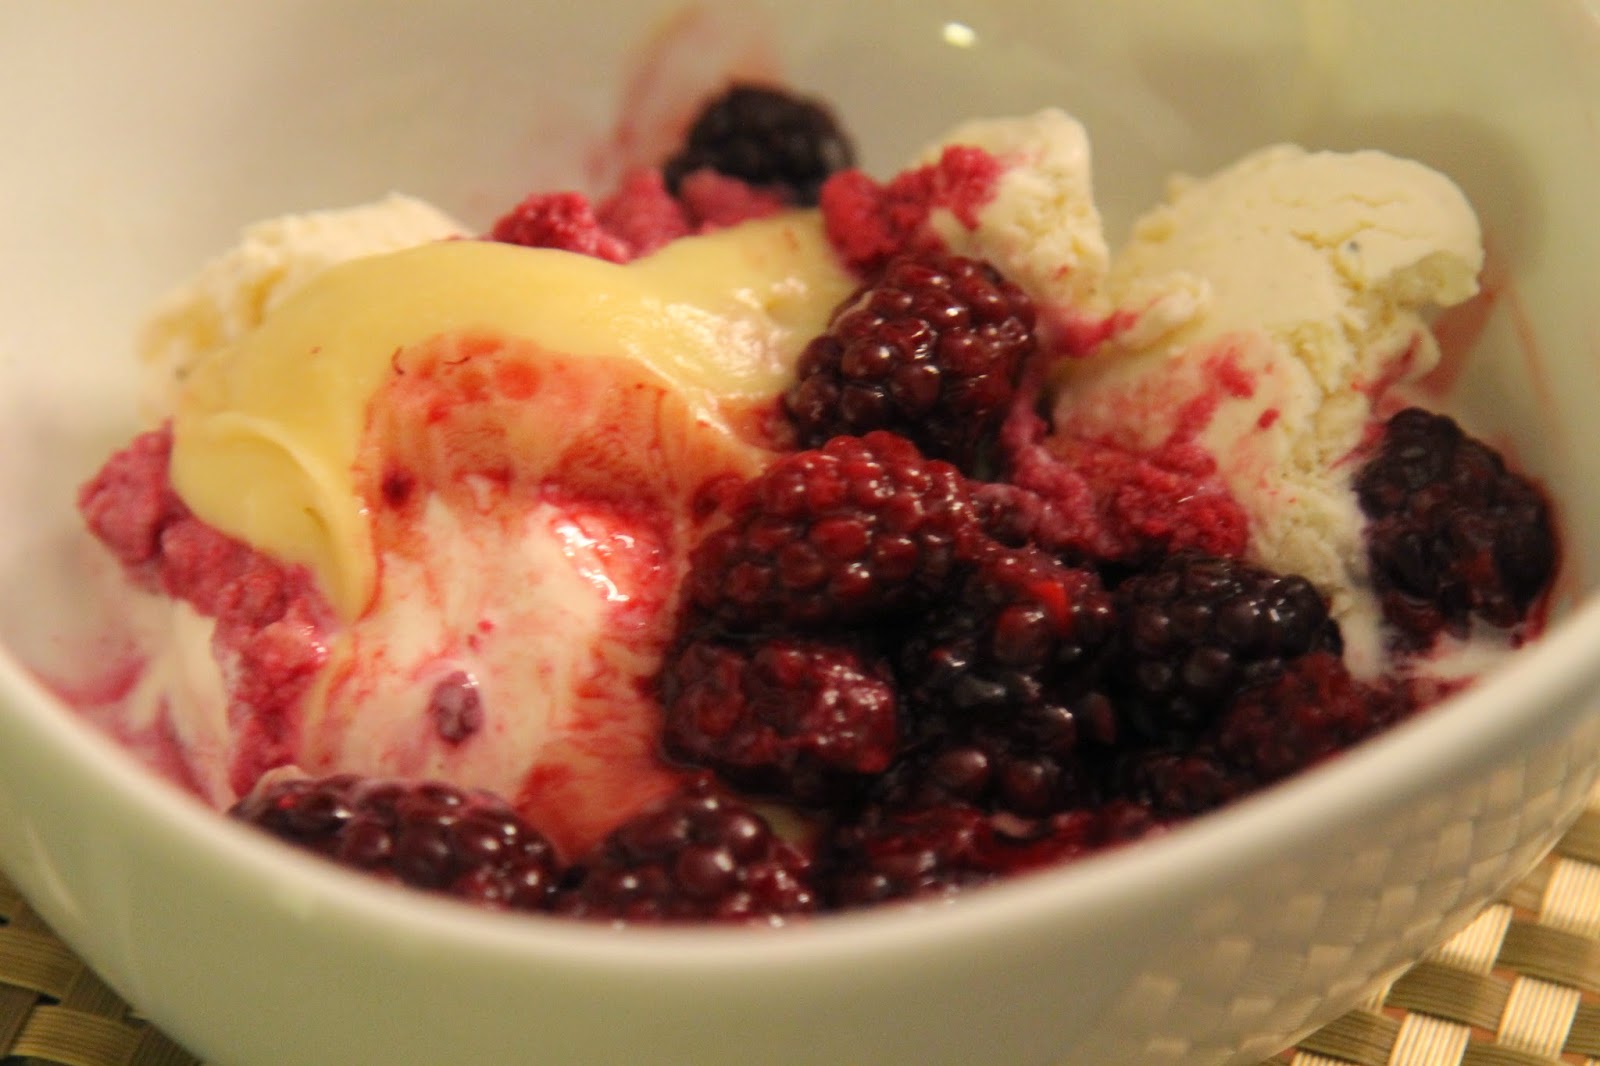
As I did make this for a dinner party - I did NOT do the final creation justice in pictures. It's quite laughable actually. I so wanted to serve this in a deep martini glass or a glass dessert bowl. Sadly I had neither of those so regular bowls it was - paired with plastic spoons as we had put the regular spoons all in the dishwasher. Classy. I also had to pretend to not be geeky about this dessert so the image that I did end up getting too was laughable.

Nevertheless, it tasted divine. So take my word for it.

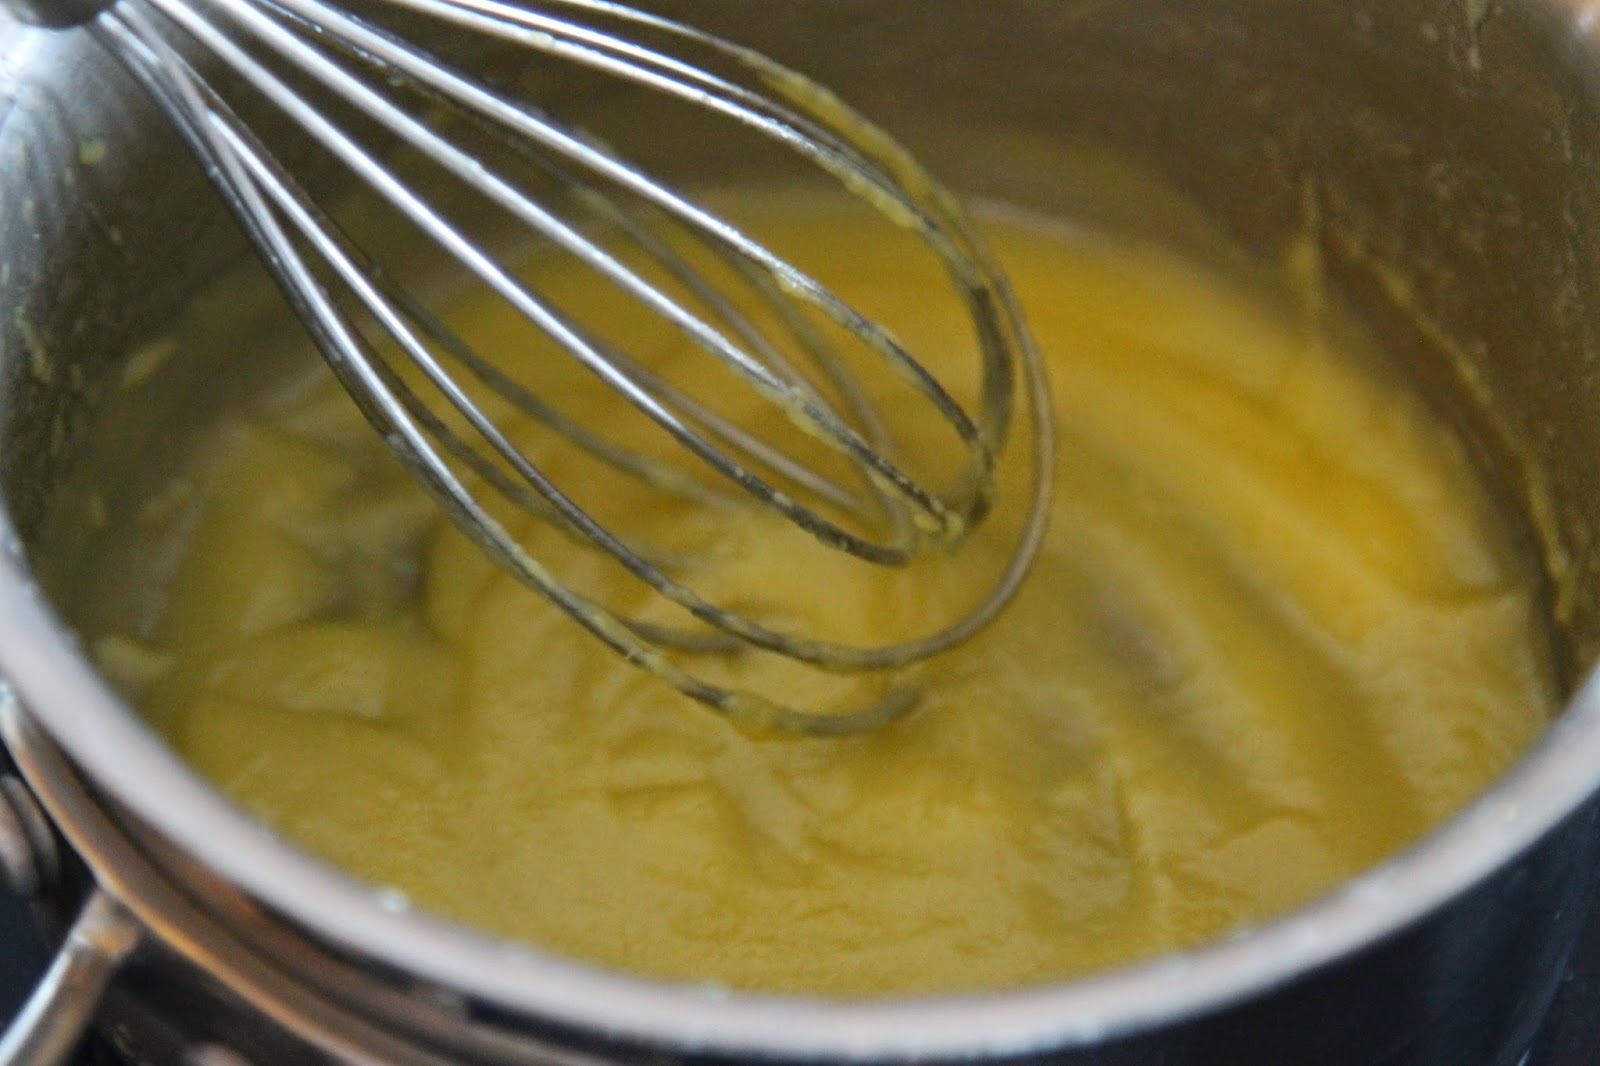
Custard base infused with bay leaf
Custard evolution (remove the bay leaf!)
Stewed blackberries - juices drained - see how they hold their texture?!
Just picture the flavor explosion and excuse the image :) 

Stewed Blackberries with Bay Custard and Gin
p. 305 in Plenty More
serves four

Ingredients:
  • about 1 lb/480 g blackberries
  • scant 3 1/2 tbsp/40 g superfine sugar
  • 1 1/2 tsp rose water (or orange blossom water)
  • 2 1/2 tbsp gin
  • 16 ladyfingers, broken into 3/4-inch/2-cm pieces (about 3 oz/90 g)
  • about 1 1/2 pints/360 g vanilla ice cream
Custard:
  • 6 tbsp/90 ml heavy cream
  • scant 5 tbsp/70 ml whole milk
  • 3 bay leaves
  • 1 egg yolk
  • 3 1/2 tsp/15 g superfine sugar
Directions:
  1. First make the custard. Place the cream, milk and bay leaves in a small saucepan and bring to a boil. Remove from the heat immediately. In a small bowl, whisk the egg yolk and sugar until well combined. While whisking, add a little of the milk mixture. (Remove bay leaves from milk mixture). Slowly add the remaining milk mixture, continuously whisking until combined. Return the liquid to the saucepan and place over medium-low heat. Stir continuously for about 10 minutes, until the sauce thickens to a custard. Remove from the heat and set aside to cool. Keep in the fridge until ready to use.
  2. Place 2 cups/300 g of the blackberries in a small saucepan along with the sugar and summer over medium-low heat for 10 minutes, stirring occasionally, until the berries are soft but still hold their shape and lots of liquid has come out. Remove from the heat and leave to cool.
  3. Drain the juices from the blackberries and stir the rose water and gin into the juices. Soak the ladyfingers in the juices until they have absorbed all the juice.
  4. To serve, scoop a large portion of ice cream into each of 4 glasses or tumblers. Top with the soaked ladyfingers and then pour the custard over the top. Add the stewed blackberries and the remaining fresh blackberries and serve.


Saturday, April 11, 2015

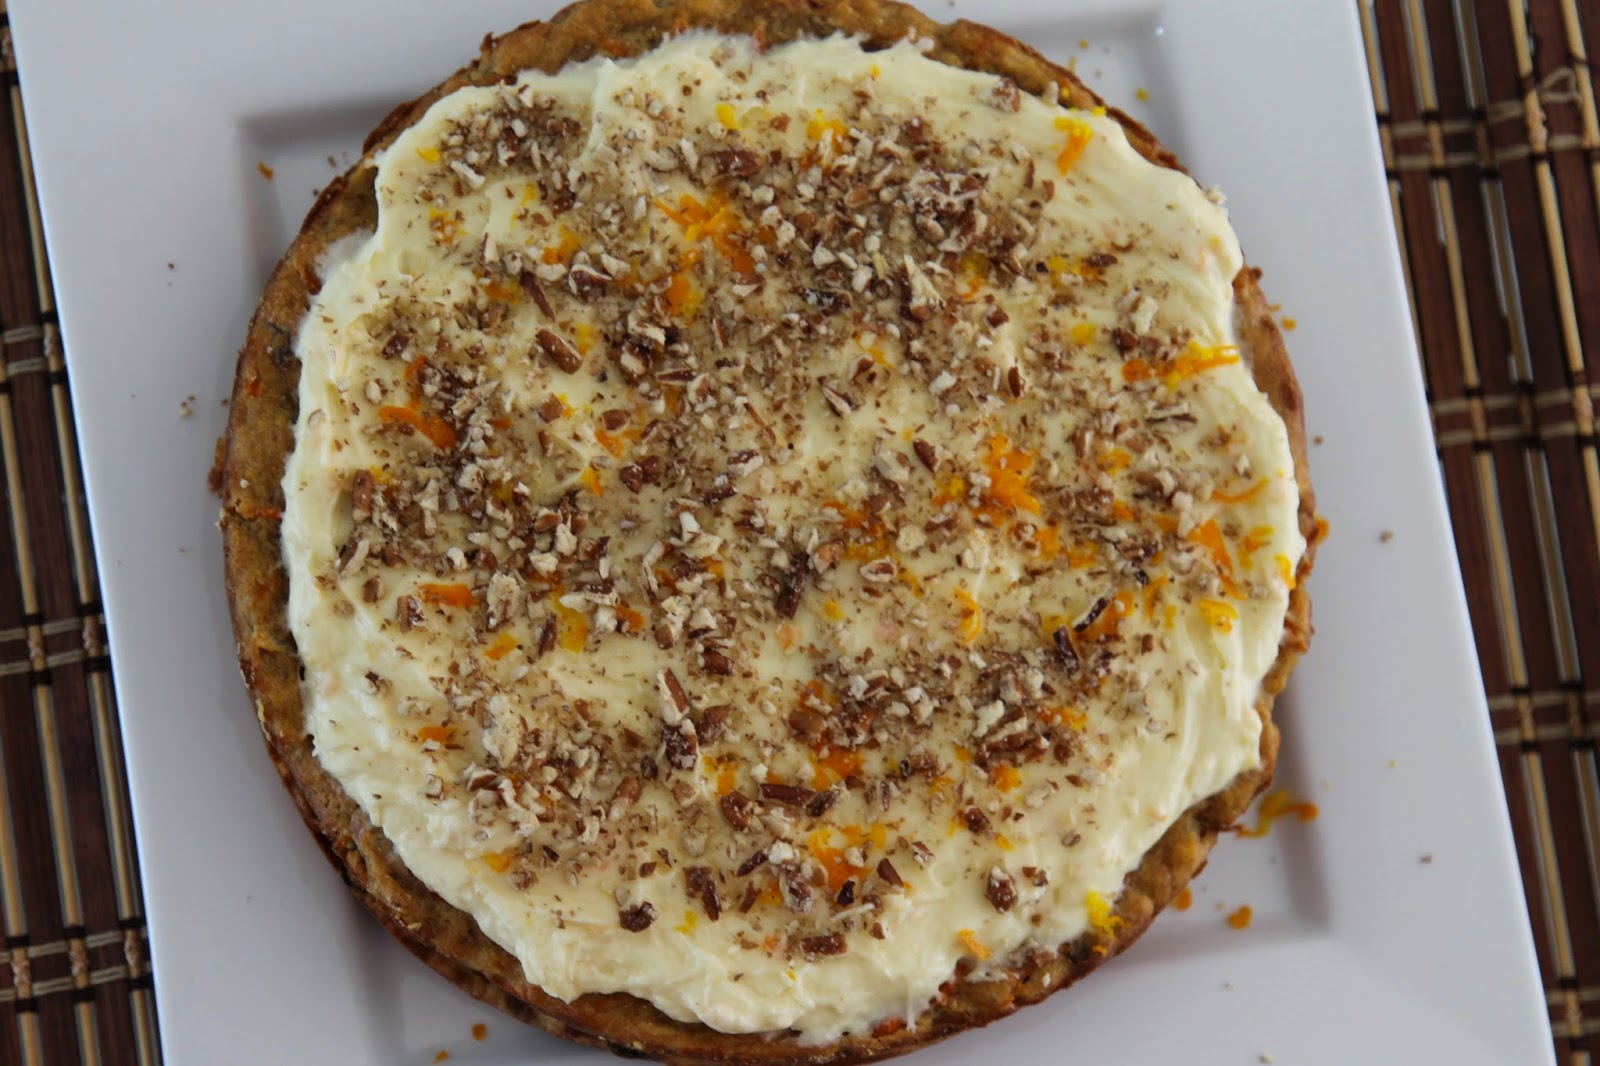
Carrot Cake Torte (Gluten Free)


I'm not sure who ever thought of the concept of putting carrots into a dessert but I'm sure glad they did! Carrot cake is one of those treats that I always forget about but thoroughly enjoy whenever I get the chance to eat it. I love the combination of the sweet, comforting spices (cinnamon) and the tangy cream cheese frosting. There are also awesome textures with the nuts, raisins, and fresh carrots interlaced in the sweet cake. Brilliant! It's a dessert that, if not too sweet, or too heavy, can keep me excited with every bite - unlike its standard chocolate or vanilla cousin.

Since migrating to a gluten-free diet, I haven't eaten or baked too many cakes. Achieving that perfectly fluffy cake is just bit more difficult without gluten (though not impossible). So I've been creating more "tortes" than "cakes." I use those terms loosely because in reality, all tortes are cakes, but not all cakes are tortes (brings me back to my school days). Tortes are generally more dense than a cake and often lower in height. It's those two descriptors that have made me call this latest creation a "torte" rather than a cake. If you set your mind to a fluffy carrot cake, you will be sorely disappointed. However, if you are looking for some that captures all of the delicious flavors of a carrot cake in a more "compact" bar-like treat, then this is a great choice.


I used a Jamie Oliver recipe for a gluten-free Carrot Cake as my base but made a few tweaks along the way. One of the major "tweaks" is unknowingly omitting what is likely a key component of his cake - the gluten-free self-rising flour. This would be an all-purpose gluten free flour with the addition of baking powder and possibly salt. This fact completely slipped past my consideration set as I rushed to mix up the cake and get it in the oven. Only once the cake was in the oven did I realize there was no "rising" ingredient: baking powder. SO torte it is :)

Just a note: if you do not have self rising flour, you can make your own with the following ratio:

  • 1 cup gluten-free flour
  • 1 1/2 teaspoon baking powder
  • 1/2 teaspoon salt

I also made the cake into two layers instead of one as I like to have a little layer of frosting break up my bites of cake. Just a personal preference.

This was a really fantastic take on a carrot cake. Though it isn't light and fluffy (obviously) I actually loved the texture which was more dense but not overly "heavy." The cake itself was not incredibly sweet which may not be ideal for some sweet-tooths but that again was a true delight for me. I served this with a sprinkle of powdered sugar to add a hint of sweetness but after a full meal, I don't feel like something that is cringe-worthy sweet. This was a perfect balance of treat and wholesomeness which didn't make me feel too bad about the fact that I would be consuming the cake for the next few days. Next time I'll try to remember the baking powder - or maybe not - the "torte" texture was a welcome mistake.


Monday, February 16, 2015

Tiramisu Meringue Roulade


Growing up, baking was one of my first passions. As I've gotten more into cooking, I've spent less time baking. Still, whenever an occasion calls for a dessert, I'm the designated dessert queen. For Valentine's Day - I couldn't quite figure out what to make. Flourless chocolate cake or lava cake seem to be staples but with the expansive menu that we had planned, I didn't want a heavy chocolate finale. 

Going on the loosely Italian theme that we had for tonight - one of my favorite desserts came to mind: Tiramisu. While not a "light dish" - Tiramisu typically does not weigh you down like some sweet treats. The creamy yet fluffy "pudding" laced with coffee and booze of some sort (rum, khalua) and light, spongy vessels for soaking up the goodness is a harmonious way to end a meal. Some people like coffee with their dessert. I like coffee in my dessert. 

Still, in all of its perfection, there are two primary issues (for me) with Tiramisu:
  1. The Heavy Cream. When whipped up, one often forgets just how dense heavy cream is. I don't mind a touch of it here and there but let's be honest, there are ways around it. And if you have issues with lactose, heavy cream is not your friend. So my version omits the heavy cream and makes a bit of an embarrassing shortcut (ahem...whipped topping) that only my mother would be proud of. If you love heavy cream, by all means, add it to this dish by following the traditional tiramisu pudding recipe.
  2. The Lady Fingers. Though more eggy and sugary than floury - these spongy cookies still contain gluten. I could make a gluten free version had I wanted to create a true Tiramisu - but I was instead inspired by a new creative approach.
So in flipping through my trusty Plenty More cookbook, I found a recipe that inspired me to try a new take on a tiramisu. The recipe in itself would have actually been a perfect Valentine's Day dessert: Meringue Roulade with Rose Petals and Fresh Raspberries. How romantic does that sound? Still, stuck on my coffee inspired flavors, I thought - why not make the traditional (or slightly nontraditional) tiramisu filling and roll that up in the light and airy meringue. Both a meringue and lady fingers have similar qualities, so I was certain the flavors would mesh well. Then it was just about the execution.


Meringue for the Roulade - with a touch of coffee grounds
In making the meringue, I was reminded by just how much I will appreciate a KitchenAid once I finally have one in my home. In my stubbornness, I said that I would not let myself have one until I was married. That was a stupid rule - but I guess I've said it for so long that I might as well suffer through my ancient hand mixer to make marriage that much more exciting.

One of my creative additions was that of an unknown amount of coffee grounds. The recipe called for "superfine sugar" which I did not have. Instead, I took my normal cane sugar and ground it up with our coffee grinder which still had some of the coffee bean residue around the vessel. Rather than clean it out, I figured, might as well make a coffee sugar - it's a coffee dessert anyway. It was brilliant. In the recipe, I mentioned "instant coffee" - I would say you could go that route or blend up the fine grounds with the sugar - what's important is that you don't have any significant coffee specks and that it simply imparts the rich flavor on the meringue.

Saturday, February 7, 2015

S'more Brownies


It was a cold and snowy Super Bowl Sunday. Finally, Chicago looked like Chicago in the wintertime (though I can't say I was complaining about the lack of snowfall). What better to do on a weekend winter day than to bake! I've found that as the temperatures have plummeted, my sweet tooth has emerged.


As Derek and I were preparing for the Big Game later on in the evening - we stayed cozy and warm but busy in the kitchen. Derek was preparing his famous "jalapeno poppers" - a staple to our Super Bowl experience for several years now. To me, it isn't a Super Bowl if I do not have his amazing poppers hot and fresh from the oven. His version is made is reduced fat cream cheese, shredded cheese, bacon, Cajun spice (and possibly other additions as well) - all stuffed in a half (seeded) japaleno and coated with panko or coarse breadcrumbs (gluten free) and baked in the oven. Delicious. And not quite as sinful as one would imagine a jalapeno popper to be. (basic recipe here)

You know what was sinful though? These guys:


It's Super Bowl after all - a little sin won't kill ya! These were an ode to one of my favorite childhood treats - S'Mores. Those gooey yet crunchy, sweet and smokey treats bring me back to those days that calories and sweets didn't really matter! 

I'll also admit that I took a shortcut version and used a - gasp - brownie mix. Because I was keeping these gluten free - I figured this was the easiest route. Plus - another admission - I had actually made brownies the day prior that I was planning on bringing for the party. These were from scratch - and were both gluten free and vegan. Wahoo! Then I realized I am not necessarily cooking for myself and while I enjoyed the brownies (and then proceeded to polish off that pan ALSO) I didn't think a bunch of football-watching guys would appreciate the health aspect of these brownies. Thus, a second try on the day of Super Bowl - to make something that would be a bit more of a hit. These were simple (relatively) and delicious.

Monday, January 5, 2015

Roasted Banana Pudding


I had never planned on posting about our New Year's "Good Luck" meal but I was so blown away with the flavor of the dessert that I had to share my excitement!

Over the past few years' I have been privileged to attend a true Southern-style New Year's celebration meal with all the fixins': Pork with Sauerkraut, Collard Greens, Black Eyed Peas, Cornbread and Banana Pudding. Deeeeeeelicious.

I never really had looked into why these dishes were celebration staples until this year when I was tasked with keeping the tradition alive. Growing up we never had a New Year's food tradition but I've learned that, like most other holidays, many cultures have traditions surrounding celebrating the new year and with the food centered around "good luck."  So while many people start the year off with dieting, many others around the globe are feasting - all in the name of luck!


The star of the New Year's Celebration menu is the pork. I learned that pork is the preferred meat based on how the animal is built and how it moves. A pig, by nature, first grounds itself with its snout before moving forward. This signifies progress. On the flipside, popular animals such as chickens and turkeys scratch backward before proceeding forward. Progression sounds good to me for a new year outlook - I'm not sure what this means for vegetarians though!

We slow roasted the pork (pork butt) in a mixture of spices, beer, and the next lucky ingredient: sauerkraut!

I'm of German heritage and attribute my love for sauerkraut to that. This concoction of fermented cabbage is not only healthy and delicious, it is also said to make your next year more "sweet" by having the "sour" cabbage. 

Saturday, December 10, 2011

Thanksgiving Apple Pie


Looks wonderful doesn't it? We used the recipe that we had collected from a pie-making class.

For those who prefer not to squint  the recipe is below.
That recipe calls for mixing the dough in a food processor. Well - we wanted to follow directions but do not have a decent food processor, so we had to work with what we had:


Somehow, we were able to mix up all of this in that little guy...and it turned out just fantastic....though next time, if by then we do not have a decent food processor, I'll stick to a pastry cutter!


Flaky Pie Dough
from Baking Arts
yields 1 double crust of 2 bottom crusts

2.5 cups All-Purpose Flour
1 tsp salt
2 tbsp sugar
6 oz butter, chilled (1.5 sticks)
1/4 cup vegetable shortening or lard 
1/2 cup cold water + more if needed

For best results on warm days, chill flour in a covered metal bowl for 30 minutes. Place dry ingredients and shortening or lard in the bowl of a food processor and pulse for 15 seconds until it has the appearance of sand. Add the butter and pulse in 1 second increments until the butter is no larger than small  pebbles. 

Turn mixture into a mixing bowl and drizzle in almost all of the water. Fold together using a plastic scraper or spatula. Add additional water, if needed, to blend all the ingredients. Chill for 2 hours before using. Can be frozen for several months.

Rolling and Forming:

Lightly flour table and dough on both sides. Work rolling pin over the dough to help soften and flatten. Begin rolling dough, pivot dough frequently to keep dough a round shape and to check for sticking. Dust with flour as required. Press edges together if they crack. Roll dough to 1/8" thick. Place dough into a 9" pie pan. Allow dough to rest in bottom edges of pie tin. 

Trim dough 1/2 past the edge of the pie tin. Chill and rest dough before filling and topping with second crust. 

If creating a single crust pie, fold overhanging edge under itself so the dough is resting on the edge of the pie tin. Crimp edges of dough. 

For double crust pie, after placing second rough of dough on top, trim top crust to 1/2 inch and fold the bottom and top edges of dough under and crimp.

Sunday, December 4, 2011

Molasses Spice Cookies with Orange Essence (from Cooks Illustrated)

This recipe, from Cooks Illustrated, is a real winner. I have gotten nearly perfect results every time I have tried it. They are soft and chewy and have a real kick with the ginger and a bit of brightness from the orange zest. A perfect holiday treat!

Molasses Spice Cookies with Orange Essence (from Cooks Illustrated)

INGREDIENTS
  • 1 cup granulated sugar (about 7 ounces) 
  • 3 teaspoons grated orange zest 
  • 2 1/4 cups unbleached all-purpose flour (11 1/4 ounces) 
  • 1 teaspoon baking soda 
  • 1 1/2 teaspoons ground cinnamon 
  • 1 1/2 teaspoons ground ginger 
  • 1/2 teaspoon ground cloves 
  • 1/4 teaspoon ground allspice 
  • 1/4 teaspoon ground black pepper 
  • 1/4 teaspoon table salt 
  • 12 tablespoons unsalted butter (1 1/2 sticks), softened but still cool 
  • 1/3 cup dark brown sugar (about 2 1/2 ounces) 
  • 1 large egg yolk 
  • 1 teaspoon vanilla extract 
  • 1/2 cup molasses (about 6 ounces), light or dark 
  1. Adjust oven rack to middle position and heat oven to 375 degrees. Line 2 baking sheets with parchment paper. In workbowl of food processor, process 2/3 cup sugar and 2 teaspoons orange zest until pale orange, about 10 seconds; transfer sugar to 8- or 9-inch cake pan and set aside. 
  2. Whisk flour, baking soda, spices, and salt in medium bowl until thoroughly combined; set aside.
  3. In standing mixer fitted with paddle attachment, beat butter and 1 teaspoon grated orange zest with brown sugar and remaining 1/3 cup granulated sugar at medium-high speed until light and fluffy, about 3 minutes. Reduce speed to medium-low and add yolk and vanilla; increase speed to medium and beat until incorporated, about 20 seconds. Reduce speed to medium-low and add molasses; beat until fully incorporated, about 20 seconds, scraping bottom and sides of bowl once with rubber spatula. Reduce speed to lowest setting; add flour mixture and beat until just incorporated, about 30 seconds, scraping bowl down once. Give dough final stir with rubber spatula to ensure that no pockets of flour remain at bottom. Dough will be soft.
  4. Using tablespoon measure, scoop heaping tablespoon of dough and roll between palms into 1 1/2-inch ball; drop ball into cake pan with sugar and repeat to form about 4 balls. Toss balls in orange sugar to coat and set on prepared baking sheet, spacing them about 2 inches apart. Repeat with remaining dough. Bake 1 sheet at a time until cookies are browned, still puffy, and edges have begun to set but centers are still soft (cookies will look raw between cracks and seem underdone), about 11 minutes, rotating baking sheet halfway through baking. Do not overbake. 
  5. Cool cookies on baking sheet 5 minutes, then use wide metal spatula to transfer cookies to wire rack; cool cookies to room temperature and serve. (Can be stored at room temperature in airtight container or zipper-lock plastic bag up to 5 days.)                                                                                                                          

Friday, November 25, 2011

Gingersnap Streusel Pumpkin Pie


This has easily become my favorite Thanksgiving dessert. Never being a huge fan of pumpkin pie in the past, I was looking for a twist on the classic when I was tasked with hosting my first Thanksgiving (original post here). Fast-forward a few years and this pie has become a staple at my Thanksgiving table. This pie is outstanding in every way. It has a bit of crunch from the pecans and some additional spice and depth of flavor from the gingersnaps that make this level above the traditional pumpkin pie.

Gingersnap Streusel Pumpkin Pie 

1 flaky pie crust, unbaked
2 cups crushed gingersnap cookies (about 40)
1 cup chopped pecans
½ cup powdered sugar
¼ cup melted butter
1 15 oz can pumpkin

1 14 oz can sweetened condensed milk
2 eggs
½ cup sour cream
1 tsp cinnamon
½ tsp vanilla extract
¼ cup ground ginger

Streusel:
¼ cup flour
¼ cup brown sugar
2 Tbsp melted butter
¾ cup chopped pecans.

Preheat oven to 350F. Fit pie crust into a 9 inch deep pie pan (preferably ceramic). Fold edges under and crimp as desired. Stir together crushed gingersnaps, chopped pecans, powdered sugar and melted butter. Press mixture on the bottom and ½ inch up the sides of the pie crust.

Bake at 350F for 10 minutes. Let cool completely on a wire rack (about 30 minutes).

Whisk together pumpkin and next 6 ingredients until well blended. Pour into prepared crust. Place pie on an aluminum foil lined baking sheet. Bake at 350F for 30 minutes. 

Sprinkle streusel around the edge of the crust. Bake 40 minutes longer or until set, shielding edges with aluminum foil during last 25 minutes of baking if necessary. Insert gingersnap cookies around edge of crust. Let cool completely.

Serve with fresh, whipped cream.


Wednesday, June 1, 2011

Snickerdoodles


1/2 cup butter, softened
1/2 cup shortening
1 1/2 cups white sugar
2 eggs
2 teaspoons vanilla extract
2 3/4 cups all-purpose flour
2 teaspoons cream of tartar
1 teaspoon baking soda
1/4 teaspoon salt
2 tablespoons white sugar
2 teaspoons ground cinnamon

Preheat oven to 400 degrees F (200 degrees C).

Cream together butter, shortening, 1 1/2 cups sugar, the eggs and the vanilla. Blend in the flour, cream of tartar, soda and salt. Shape dough by rounded spoonfuls into balls.

Mix the 2 tablespoons sugar and the cinnamon. Roll balls of dough in mixture. Place 2 inches apart on ungreased baking sheets.
Bake 8 to 10 minutes, or until set but not too hard. Remove immediately from baking sheets.

Friday, May 20, 2011

Individual Strawberry Clafoutis


Individual Strawberry Clafoutis
serves 2

6 fresh strawberries
2 tbsp + 2 tsp all purpose flour
2 tbsp sugar
1/8 tsp baking powder
pinch salt
pinch cinnamon
1/3 cup milk
1 large egg
1/2 tsp vanilla extract
powdered sugar, for garnish

Preheat oven to 425F.

Wash and dry strawberries, then trim leafy tops off. Take out six 6-oz ramekins or oven-safe custard cups and place 3 strawberries in the bottom of each.
In a large bowl, whisk together flour, sugar, baking powder and salt. Add in milk, eggs, vanilla and almond extracts and whisk very vigorously until mixture is smooth and lump-free. This can also be done in the food processor.

Divide custard evenly into ramekins, filling each about 2/3 – 3/4 full. Strawberries may float up a bit, which is fine.
Place ramekins on a baking sheet. Turn the oven temperature down to 350F as you put the baking sheet in the oven.
Bake for 30-35 minutes, until a sharp knife inserted into the center of each clafoutis comes out clean.

Sprinkle with powdered sugar.

Clafoutis will fall somewhat during cooling.

Makes 2

Monday, May 16, 2011

Strawberry Limoncello Granita with Whipped Cream and Candied Basil


Strawberry Limoncello Granita with Whipped Cream and Candied Basil
Fresh Strawberry Granita
Makes about 6 cups

1 cup hot water
3/4 cup sugar
2 tablespoons limoncello
3 cups sliced hulled strawberries (1 pound whole berries) plus additional berries for garnish

Stir first 3 ingredients in small bowl until sugar dissolves. Blend 3 cups strawberries in processor until smooth. Add sugar syrup and blend until combined.
Pour mixture into 13x9x2-inch nonstick metal baking pan. Freeze until icy around edges, about 25 minutes. Using fork, stir icy portions into middle of pan. Freeze until mixture is frozen, stirring edges into center every 20 to 30 minutes, about 1 1/2 hours. Using fork, scrape granita into flaky crystals. Cover tightly and freeze. (Can be made 1 day ahead. Keep frozen.) Scrape granita into bowls. Garnish with berries

Candied Basil

Ingredients
1/4 cup sugar
1 1/4 tablespoons water
8 fresh basil leaves, washed and thoroughly dried
Instructions

Preheat the oven to 175ºF.
Combine the sugar and water in a small saucepan over low heat until the sugar has completely dissolved. Remove from the heat and let cool so that it’s just warm (not hot, or the basil will discolor). Soak the basil leaves in the syrup for 5 minutes.
Remove the leaves from the syrup and place them on a baking sheet lined with parchment paper. Bake for 10 minutes, or until crystallized.
Preparing an Ice Bath:

Fill a large bowl halfway with water and ice, then nestle a smaller bowl in the ice water that’s in the larger bowl. Be careful to ensure that none of the ice water drips into the smaller bowl.

Friday, April 22, 2011

Pavlovas with Lemon Curd and Berries

In coming up with the menu for hosting a dinner for another couple, I went looking for a dessert that would be light but still impressive. With a heavier main course, chocolate and cheese were out of the question. I had just made an apple pie earlier that week so I wanted to steer away from that direction as well. Then I remembered this fantastic dessert I had made one time before - YEARS ago - at home in Virginia. Pavlova - a fantastic light and airy dessert, void of anything that is supremely sinful, and highlights the fresh berries that are just now coming into season - yes, welcome summer - oh how I've missed you - though I wish your temperatures would be an indication of your arrival.

The Wikipedia description for "Pavlova" gives the following insight about this lesser-known dessert:

Pavlova is a meringue-based dessert named after the Russian ballet dancer Anna Pavlova. Colloquially referred to as "pav", it is a cake similar to meringue with a crispy crust and soft, light inner. The dessert is believed to have been created in honour of the dancer either during or after one of her tours to Australia and New Zealand in the 1920s. The nationality of its creator has been a source of argument between the two nations for many years, but formal research indicates New Zealand as the more probable source.

The dessert is a popular dish and an important part of the national cuisine of both countries, and is frequently served during celebratory and holiday meals.


So, surprise! it's not a Russian dessert despite the seemingly Russian name!

The following recipe found on Epicurious.com caught my eye:

Pavlovas with Lemon Curd and Berries

Original Recipe Found HERE

For meringue:
1 cup superfine granulated sugar
1 tablespoon cornstarch
3 large egg whites at room temperature 30 minutes
3 tablespoons cold water
1 teaspoon distilled white vinegar
1/4 teaspoon vanilla

For filling:
1/2 cup granulated sugar
1 tablespoon cornstarch
1/8 teaspoon salt
1/3 cup fresh lemon juice (used Meyer Lemons)
1/2 stick unsalted butter
3 large egg yolks
2 teaspoons grated lemon zest (I probably used a full tablespoon)
1 cup heavy cream (I forgot this step)
4 cups mixed berries (I used raspberries, blackberries, strawberries, and kiwi)
1 Tbsp sugar

Make meringue:

Preheat oven to 300°F with rack in middle. Trace an approximately 7-inch circle on a sheet of parchment paper or several smaller circles for individual servings. Turn parchment over and put on a baking sheet.

Whisk together superfine sugar and cornstarch in a small bowl.

Beat whites with a pinch of salt using an electric mixer at medium speed until they hold soft peaks. Add water (whites will loosen) and beat until whites again hold soft peaks.

Increase speed to medium-high and beat in sugar mixture 1 tablespoon at a time. After all sugar has been added, beat 1 minute more.

Add vinegar and vanilla and beat at high speed until meringue is glossy and holds stiff peaks, about 5 minutes (longer if using hand-held mixer).

Gently spread meringue inside circle on parchment, making edge of meringue slightly higher than center (the "crater" is for curd and fruit). Bake until meringue is pale golden and has a crust, about 45 minutes (inside will still be marshmallow-like).
Turn oven off and prop door open slightly with a wooden spoon. Cool meringue in oven 1 hour.

Make Lemon curd while meringue bakes:

Stir together sugar, cornstarch, and salt in a 2-quart heavy saucepan, then add lemon juice and butter. Bring to a simmer over medium-high heat, whisking, then continue to simmer, whisking constantly, 1 minute. Lightly beat yolks in a small bowl and whisk in 1/4 cup lemon mixture, then whisk into remaining lemon mixture in saucepan. Reduce heat to low and cook, whisking constantly, until curd is thickened, about 2 minutes (do not let boil). Transfer to a bowl and stir in zest. Chill, surface covered with parchment, until cool, about 1 1/2 hours.

Mix berries with 1 tablespoon of sugar and let sit for 30 minutes.

Assemble Pavlova:

Beat heavy cream until it just holds stiff peaks, then fold 1/4 cup beaten cream into curd to lighten. Spoon lemon curd into meringue and mound berries on top. Serve remaining whipped cream on the side.


This picture certainly doesn't do anything for the dish. I was hurried and had it on a plate that was far too small for the serving size. Oh well.

Taste is more important - as is texture with this dish - and it scored well on both fronts. Though I forgot to add the whipped cream to the lemon curd, I still really enjoyed the mixture of tart/sweet/fresh that encompasses this dessert. The base is crunchy on the outside, slightly chewy on the inside, and light and airy all throughout. I was a bit wary while making the meringue because it called for cornstarch and vinegar instead of cream of tartar, the traditional ingredient in a meringue that I made sure to have some on hand in case the recipe didn't work out. Luckily, I didn't have to use it! The meringues were beautiful and the flavor stood well alongside the lemon curd and berries. The only change I would suggest is to cut down on the sugar slightly - it probably doesn't need a full cup!

With the lemon curd, I was shocked to realize how easy it is to make! You can spend a pretty penny buying a jar of lemon curd at the store, but it is inexpensive and simple to whip up at home. I wasn't shy about adding the zest or lemon juice, I like the tart lemon flavor - and I cut down on the sugar slightly to ensure that the tartness wasn't overpowered. Now I'm inspired to try all different kinds of "curd" - how about espresso, or chocolate? Why does it have to be citrus?

And the fruit, well it was just a great way to use my first berries of the season - and they served as stars of this refreshing yet slightly decadent dessert. Next time I make it, I'll be sure to take a decent picture.

Monday, April 11, 2011

Ad Hoc Chocolate Chip Cookies

With Derek out of town, the Ad Hoc book started getting dusty - so I figured I'd crack it open and try something from it for myself.

On Sunday I whipped up a half-batch of the following recipe, making only one minor adjustment. I added vanilla...I had to...it's my favorite part of a chocolate chip cookie (well, besides the chocolate chips) and I know that Thomas Keller purposely did not add it and though I trust his chef abilities, I had to satisfy my baker urge to add it - just a little bit.

Ad Hoc at Home Chocolate Chip Cookies

(makes about thirty 3-inch cookies)

2 1/3 cups plus 1 tablespoon all-purpose flour
3/4 teaspoon baking soda
1 teaspoon kosher salt
5 ounces 55 percent chocolate, cut into chip-sized pieces
5 ounces 70 to 72 percent chocolate, cut into chip-sized pieces
8 ounces (2 sticks) cold unsalted butter, cut into small pieces
1 cup packed dark brown sugar, preferably molasses sugar
3/4 cup granulated sugar
2 large eggs

Position racks in the lower and upper thirds of the oven and preheat oven to 350 degrees. Line two baking sheets with Silpats or parchment paper.

Sift flour and baking soda into a medium bowl. Stir in the salt.

Put chips in a fine-mesh basket strainer and shake to remove any chocolate “dust” (small fragments).

In the bowl of a stand mixer fitted with the paddle, beat half the butter on medium speed until fairly smooth. Add both sugars and the remaining butter, and beat until well combined, then beat for a few minutes, until mixture is light and creamy. Scrape down sides of the bowl. Add eggs one at a time, beating until the first one is incorporated before adding the next and scraping the bowl as necessary. Add dry ingredients and mix on low speed to combine. Mix in chocolate.

Remove bowl from mixer and fold dough with a spatula to be sure the chocolate is evenly incorporated. The dough or shaped cookies can be refrigerated, well wrapped, for up to 5 days or frozen for 2 weeks. Freeze shaped cookies on the baking sheets until firm, then transfer to freezer containers. (Defrost frozen cookies overnight in the refrigerator before baking.)

Using about 2 level tablespoons per cookie, shape dough into balls. Arrange 8 cookies on each pan, leaving about 2 inches between them, because the dough will spread. Bake for 12 minutes, or until the tops are no longer shiny, switching the position and rotating pans halfway through baking.

Cool cookies on the pans on cooling racks for about 2 minutes to firm up a bit, then transfer to the racks to cool completely. Repeat with second batch of cookies. (The cookies can be stored in an airtight container for up to 2 days.)


His technique with the cold butter, whipping half alone and half with the addition of sugar, was quite unique. I am not sure of the rationale behind this, but I did it anyway! For the chocolate, I used used a 3.5 oz bar of Ghirardelli dark chocolate 72% and then one Hershey's Special Dark (yuck, I know, Derek had it leftover from his Christmas stocking - it's not my favorite chocolate) which is really only about 46% dark chocolate (lame) and then an additional 60% chocolate Ghirardelli square (remember, I did a half recipe so it was only about 1 1/4 cup chocolate total).

For me, these were good but still not perfect. Mind you, my execution may not have been perfect, though I did follow the recipe, but the cookies were a little flatter than I like - not completely flat, but the higher butter to flour ratio typically lends itself to a flatter cookie. Perhaps it would be different if I chilled the dough a little before cooking?

The flavor of the cookies were somewhat butter-heavy. You can certainly tell it is there which makes for a decadent and enjoyable cookie. And when you use quality chocolate - you can tell. Another difference between this cookie and a traditional chocolate chip cookies is the lack of "chips" and introduction of mini slabs of chocolate that make for fantastic chocolate-heavy bites throughout the cookie.

Though these were good, they were not my end all-be all in my search for the perfect chocolate cookie...the search continues.

Sunday, March 20, 2011

Italian Cream Cake

Only a few times a year do I make a full blown cake (as opposed to cupcakes which are a bit more common in my kitchen). The driver of these occasions is almost always a birthday. The time, it was the birthday of our very own Derek. Historically, I have made three cakes for Derek:

1. German Chocolate (probably the most difficult)
2. Rum
3. Pineapple Upside Down

Next up - one to feed his love for coconut - Italian Cream Cake.

Now I hadn't really heard of this before I came across it. It differs from a standard Coconut Cake in that it typically uses more eggs, buttermilk, and has a cream cheese frosting. Since I'm a sucker for cream cheese frosting and don't really care for standard buttercream, I was excited to bake this into reality.


ITALIAN CREAM CAKE

Cake
1/2 cup shortening, room temperature
1/2 cup butter, room temperature
1 3/4 cups sugar
5 eggs, room temperature, yolks and whites separated
1 cup buttermilk
1 teaspoon baking soda
2 cups cake flour
1 teaspoon vanilla
1 2/3 cup unsweetened coconut

Icing
1/2 cup butter, room temperature
8 oz cream cheese, room temperature
3 cups sifted powdered sugar
1 teaspoon vanilla
1 cup chopped pecans, toasted

garnish: 1+ cup unsweetened coconut, toasted

1. Beat shortening and butter and sugar until creamy. Blend in egg yolks into mixture.

2. Add baking soda to buttermilk. Mix in buttermilk and flour, alternately into egg mixture.

3. Beat egg whites until stiff; add vanilla. Fold stiff egg whites into batter, and then fold in coconut.

4. Divide batter into 3 8 or 9” cake pans that are greased and floured. Bake at 350° for about 23-25 minutes or until toothpick comes out clean.

5. For Icing: Mix butter and cream cheese. Add sugar and vanilla. Divide frosting into two bowls, about 1/2 and 1/2 (enough for frosting the inside layers and then for frosting the top and sides of the cake). Add the chopped pecans to the frosting reserved for the filling layers.

6. Make sure cake layers are even and easily stackable. If one is slightly uneven, use a long bread knife to shave off part of the cake in order to make it even (you don't want a topsy cake).

7. Place one layer down on a serving platter. Spread half of the reserved pecan frosting evenly on the layer. Top with second layer and spread on the rest of the pecan frosting. Top with final layer and frost the top and sides with the reserved plain frosting.

8. Cover sides of cake with toasted coconut.


It was quite a production to keep this hidden from Derek before his birthday. I had made it on Sunday white he was still away in Tahoe as there is certainly no secrecy in baking a cake when you are both in the same apartment at the same time. I then had to hide this in our standard size refrigerator until Tuesday night when I would finally reveal it. Mind you, this is not a small cake and I was scared of any "refrigerator smell" seeping into the cake. To protect it, I placed a large all-clad pot over the cake and then wrapped it all up in saran wrap - and then hid that behind a big bag of leafy greens - I knew Derek would probably not be grabbing for that. Luckily - it all worked out and at 1 AM, when we finally got home from a night of dinner and a Lady Gaga concert, I pulled my creation out of the refrigerator, stuck a candle in the middle and gave the birthday boy his cake.

Though 1 AM isn't necessarily my ideal time for serving a dessert, it was a special occasion and I couldn't just wait until the next day - what's a birthday without a candle and cake?

Though the cake was a bit cold after having been sitting in the refrigerator for a few days, I was really pleased with the final product. I loved the toasted pecans and coconut, two details that were not included in the original recipe. I was a bit nervous because I used unsweetened coconut which, on its own, it's amazing. However, I'm glad I did. The cake was already sweet enough and when mixed in with the other ingredients, it added the perfect burst of coconut without adding more sweetness.

My only critique was that it was not quite as moist as I would have like it. It was far from dry - and I would be happy to be served it anywhere - but with a name like Italian Cream Cake, one would expect it to be incredibly moist. I would have liked to try it right after I had made it because I suspect the product would have been a bit different. Unfortunately, I couldn't eat Derek's birthday cake before he did :)

Sunday, March 13, 2011

Whole Wheat Chocolate Cherry Cookies

Rainy Sunday afternoons are the perfect occasion for baking so I was fortunate to come across one this past weekend. And though I looked at several recipes to use up sweet potatoes or tangerines, both of which are in full supply in our kitchen, I settled on an old favorite of mine, "healthier" chocolate chip cookies. My product this time really was pretty healthy! Let's do a side to side comparison with a the standard Nestle Toll House Chocolate Chip Cookie

Nestle Toll House Chocolate Chip Cookie vs. my Whole Wheat Chocolate Cherry Cookies

2 1/4 cups all-purpose flour vs. 2 cups whole wheat pastry flour
1 teaspoon baking soda vs. 1/2 teaspoon baking soda + 1/2 teaspoon baking powder + 1 teaspoon apple cider vinegar
1 teaspoon salt vs. 3/4 teaspoon salt
1 cup (2 sticks) butter vs. 6 tablespoons (3/4 stick) butter
3/4 cup granulated sugar vs. 1/3 cup organic cane sugar
3/4 cup packed brown sugar vs. 2/3 cup packed brown sugar
1 teaspoon vanilla extract vs. 1 teaspoon vanilla extract
2 large eggs vs. 1 large egg
2 cups (12-oz. pkg.) NESTLÉ® TOLL HOUSE® Semi-Sweet Chocolate Morsels vs. 1 cup Ghirardelli dark chocolate chips and 1 Trader Joe's dark chocolate bar
1 cup chopped nuts vs. 1/3 cup dried cherries
+ in my recipe, 1+ tablespoon ground flax seed, 1 teaspoon espresso powder

Quite a difference!!

For a simplified look at what I did:

Ingredients

6 tablespoons butter, softened
1/3 cup sugar
2/3 cup brown sugar
1 teaspoon cider vinegar
1 teaspoon vanilla
1 egg
1/2 teaspoon baking soda
1/2 teaspoon baking powder
2 cups whole wheat pastry flour
1 teaspoon espresso powder
1 tablespoon ground flax seed
3/4 teaspoon salt
1 cup chocolate chips
1 dark chocolate bar, roughly chopped
1/3 cup dried tart cherries, chopped

Servings: About 2 dozen


Directions

Preheat oven to 350 degrees.

In a large mixing bowl cream together the butter and sugars. Add in the egg, vinegar, and vanilla, mix until light and fluffy.

In a separate bowl, stir together the flour, baking soda, baking powder, salt, and espresso powder. Slowly mix dry ingredients into butter mixture.

Gently stir in the chocolate chips, chocolate chunks, and dried cherries.

Drop cookie dough by rounded spoonfuls on a cookie sheet (best if lined with a silpat). Bake the cookies for 13-16 minutes or just until lightly browned. Remove from oven and after about two minutes, transfer cookies to a cooling rack.


The look and texture of these cookies is something that I have been trying to achieve for quite some time - and it's a completely wheat cookie? That seems absurd. I don't know what it was that made these so perfectly crisp on the outside, risen to a perfect level, and soft on the inside. Perhaps the addition of vinegar? I read that vinegar is like a super-leavener, pairing well with the characteristically dense wheat flour. I think wheat pastry flour is key as well - it is nowhere near as gritty as a standard whole wheat flour would be.

And then I have to confess. I had some "buttery sticks" in my refrigerator after a baking episode with a vegan friend of mine, and wanted to test them out in baking. So I used 4 T. of the "butter stick" and then 2 T. of real butter - and, well, it seemed to work! However, I can get a little bit of the buttery stick taste in the cookie so I don't think that will be my go-to for this recipe, next time I will try 100% butter and hope that it turns out the same. I also read that the buttery sticks have a higher melting point so the other ingredients in the cookie have a longer time to rise and cook up while in the oven - so this may have contributed to the great shape and texture of the cookie. When I do the butter I'm going to refrigerate the dough for a bit so that the dough starts out at a cooler temperature - we'll see.

With cookies, it's science waiting to be perfected and many, many batches of cookies and spoonfuls of raw dough in between.

A few final notes - I would either add more cherries or remove them altogether. They didn't really stand out - so may have been best soaked in some liquor or port...And the coffee flavoring in the dough was very mild - but that's the point. It's not totally necessary but adds some depth - I may try cinnamon next time - cinnamon is good with nearly everything in my opinion....

Tuesday, February 15, 2011

Cupcake Wars: Carrot Cake vs. Red Velvet

I didn't think I would see the day that Derek would ask me if I wanted to do a cupcake war. Maybe it was due to the fact that I always make him watch that show on the Food Network. For some reason, despite the corny comments and staged conversations and drama, I can't get enough of Cupcake Wars! However, I think the real reason Derek brought up the enticing idea of a cupcake war was to make up for his timing flub causing us to miss the baking class (given to me as a Christmas gift) that we were supposed to attend that day. Unfortunately the class credit was lost and my excitement for learning how to bake the perfect pie crust was crushed with it.

So option number two - cupcake wars - would have to fit the bill for the day. In reality, this is a very tough challenge considering our lack of baking resources in our kitchen....and then we didn't start until 10 PM, so let's just say we were having to eat cupcakes well into the night/early morning - not quite the best thing to have right before bed, but fun nonetheless.

I selected Red Velvet for my cupcake. Cliche - especially for anyone who has seen Cupcake Wars - but I had personally never made them and really hadn't even eaten one before - at least not that I can remember. Additionally, the next day was Valentine's Day so a red cupcake just seemed to fit the bill.

Derek's choice obviously was limited to three options as Ad Hoc only features three cupcakes and Derek wouldn't dare venture to another source!! The options were White, Chocolate, or Carrot Cake. After first selecting chocolate but not being able to find the right "alkalized chocolate" at Whole Foods - Derek switched to Carrot Cake - one of my top 3 favorite flavors. At this point, I had already concluded that I would be voting for Derek's cupcake over mine for the simple fact that I find Carrot Cake irresistible - if executed correctly, of course.

I went first in the kitchen since I wanted to quickly get mine in and out of the oven, thinking about how I need to just go to bed with work looming early the next morning. After deliberation, I selected the red velvet cupcake recipe from JoyofBaking.com - crossed my fingers, and hoped it would work out.


Katie's Entry:
Red Velvet Cupcakes
source: http://joyofbaking.com/RedVelvetCupcakes.html#ixzz1E43wJtfn

1 1/4 cups (125 grams) sifted cake flour
1/4 teaspoon salt
1 tablespoons (10 grams) regular or Dutch-processed cocoa powder
1/4 cup (57 grams) unsalted butter, at room temperature
3/4 cups (150 grams) granulated white sugar
1 large egg
1/2 teaspoon pure vanilla extract
1/2 cup (120 ml) buttermilk
1 tablespoon liquid red food coloring
1/2 teaspoon white distilled vinegar
1/2 teaspoon baking soda

Red Velvet Cupcakes: Preheat oven to 350 degrees F (175 degrees C) and line 12 muffin tins with paper cupcake liners.

In a large bowl sift together the flour, salt, and cocoa powder.

In the bowl of your electric mixer, or with a hand mixer, beat the butter until soft (about 1-2 minutes). Add the sugar and beat until light and fluffy (about 2-3 minutes). Add the egg and beat until incorporated. Scrape down the sides of the bowl. Add the vanilla extract and beat until combined.

In a measuring cup whisk the buttermilk with the red food coloring. With the mixer on low speed, alternately add the flour mixture and buttermilk to the butter mixture, in three additions, beginning and ending with the flour.

In a small cup combine the vinegar and baking soda. Allow the mixture to fizz and then quickly fold into the cake batter.

Working quickly, divide the batter evenly among the 12 muffin cups and smooth the tops with an offset spatula or the back of a spoon. Bake in the preheated oven for approximately 18 - 23 minutes, or until a toothpick inserted in the center of the cupcakes comes out clean.

Cool the cakes in their pans on a wire rack for 10 minutes and them remove from pan. Let cool completely before frosting. Either spread the frosting with a knife or offset spatula, or use a large 1M Wilton open star decorating tip to pipe the frosting.

Cream Cheese Frosting: OK I cheated in this arena. Not because I was lazy but because I had been lazy about a week ago when I made mini brownies decorated with football lacing made of frosting, store bought cream cheese frosting to be exact. With about half of the container left sitting in my refrigerator, I decided to use it up and mix it with the rest of some grainy Neufchatel cheese that Derek had bought and disliked. Putting two mediocre ingredients together isn't exactly recipe for success, but I thought I'd give it a try. I also threw in some vanilla and cinnamon and hoped for the best after blending all of the elements together.

Makes 24 mini cupcakes.


MY REVIEW: First the cupcakes. The batter, to me, seemed pretty thick and didn't WOW me. Without many additives to a normal batter recipe except for a scant portion of cocoa powder and red food coloring....and vinegar...the batter tasted a bit floury. But not knowing what it is supposed to taste like, I still hoped for the best and threw the cupcakes into the oven.

Thankfully, they puffed up nicely and turned out looking like a red velvet cake. The next test was taste. They were good - but just good. They were not heavy but they were not super light and fluffy. And the flavor was interesting, again, good, but not great. I'd rather have a chocolate or lemon...or....gasp...carrot cupcake.

And the frosting was OK, a little grainy due to the already grainy cream cheese substitute that I used, but the flavor ended up being pretty good! Still, I asked Derek to use some of his frosting as I'd be taking these to the office and didn't want to serve frosting that would be slightly off-putting in texture.

My Cupcake Grade: B

Now onto Derek's Carrot Cake, compliments of Ad Hoc at Home.

Ad Hoc Carrot Cupcakes

Cupcakes
2 cups cake flour
1 teaspoon baking powder
1 teaspoon baking soda
2 teaspoons ground cinnamon
4 large eggs
1/4 cup whole milk
1 teaspoon vanilla paste or pure vanilla extract
1 cup granulated sugar
1 cup packed light brown sugar
1 cup canola oil
3 cups finely shredded carrots
1 1/2 cups coarsely chopped toasted walnuts (Derek used pecans, un-toasted)

Cream Cheese Frosting (makes about 3 cups)
1 1/2 pounds cream cheese, at room temperature
1/2 pound (2 sticks) unsalted butter, cut into chunks, at room temperature
1 1/2 cups powdered sugar, sifted
1 teaspoon vanilla paste or pure vanilla extract

Preheat the oven to 350°F and have all ingredients at room temperature. Also have your cupcake liners and pans ready.

Wash and peel your carrots. Using a grater, shred your carrots and set aside.

Using your stand mixer, beat the eggs, milk, vanilla extract, granulated sugar, and brown sugar until smooth.

Add in the oil.

Sift the flour, baking powder, baking soda, and ground cinnamon. Slowly add this and mix.

Add in the shredded carrots.

Using an ice cream scoop, divide the batter evenly into the cupcake liners.
Bake for 20-30 minutes (depending on your oven) or until a cake tester comes out clean.

Remove the cupcakes and let it cool to room temperature.

For the Frosting:

Have all ingredients ready at room temperature.

Using your stand mixer, beat the cream cheese until smooth.

Add the butter and mix until smooth. Include the pure vanilla extract.

Beat in the icing sugar until frosting is smooth.

Once the cupcakes have cooled, frost and eat!


MY REVIEW: OK so I'm not sure who to give the credit to, the chef who crafted, or a least blessed, this recipe, or the chef who executed it for me. I suspect credit is due in both arenas. These were fabulous, simply to die for. Wow.

From the start you could tell these were a totally different product than what I had produced with the red velvet cupcakes. The batter was very runny in contrast to my slightly thick batter. However, this runny batter baked up into an extremely moist and light cupcake that certainly satisfied my carrot cake loving soul.

He could have reduced the sugar by a little bit - and if he had made larger cupcakes, I would say the pecans should have been larger as they were diced pretty fine - but for the small bite size cupcake - it worked! I'd love to also try raisins in it since I love that addition to carrot cake - Derek does not.

The frosting was good as well - nothing special, just a solid cream cheese frosting that went beautifully with the cake.

Derek's Cupcake Grade: A

Bare:


Iced:


Gosh, I hate to admit it - but his cupcakes, regardless of my flavor preference, were just a cut above my product. I want one this moment as I type this...You better believe that I'm ready for another battle....

Monday, January 31, 2011

Pear Tart with Goat Cheese and Port

To me, this dessert embodies every dessert direction with exception to chocolate: fruit, pastry, cheese, dessert wine. It seemed like a good choice for a dinner party, covering all bases.

Pear Tart with Goat Cheese and Port


Ingredients

All-purpose flour, for dusting
1 piece store-bought frozen puff pastry, defrosted according to package directions
1/4 cup currants
1 1/2 cups ruby port
1 (4-ounce) log mild goat cheese
1/4 cup confectioners' sugar
1 teaspoon vanilla extract
3 firm-ripe pears, cored and sliced as thinly as possible
2 tablespoons apricot jam
Splash water
2 tablespoons dark brown sugar
Directions
Preheat the oven to 400 degrees F and line a baking sheet with parchment paper.

On a lightly floured work surface, roll the puff pastry sheet to a thickness of between 1/4 and 1/8-inch. Using a plate or other round template as your guide, cut the pastry to a 12-inch circle. Refrigerate while you prepare the toppings.

Combine the currants and port in a small nonreactive bowl and set aside to allow the currants to plump for at least 20 minutes.

In a food processor, or using a hand mixer, combine the goat cheese with the confectioners' sugar and the vanilla and mix until smooth. Drain the currants from the port and in a small saucepan reduce the port to about 1/4 cup. Reserve the port reduction for serving.

Place the puff pastry circle onto the lined baking sheet and spread the goat cheese mixture over the puff pastry, leaving about a 1-inch border around the edges. Sprinkle the currants over the goat cheese; arrange the pear slices evenly over the goat cheese, overlapping the slices to form a fanned out pattern. Combine the apricot jam with a small amount of water; in a small saucepan or in the microwave, melt the jam. Brush the tart with the apricot jam and sprinkle with the dark brown sugar.

Bake the tart until pastry is golden brown on the bottom and sides, usually 25 to 30 minutes. Remove the tart from the oven and transfer to a wire cooling rack to cool. Serve the tart at room temperature, drizzled with some of the port reduction.


I didn't quite realize how much of a pain cutting and arranging the pear slices would be. However, I think I did a decent job of making them look pretty - but it took a long time and careful selection of pear slices. When it went into the oven, I was pretty excited for the final product, I had done everything according to the recipe and it looked nice!

Unfortunately, the final product was a bit disappointing. The skin on the pears seemed too tough, I would have peeled them. But that wasn't the worst part...the cheese got a bit crumbly!!! The flavor was so good but it just wasn't right.

Oh well.

It was still impressive-ish.

The best part of making this dessert was the return to childhood that I had during the process. Whenever my Mom would make a pie with a homemade pie crust, she would make a "crusty" with the leftover dough. A "crusty" was basically rolled out dough spread with some butter, sprinkle it with cinnamon and sugar, roll it up like a cigar in a crescent moon shape, and bake it until lightly golden. Though I was using puff pastry, I did the same with my leftover scraps, and to me, this was the most satisfying part of the whole dessert!

Sunday, January 9, 2011

Mini Chocolate Cupcakes with Orange Frosting

One of the gifts that I received this Christmas was a great big mini-muffin pan. The pan is perfect for making wonderful bite sized treats such as muffins (obviously), cupcakes, brownie bites, quiche, etc... to break it in, I chose to bake up some mini cupcakes to bring to a party to watch the Auburn/Oregon game. And since we were going to an apartment of avid Auburn fans (and I was rooting for them as well) then I thought - how perfect to make these little creations in Auburn colors (or somewhere along those lines at least)!


I'd call this a "semi-homemade" recipe since I must admit that I purchased store-bought frosting - Duncan Hines Whipped White Frosting - in the big container. But of course, I had to tweak it - otherwise I really couldn't take any credit for how tasty the end product would be. For the cupcake, I used my trusted source: joyofbaking.com.

Chocolate Cupcakes with Orange Frosting:

1/2 cup (50 grams) Dutch-processed cocoa powder
1 cup (240 ml) boiling hot water
2 tsp. instant espresso powder
1 1/3 cups (175 grams) all purpose flour
2 teaspoons baking powder
1/2 teaspoon salt
1/2 cup (113 grams) unsalted butter, room temperature
1 cup (200 grams) granulated white sugar
2 large eggs
2 teaspoons pure vanilla extract

Chocolate Cupcakes: Preheat oven to 375 degrees F (190 degrees C). Lightly butter, or line 16 muffin cups with paper liners (I used my mini muffin pan and made around 48 mini cupcakes total).

In a small bowl stir until smooth the boiling hot water and the cocoa powder. Let cool to room temperature.

In another bowl, whisk together the flour, baking powder, and salt.

Then in the bowl of your electric mixer, or with a hand mixer, beat the butter and sugar until light and fluffy. Add the eggs, one at a time, beating until smooth. Scrape down the sides of the bowl as needed. Beat in the vanilla extract. Add the flour mixture and beat only until incorporated. Then add the cooled cocoa mixture and stir until smooth.

Fill each muffin cup about two-thirds full with batter and bake for about 16-20 minutes (less for mini cupcakes) or until risen, springy to the touch, and a toothpick inserted into a cupcake comes out clean. Remove from oven and place on a wire rack to cool. Once the cupcakes have completely cooled, frost with icing. You can either spread the frosting on the cupcakes with a small spatula or if piping, use a large Wilton 1M open star tip to make lovely swirls (I used a ziploc bag cut in the corner...would like to have some nice baking accessories but this worked).

Orange Frosting

1 tub Duncan Hines Whipped White Frosting
4 Tbsp. Cointreau
1 orange, zested (only zest used)

Mix all ingredients together and stick in the refrigerator to cool slightly to make sure it isn't runny when you apply it.


Yum yum yum. I could (and did) eat that frosting just by itself - and I'm not a frosting person. The cupcakes came out a little dense but I believe that was due to two factors:

1. I stuck them in the refrigerator shortly after I frosted them
2. I used regular unprocessed cocoa powder which reacts with baking soda whereas dutch-processed cocoa powder reacts with baking powder. Here's what joyofbaking has to say about that....

Dutch-processed cocoa powder is treated with an alkali to neutralize its acids. Because it is neutral and does not react with baking soda, it must be used in recipes calling for baking powder, unless there are other acidic ingredients in sufficient quantities used. It has a reddish-brown color, mild flavor, and is easy to dissolve in liquids. Its delicate flavor makes it ideal in baked goods like European cakes and pastries where its subtle flavor complements other ingredients. Droste, Lindt, Valrhona, Poulain and Pernigotti are some popular brands.

Natural Unsweetened Cocoa Powder tastes very bitter and gives a deep chocolate flavor to baked goods. Its intense flavor makes it well suited for use in brownies, cookies and some chocolate cakes. When natural cocoa (an acid) is used in recipes calling for baking soda (an alkali), it creates a leavening action that causes the batter to rise when placed in the oven. Popular brands are Hershey's, Ghirardelli, and Scharffen Berger.

I found this to be a very useful tidbit of information to know that will now guide my baking. My cupcakes had that fantastic deep chocolate flavor as the natural unsweetened cocoa powder is supposed to have - if I would have just mixed it with baking soda instead of baking powder then they would have been just perfect! Note taken.